Wood Bead Butterfly
The wood bead butterfly is a delightful and whimsical craft project that can add a touch of charm to your home decor or be a fun DIY activity to enjoy with kids. By stringing wooden beads onto wire to create the butterfly's body and wings, you can craft a lovely and unique piece that brings joy and creativity. It's a versatile project that can be customized with different bead sizes, colors, and patterns, allowing you to unleash your imagination and create something special. So gather your materials, get creative, and let your crafting journey take flight with the charming wood bead butterfly!

Supplies
Here’s what you need to make a wood bead butterfly
10 inch Wooden Bead Wreath from Dollar Tree
Wired Jute Cord from Dollar Tree
Needle Nose Pliers
Wood bead wreath, wired jute twine.
How to Make a Wood Bead Butterfly
Remove Five Beads from Wreath
Begin by finding the wire connection on the wreath. Use pliers to straighten out one side of the wire. Remove five beads.
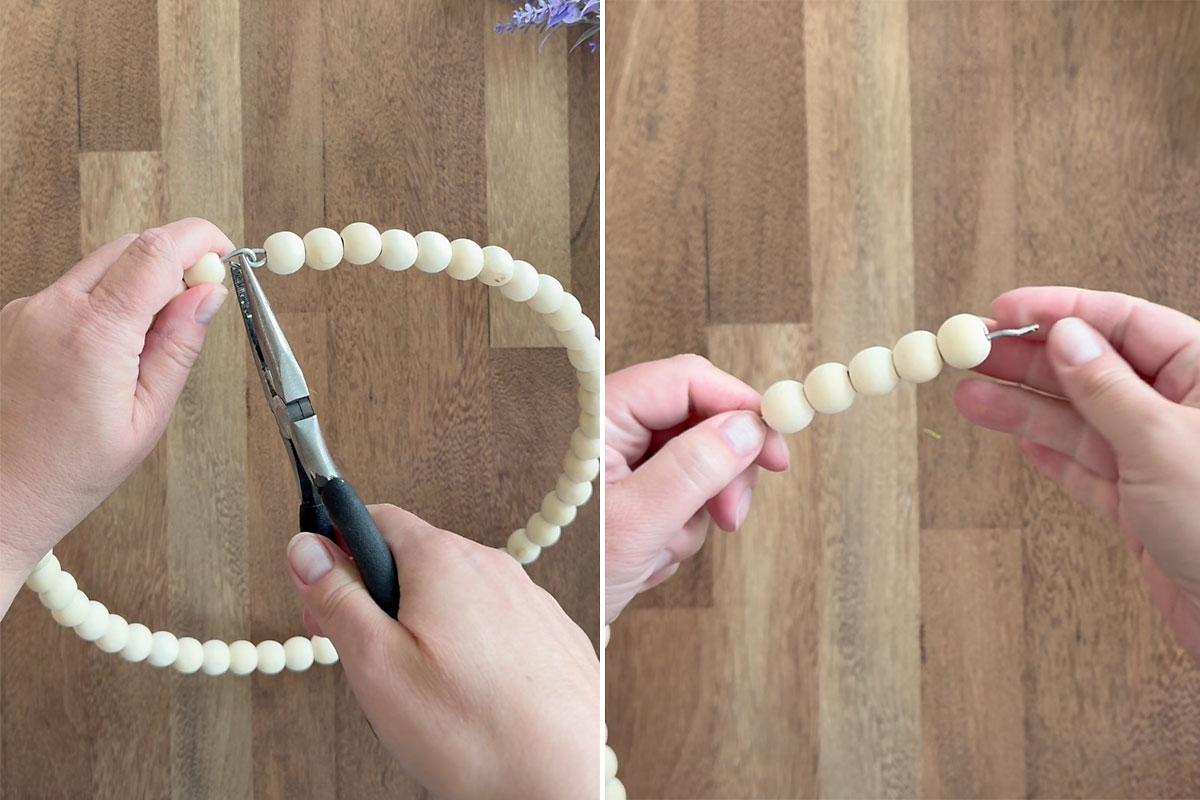
Straightening out wire that hooks wreath together.
Use the pliers to curve the end of the wire that you just straightened. Hook it back in the other curved end and use pliers to close it up. Place the wreath on the table with the connected area at the top. Split the beads in half so that there are 24 on each side of the wreath, then mark the wire at the bottom in the middle as shown below.
Closing wreath back up; marking bottom center.
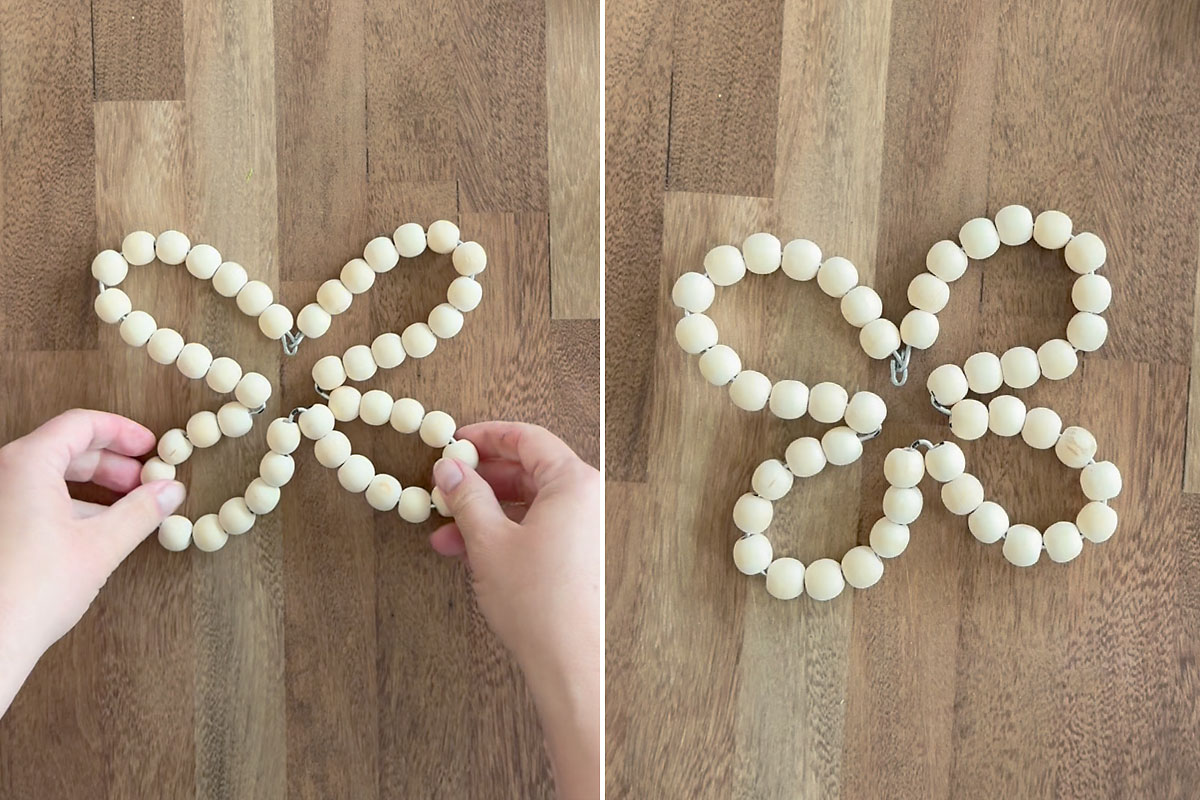
Start Shaping the Butterfly
Use the pliers to grab the wire frame where you marked in and bend it in toward the center of the wreath.
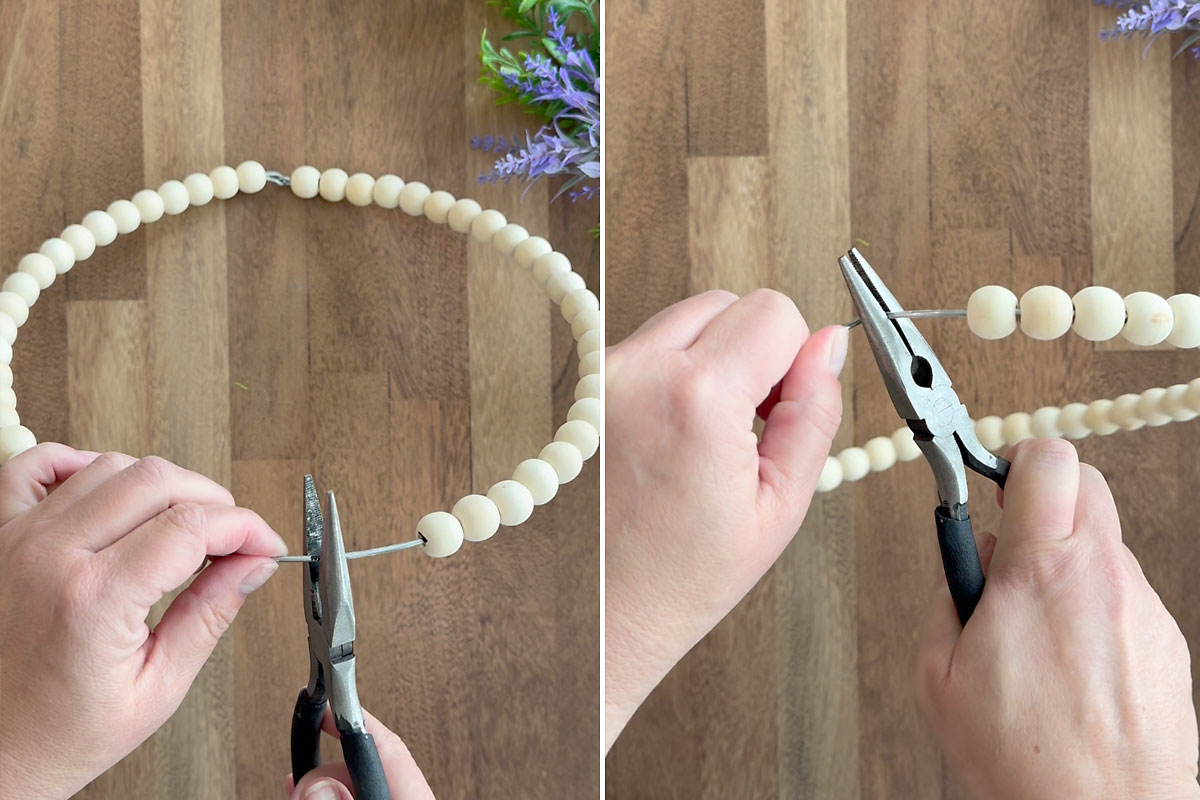
Using pliers to bend bottom of wreath in toward center.
Continue bending until the frame is in an upsidedown heart shape, as you can see below. Now you are going to split the beads again, but this time push 13 beads on each side up toward the top (connected part) of the wreath, and 11 beads toward the bottom (pointed in part) of the wreath. Use a sharpie to mark the center of the wire, as you see below. *Also* make a small mark on the inside of the beads just above and below where you marked the wire so you can keep track of which beads go above/below the next bends you will make.
Marking sides of wreath.
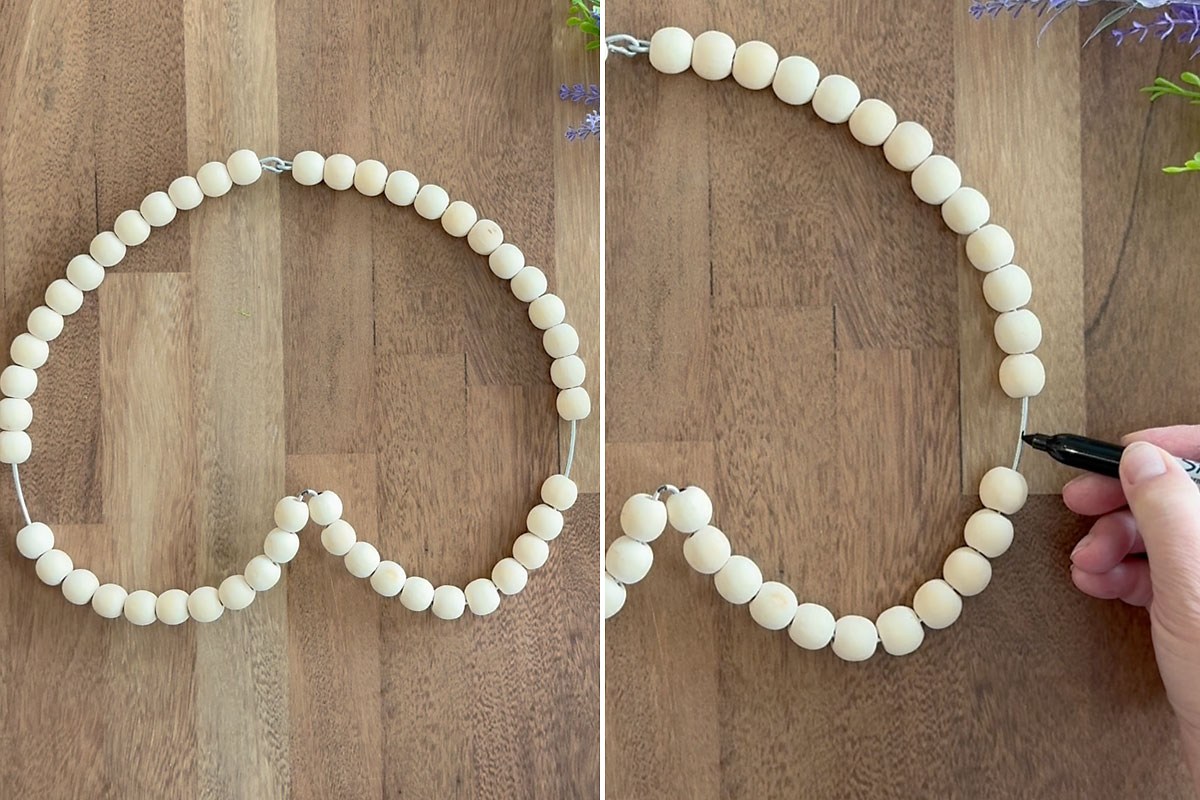
Continue Shaping the Butterfly
Now use your pliers to grab one of those side marks and bend it in toward the center as well. Remember to keep 13 beads above your bend (close to the connections) and 11 beads below your bend.
Using pliers to bend sides of wreath in toward center.
Find the mark you made on the other side, and repeat the process. Once that is done the wreath will look like the second photo below:
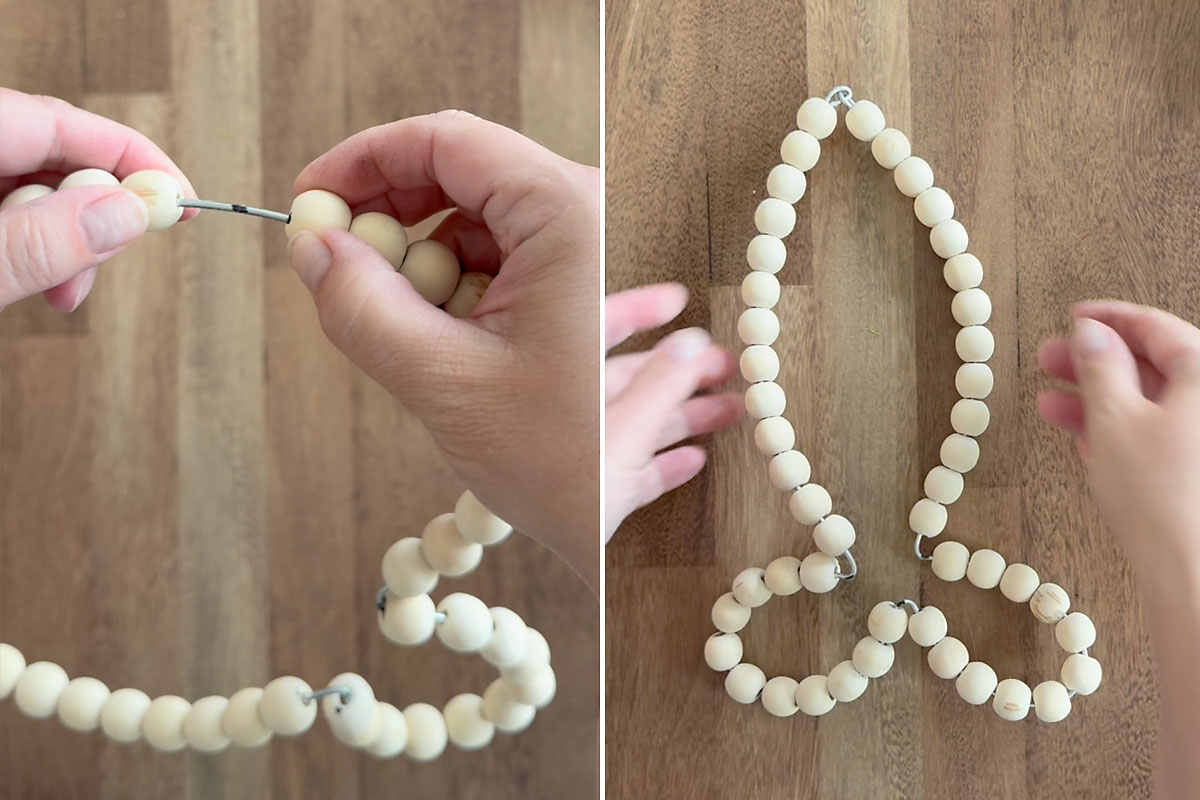
Now you’ll grab the top of the wreath, where the wire connects to itself, and bend that down toward the center as well. This will create a butterfly shape (first photo below). Pull on the wire to “open up” the bends you just made to create a nicer, more rounded wing shape (second photo below).
Bending top in toward center to create butterfly shape.
Create the body + antennae
Now you’ll grab the coil of wired jute cord. Lay one end of it over the butterfly with about six inches extending out from the top (first photo below). Wrap the jute cord down around the bottom bend of the wire and back up over the top bend (second photo below).
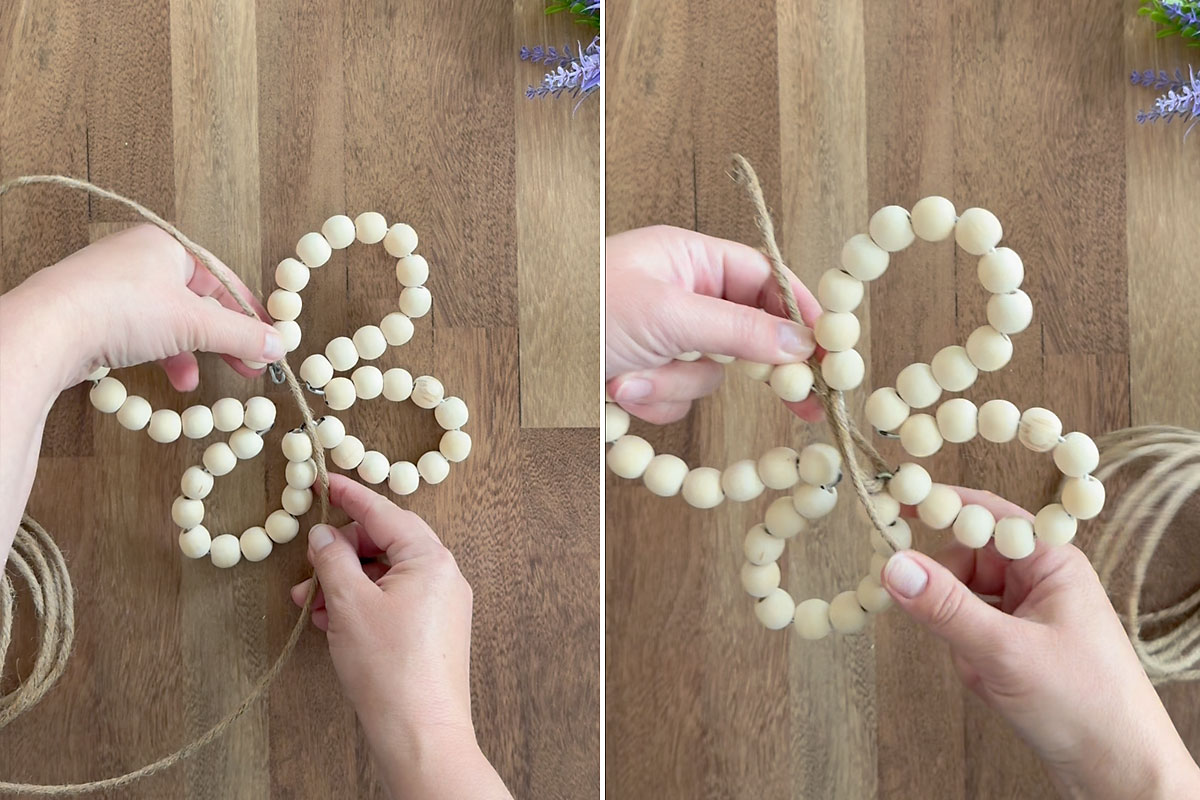
Starting to wrap wired twine around butterfly to create the body.
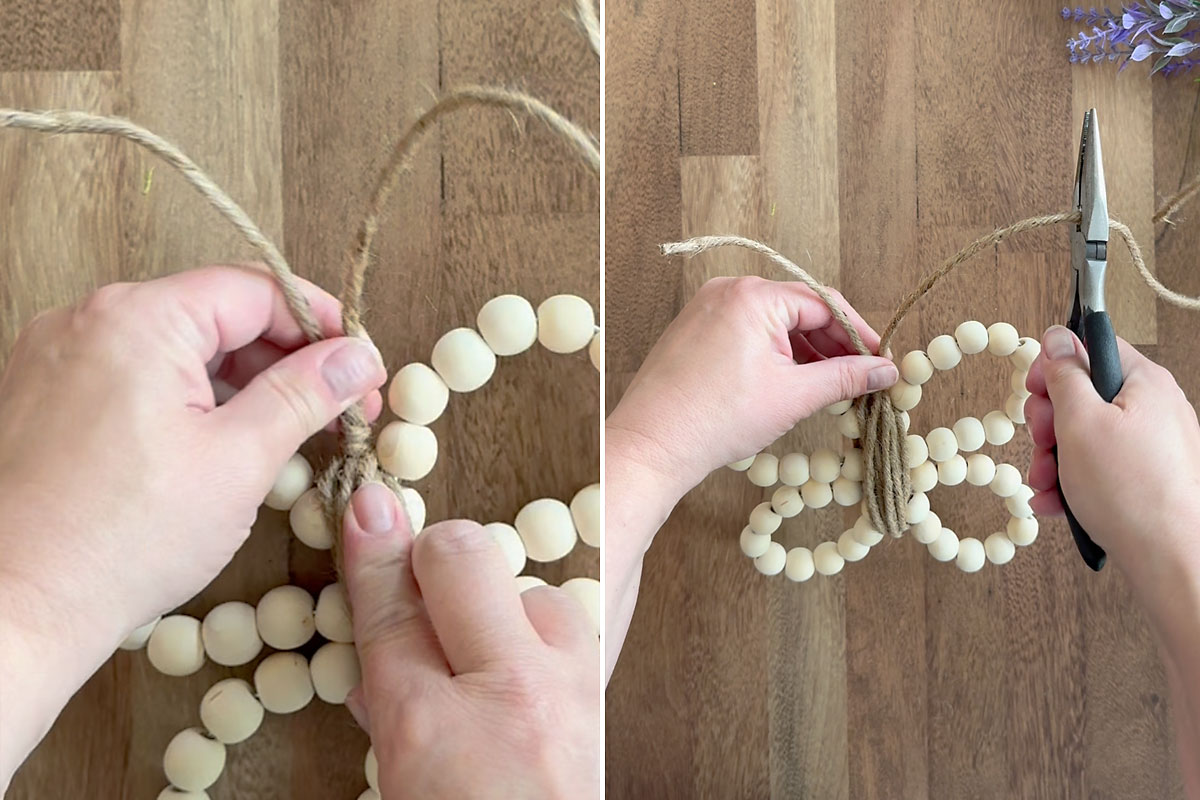
Now you’ll wrap the cord side to side once, pulling the wire bends close together. Then continue wrapping the jute cord up and down. This creates the body of the butterfly.
When you like how the body looks, twist the jute cord at the top to secure, then use the snip portion of your pliers to cut of the excess. Add a little hot glue where you cut the jute cord to keep it from fraying. Shape the antennae as desired and your beaded butterfly is ready to display!
No comments
Write a comment