Make a Puzzle Cube
Creating your very own DIY puzzle cube can be a fun and rewarding project to tackle! With a dash of creativity and a sprinkle of patience, you can personalize your puzzle cube to match your style and preferences. Gather your materials, follow a step-by-step guide, and soon you'll be proudly showcasing your custom-made puzzle cube to impress your friends and family. So grab some crafting supplies, unleash your inner artist, and let the puzzle-solving adventure begin! Who knows, you might just discover a new hobby along the way. Happy crafting!
Here’s what you need to make a 3D puzzle cube
Wood glue
Lots of q-tips
4 colors of paint
Paint brushes
27 unfinished wooden cubes
sanding block
How to make a 3D puzzle cube
Step 1- Buy the supplies
If you only plan to make 1 puzzle cube, this pack of 36 wooden cubes is the best deal. If you want to make multiple wooden puzzles, this pack of 200 wooden cubes is a great deal. (A pack of 200 wooden cubes would make 7 complete wooden cube puzzles!)
Step 2- Create shapes
First, take 23 cubes and arrange them into these 5 single layer shapes below.

Step 3- Glue the shapes together
Next, dip a q-tip into the wood glue and carefully glue the shapes together making sure that they are square and as lined up as possible. The glue does not dry super quick so you do have a little wiggle room with each piece. Use a flat surface to make sure you are getting the blocks as straight as possible. It’s also fair to note, that you do not have to make the puzzle cube in the same pieces as mine.
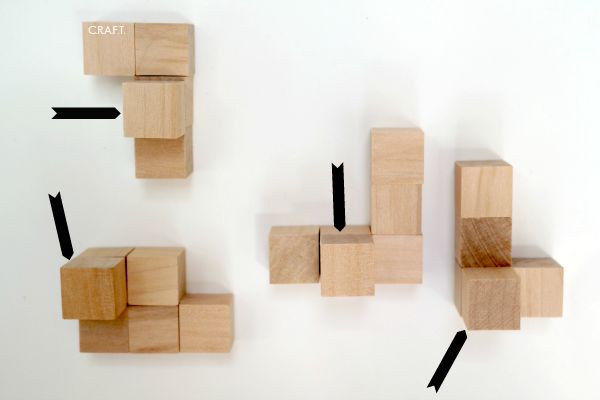
Step 4- Glue 4 more blocks
Now, set the criss cross shaped piece to the side, that one is complete! For the other 4 pieces you will need to glue one of the 4 remaining cubes to each piece. Follow the arrows!
Step 5- Allow drying time
Give the wooden pieces a few hours to completely dry before moving on to step 6.
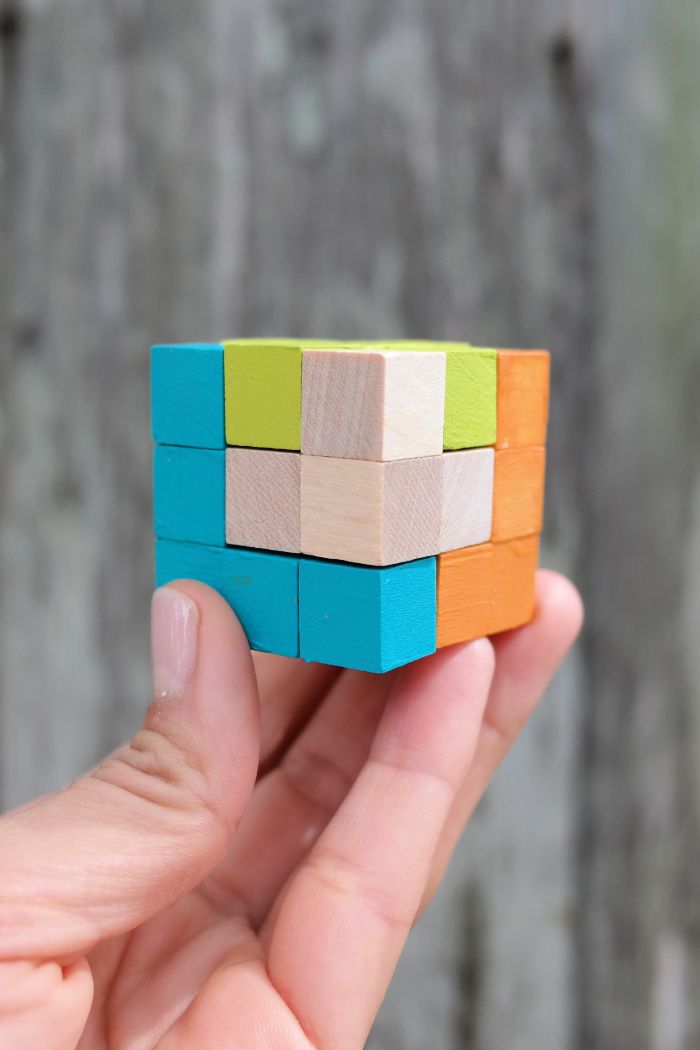
Step 6- Paint
Use a paintbrush to paint each section of the puzzle cube. I left one of my sections wood and painted the other 4 sections. Allow each peice to dry over night.
Step 7- Sand rough edges
I used sand paper after the cubes dried because a few pieces had a little dried glue.
No comments
Write a comment