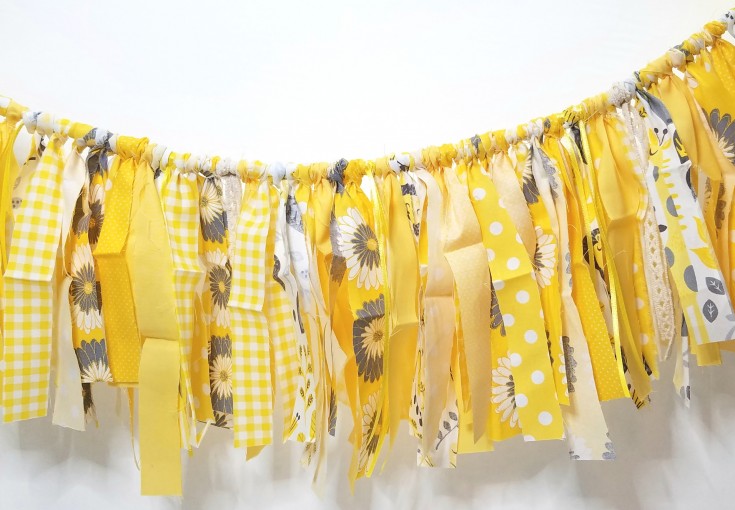
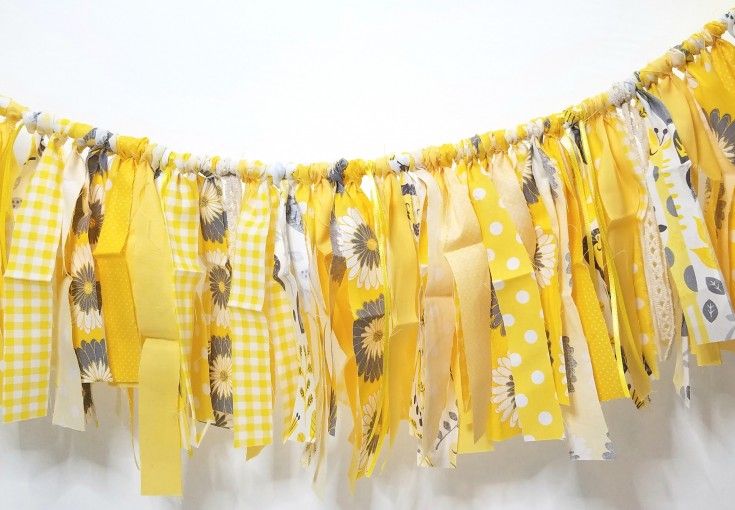
DIY Shabby Yellow Garland
If you're looking to add a touch of cozy charm to your space, creating a DIY Shabby Yellow Garland might be just the craft project for you! To make this delightful piece, start by collecting yellow fabric scraps, twine, and scissors. Cut the fabric into strips and tie them onto the twine until you've reached your desired garland length. The shabby chic look of the frayed edges adds a fun, rustic vibe that will brighten up any room in your home. Hang it on a mantelpiece, across a mirror, or drape it along a bookshelf to instantly infuse a sunny, welcoming feel into your decor. So grab your materials and get crafting – your handmade garland will surely bring a smile to your face every time you see it!
Diy Shabby Yellow Garland

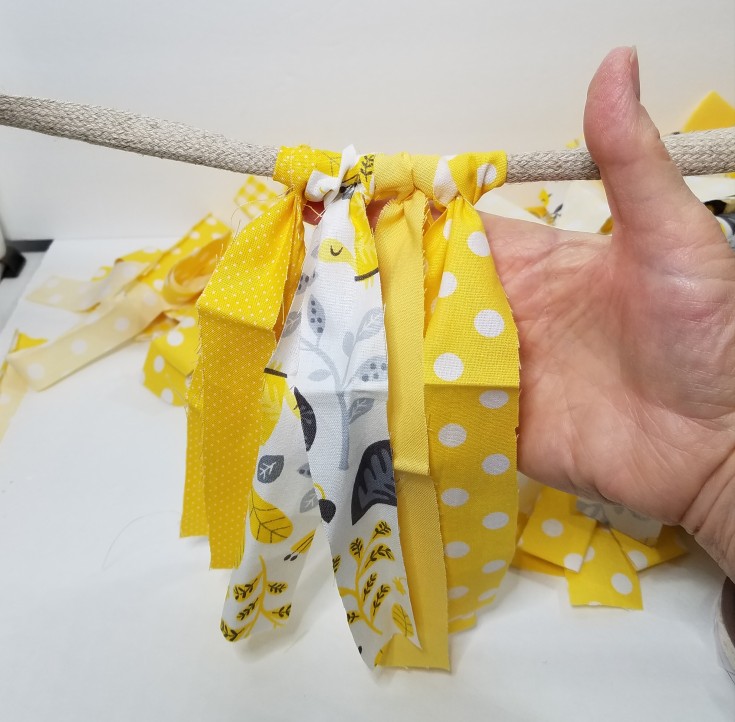
For this bright yellow garland, I started out cutting all the fabric into strips approximately one-inch thick, and I believe they were all 18 inches in length. Once all the fabric was cut into strips I pulled the tan 0ff the spool and made two slip knots on each end. Then I connected each end onto cabinet door knobs to stretch it out enough to work on while adding the fabric strips.
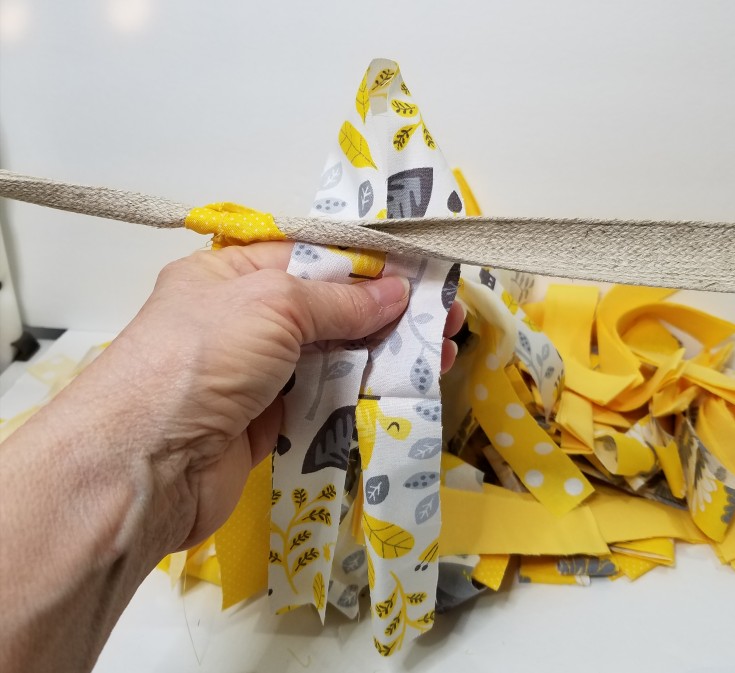
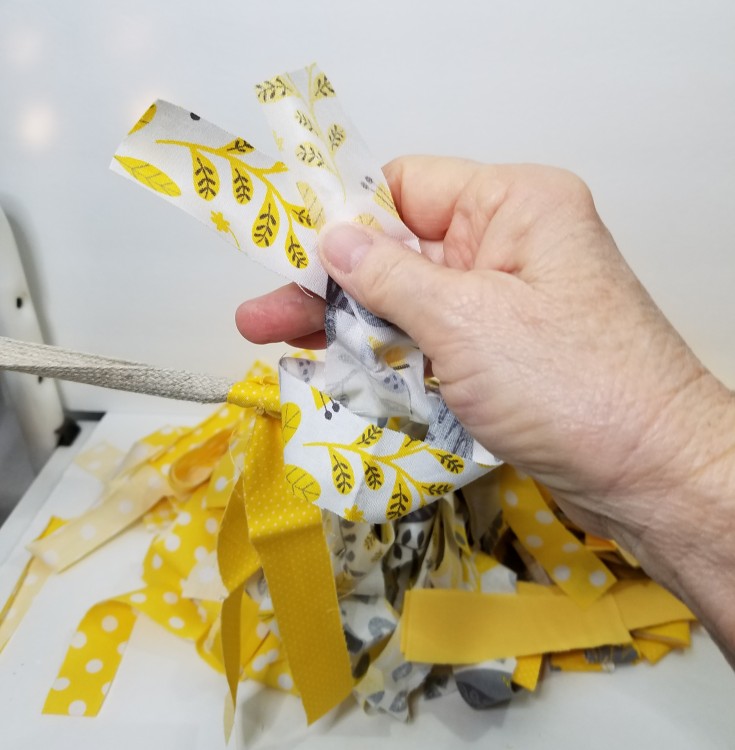
Next, I started adding the strips of fabric to the trim. To add the strips, I started off by folding each strip in half (don’t worry about getting them even it doesn’t have to be perfect because we are going for the shabby look). Then hold it on the back side of the trim and slide the two ends into the loop and pull to tighten. Continue adding each trim this same way. Mixing the different colors, and patterns up as you go.
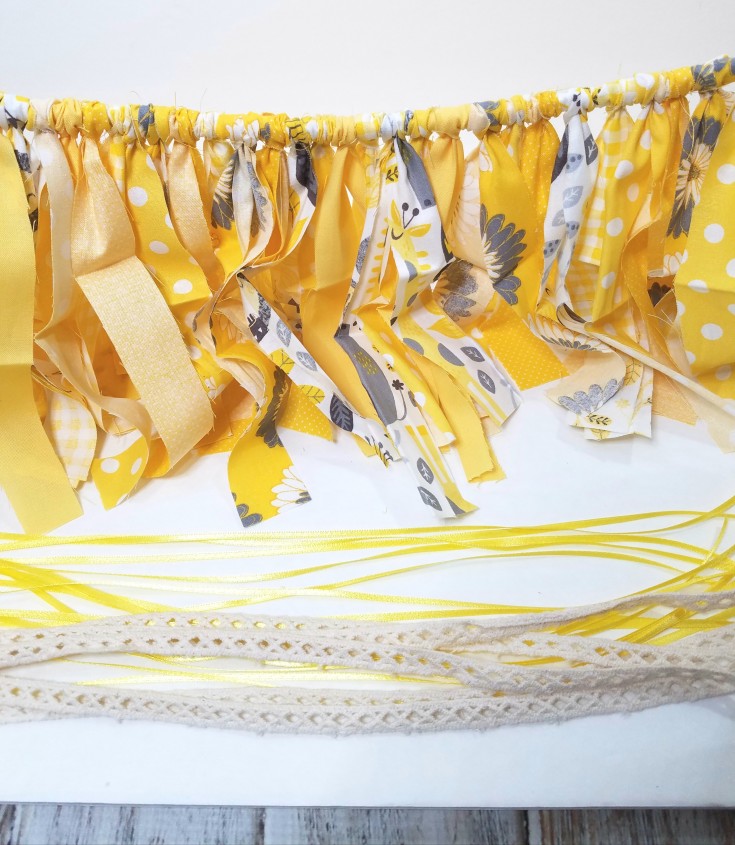
Once I got all the fabric added I went back and added some lace and yellow ribbon here and there through out the shabby yellow garland.