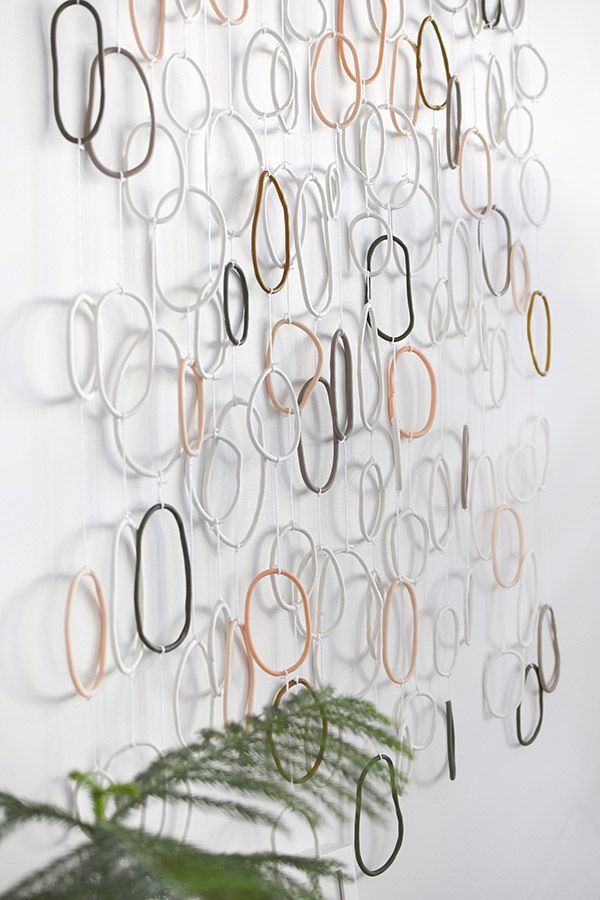
Looking for a delightful way to add charm to your space? Consider a clay ring wall art hanging! These unique pieces bring a touch of bohemian style and warmth to any room. Crafted with love and attention to detail, each clay ring is hand-shaped and adorned with intricate designs, making it a truly special addition to your decor. Whether you hang it in your living room, bedroom, or even your office, this art piece is sure to be a conversation starter and a beautiful focal point. With its earthy tones and organic texture, the clay ring wall art hanging will bring a cozy and welcoming vibe to your home, instantly making it feel more inviting and personal. So why not treat yourself to this lovely creation and let your walls tell a story of craftsmanship and style?
What supplies do I need to make a Clay Ring Art Wall Hanging?
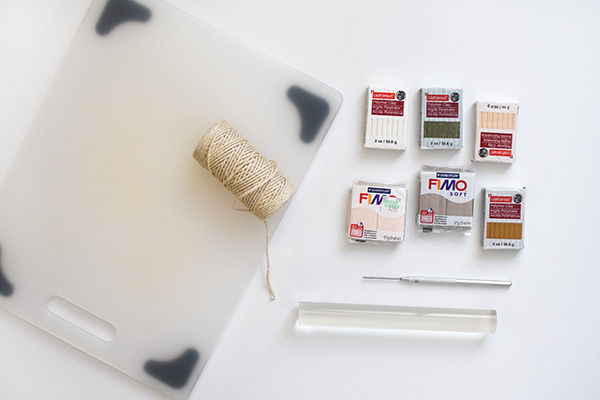
Polymer Baked Clay
2 large packages of white clay
Taupe, Olive Green, Blush, Peach + Ochre clay
Cutting Board or flat surface for rolling out clay rings
Baking Sheet + Parchment Paper
White String or Twine (needs to be thin/small so you can tie around delicate rings)
3′ Square wooden dowel
19 Wooden Beads
Hot Glue
Scissors
Miter Saw or Hand Saw
Electric Drill
5/32″ drill bit
Washi Tape + a Poster board
How to make Organic looking Clay Rings:
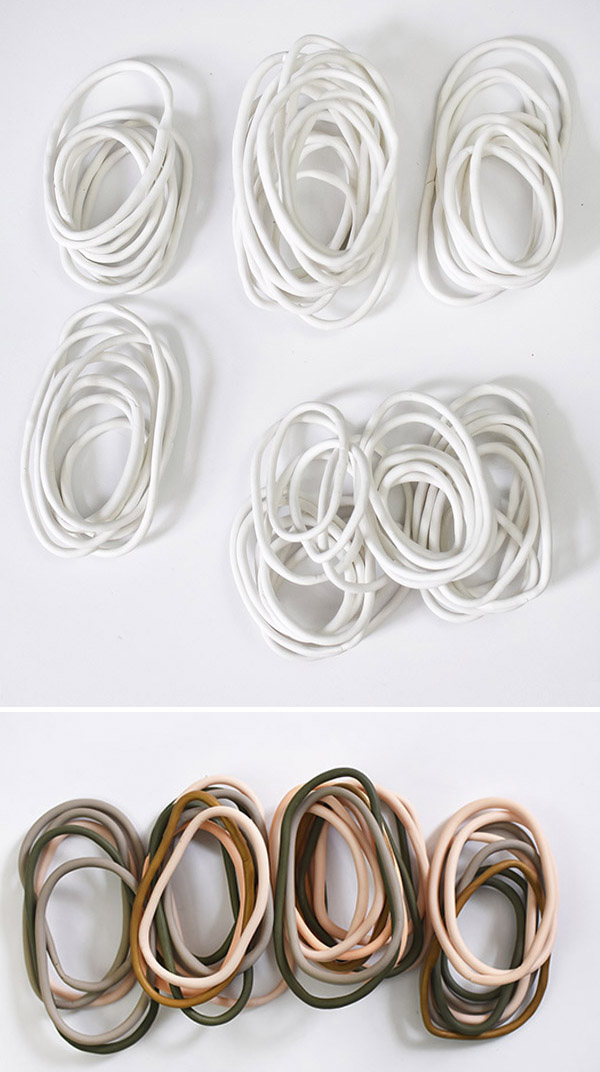
I wanted my dominate clay color to be white. I ended up making 67 various shaped and sized white clay rings.
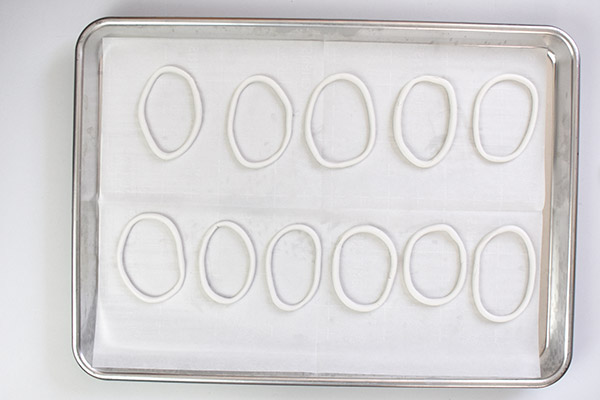
I would warm the clay in my hands and then would roll out a thin snake shape on my cutting board. Once the snake was fairly thin in size, I would cut the clay down and shape into a ring.
It was intensional to have different shapes and sizes. I like the organic non-perfect look.
Once the rings were made, I placed them on a baking sheet with parchment paper and baked per the directions on my clay.
After all the white rings were baked and cooled. I started on creating the colored rings. I ended up having 8 Taupe, 7 Olive Green, 13 Blush, 3 Peach and 4 Ochre rings.
How to make a Wooden Frame for rings:
Next, it was time to construct the frame for which these rings would be held up. You could easily just wrap string around a wooden dowel and call it good.
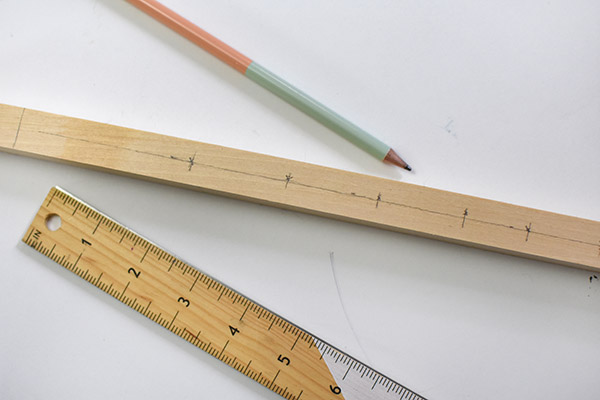
I however decided to drill holes in my dowel to fish the strings through for a more finished look. I also didn’t do perfectly spaced holes for this step. I laid my clay rings out on a piece of cardboard and based off that layout, measured and marked out where the holes would go on my wood.
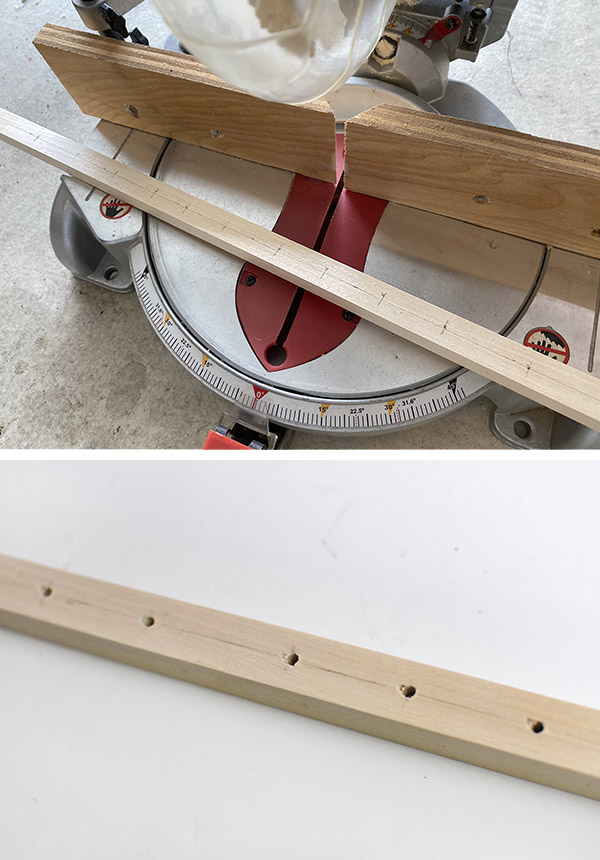
NOTE : I had 19 holes for the clay strands and then BE SURE TO ADD ONE ADDITIONAL HOLE ON EACH END. These two holes will be to hold the entire art piece on the wall.
I used an electric drill and a 5/32″ drill bit to make the holes and then trimmed down my dowel to the correct size using a miter saw. This could also be done with a hand saw, but I wanted a quick clean line.
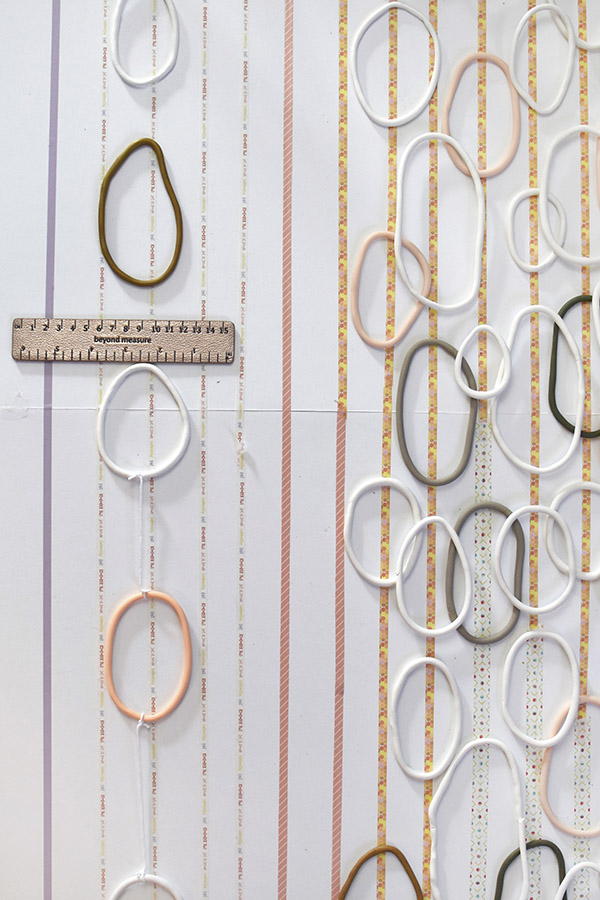
As I mentioned above, I wanted a very layered organic look to this piece. And it took me a few times to figure out how to best get that look, while also being able to string up the rings. Here is what I figured out was the best way to do that.
Start by adding washi tape to a piece of poster board roughly 1″ to 2″ apart for the width and the desired length of your artwork piece. Once you have the lines marked, you can start adding your rings in a layered look.
How to string your Art Rings:
To get the cleanest look, start at the bottom of your board and using white string, slowly start to tie each ring to each other. If you decide to string each ring indivisually then be prepared to have a LOT of strings showing.