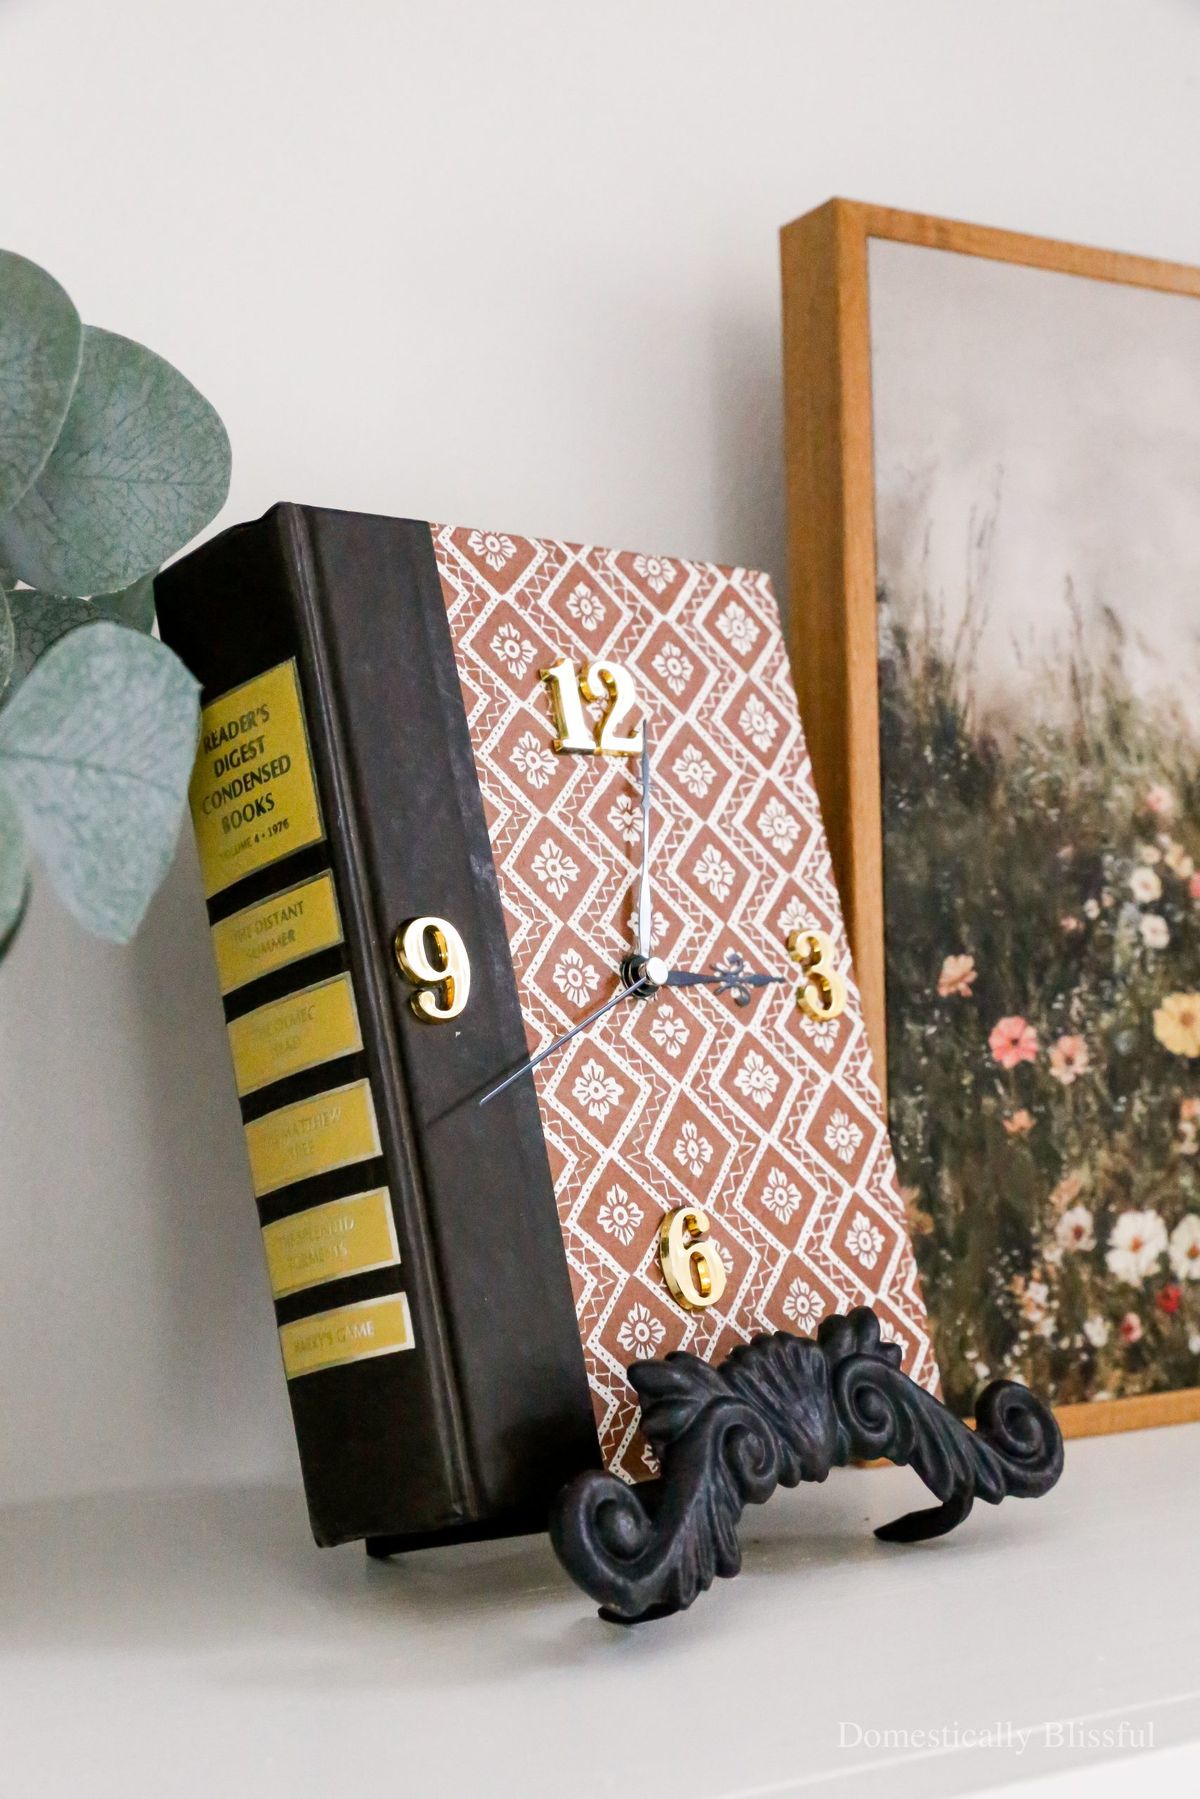
Creating your own DIY Book Clock is a fantastic way to merge practicality with creativity and add a touch of charm to your home decor. With just a few simple materials like an old hardcover book, clock mechanism, and some craft supplies, you can craft a unique timepiece that reflects your personality. The process is not only fun but also rewarding as you witness your literary masterpiece transform into a stylish and functional piece of art. Whether you choose a classic novel or a favorite childhood story, the possibilities are endless for customizing your book clock to match your taste and style. So, gather your supplies, let your imagination run wild, and enjoy the satisfaction of having a one-of-a-kind piece that stands the test of time, quite literally!
Materials:
Old Book
Ruler
Fine Point Permanent Marker
Clock Parts & Battery
Exacto Knife
Clock Numbers
E6000 Glue
Instructions:
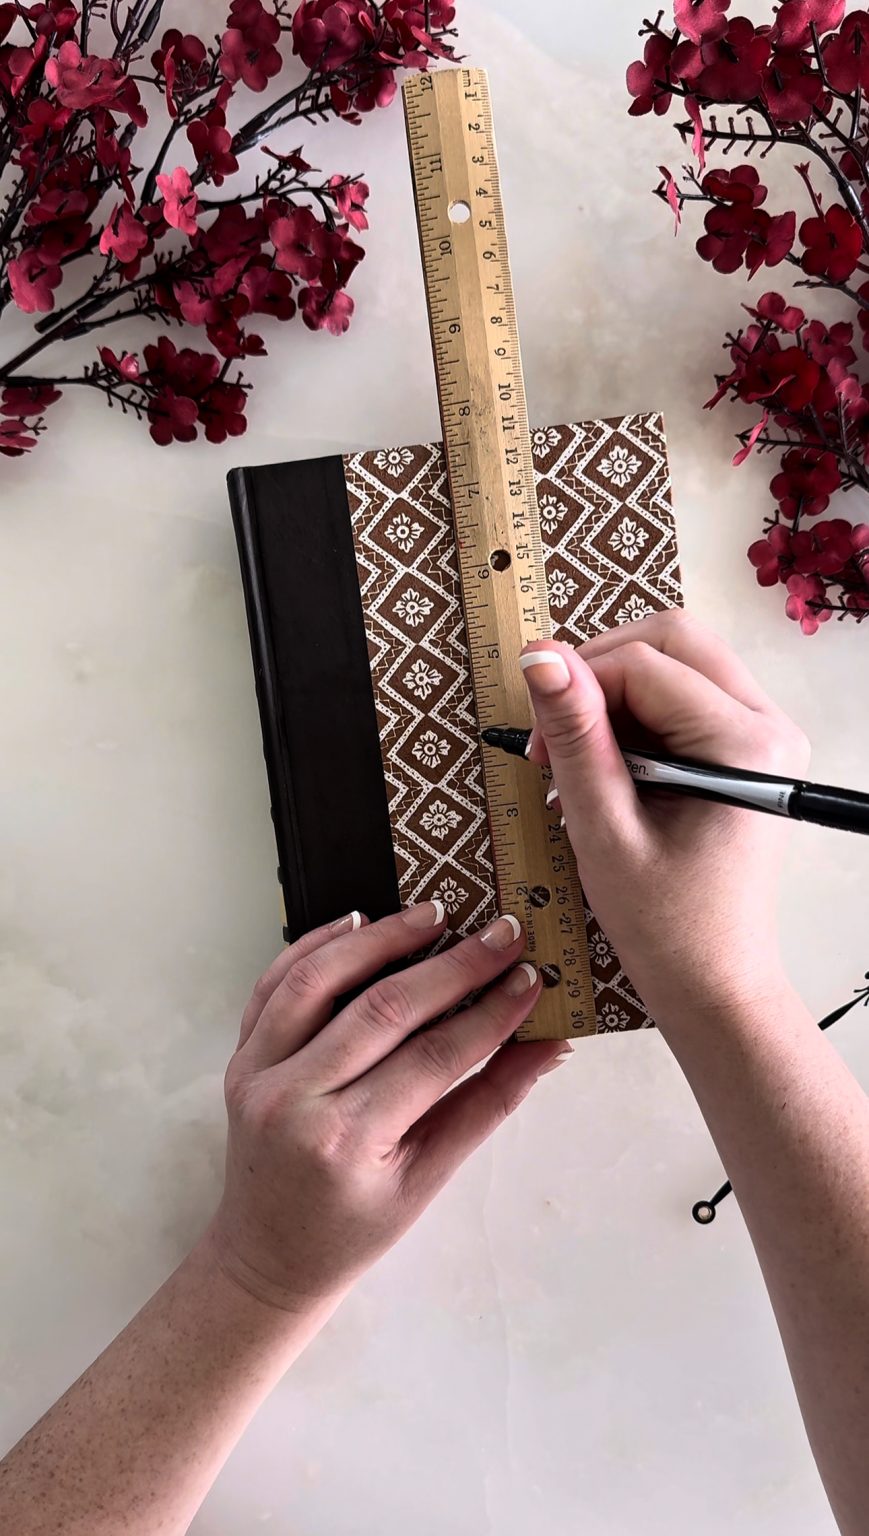
1. First, use a ruler to find the center of the book and mark it with a dot using your permanent marker.
2. Place the hour hand over the dot and trace a circle around the center.
3. Cut out the circle on the cover using an Exacto knife and make sure the clock parts fit through the hole.
4. Open up the cover, place the clock battery base in the center, and trace around it with your maker.
To find the exact center on the first page, I flipped the clock battery base upside down so that the white part that sticks through the book cover is inside the circle indentation on the first page, from where I cut out the hole in the cover. I then marked a dot in each corner on the page, then flipped it over so that it lay flat on the page between the four dots, and then finally traced around it.
5. Using your Exacto knife, cut out the traced square over and over again, removing the center pages as you go. Keep doing this until you have a square hole deep enough to fit the clock battery base.
6. Next, place the clock battery base inside the book and close the cover.
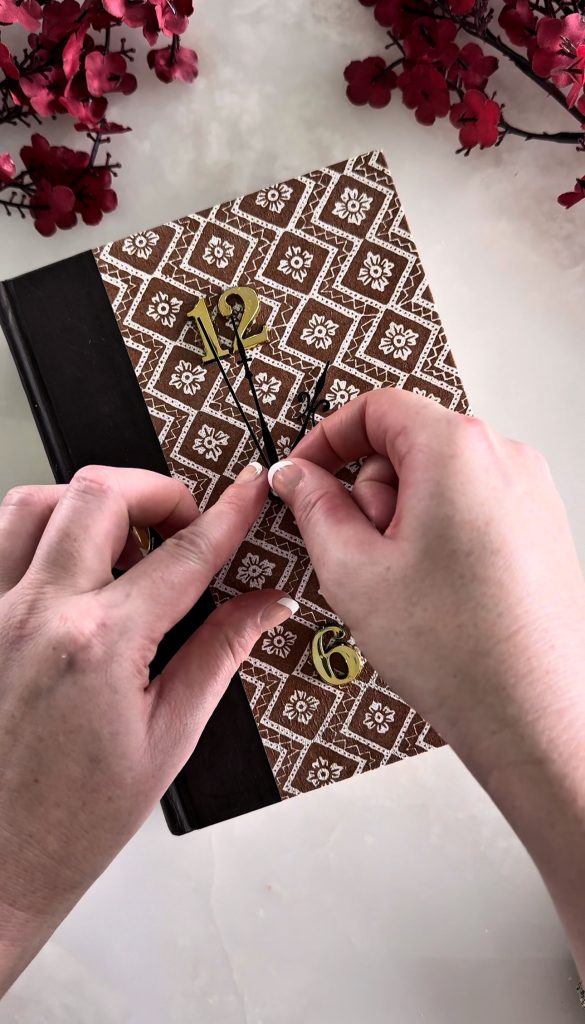
7. Then attach the hour hand on the clock and use it as a guide to evenly space your numbers around the clock.
8. Once you have the numbers in place on the cover, apply E6000 glue to the back of each number and then firmly press it back on the book cover where you want it.
9. Finally, attach the minute and second hands to your new clock.
Enjoy your new DIY Book Clock!