Homemade Leaf Coaster
Creating homemade leaf coasters can be a delightful and eco-friendly craft project for anyone who enjoys a touch of nature in their home decor. These charming coasters not only add a whimsical touch to your table setting but also make for a lovely handmade gift for friends and family. So, grab some leaves and get crafting – your coffee table will thank you!

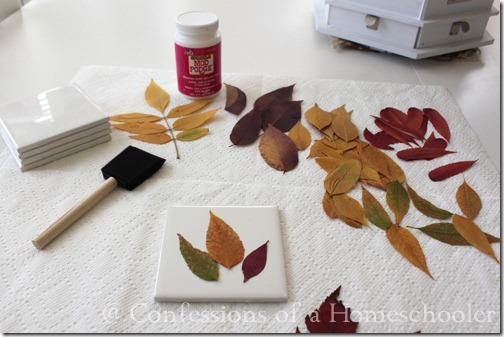
So let’s see what all we need shall we?

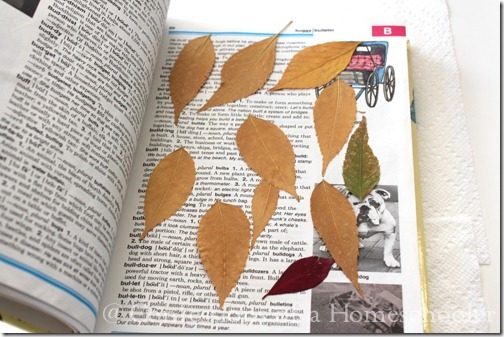

The next step is to prepare your tile. Have your students select a few leaves that they would like to use and set them out on their clean tile so they can see how the leaves will be arranged.
Once they have their arrangement all set, remove the leaves and paint a thin layer of Mod Podge over the clean tile.
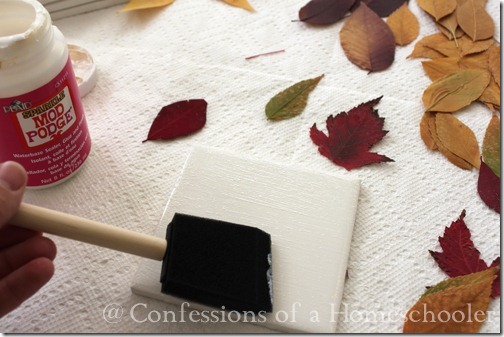
While the tile is still wet from the first coat of Mod Podge, add your first leaf, it should be the bottom layer in your arrangement, and place a think layer of Mod Podge over that leaf.
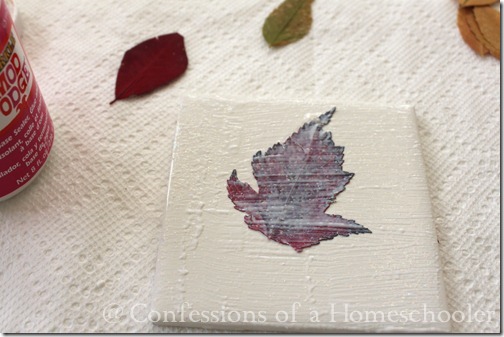
Add the next leaf and a layer of Mod Podge over that one, and so on, until all of the leaves are arranged onto your tile. Allow this layer to dry completely.
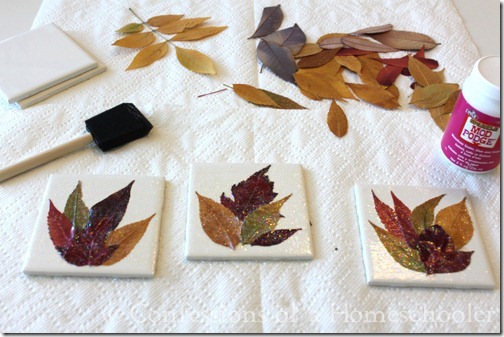
Once all of the tiles are completed and the layers of Mod Podge are dried, add one final coat of Mod Podge over your coaster and let dry.

You’ll be able to tell that th etiles are dry by touch, but you’ll also notice that they are not milky looking anymore, but instead will have a nice clear shine to them.
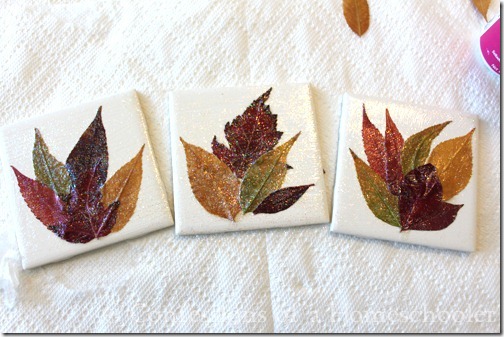
We used a glitter Mod Podge for ours, but I don’t think I like the glitter look with the leaves, so for this craft I would suggest a clear glossy Mod Podge. Although I do think the glitter one would be great for use on Christmas coasters!

One final step once the coasters are dry is to add some felt to the bottoms so they don’t scratch your tables. You can either purchase small sticky backed felt circles, or cut a square of felt and simply glue it to the bottoms.
And here are our completed coasters! These are great for gifts, or simply an addition to your own home.