DIY Pipe Cleaner Flowers — 12 Easy Steps to Colorful, Long-Lasting Blooms
Pipe cleaner flowers are an easy, inexpensive craft that delivers bright, everlasting blooms you can display year-round. In this step-by-step guide you'll find a simple method to make a single flower using just a few pipe cleaners — perfect for beginners, classroom projects, party decorations, or handmade gifts.
You'll only need a handful of pipe cleaners and a little patience. Follow the 12 steps below and use the photos as visual guides while you work.
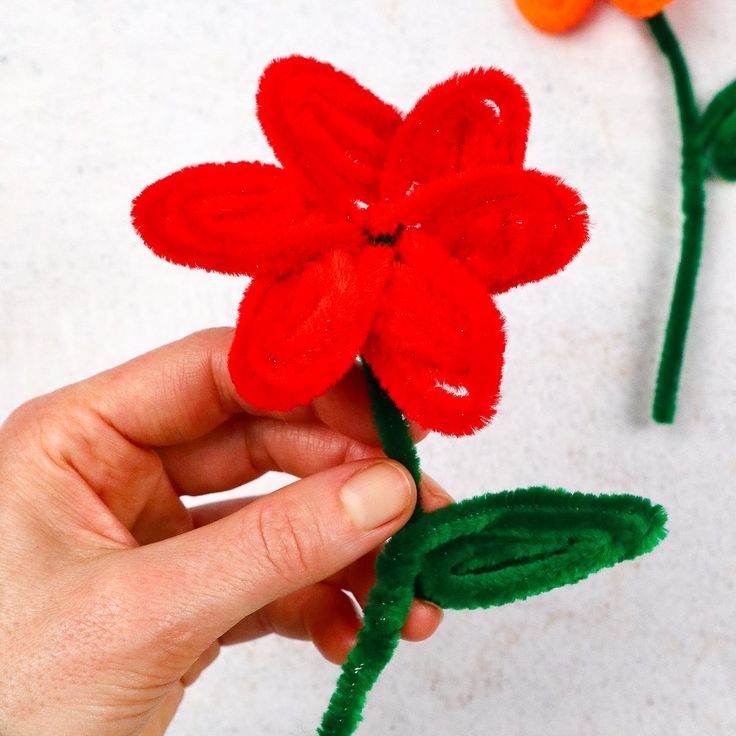
Finished pipe cleaner blooms ready to display.
Supplies You’ll Need
- 3 pipe cleaners 12" long (for the petals)
- 2 pipe cleaners 12" long (for the stem and leaf)
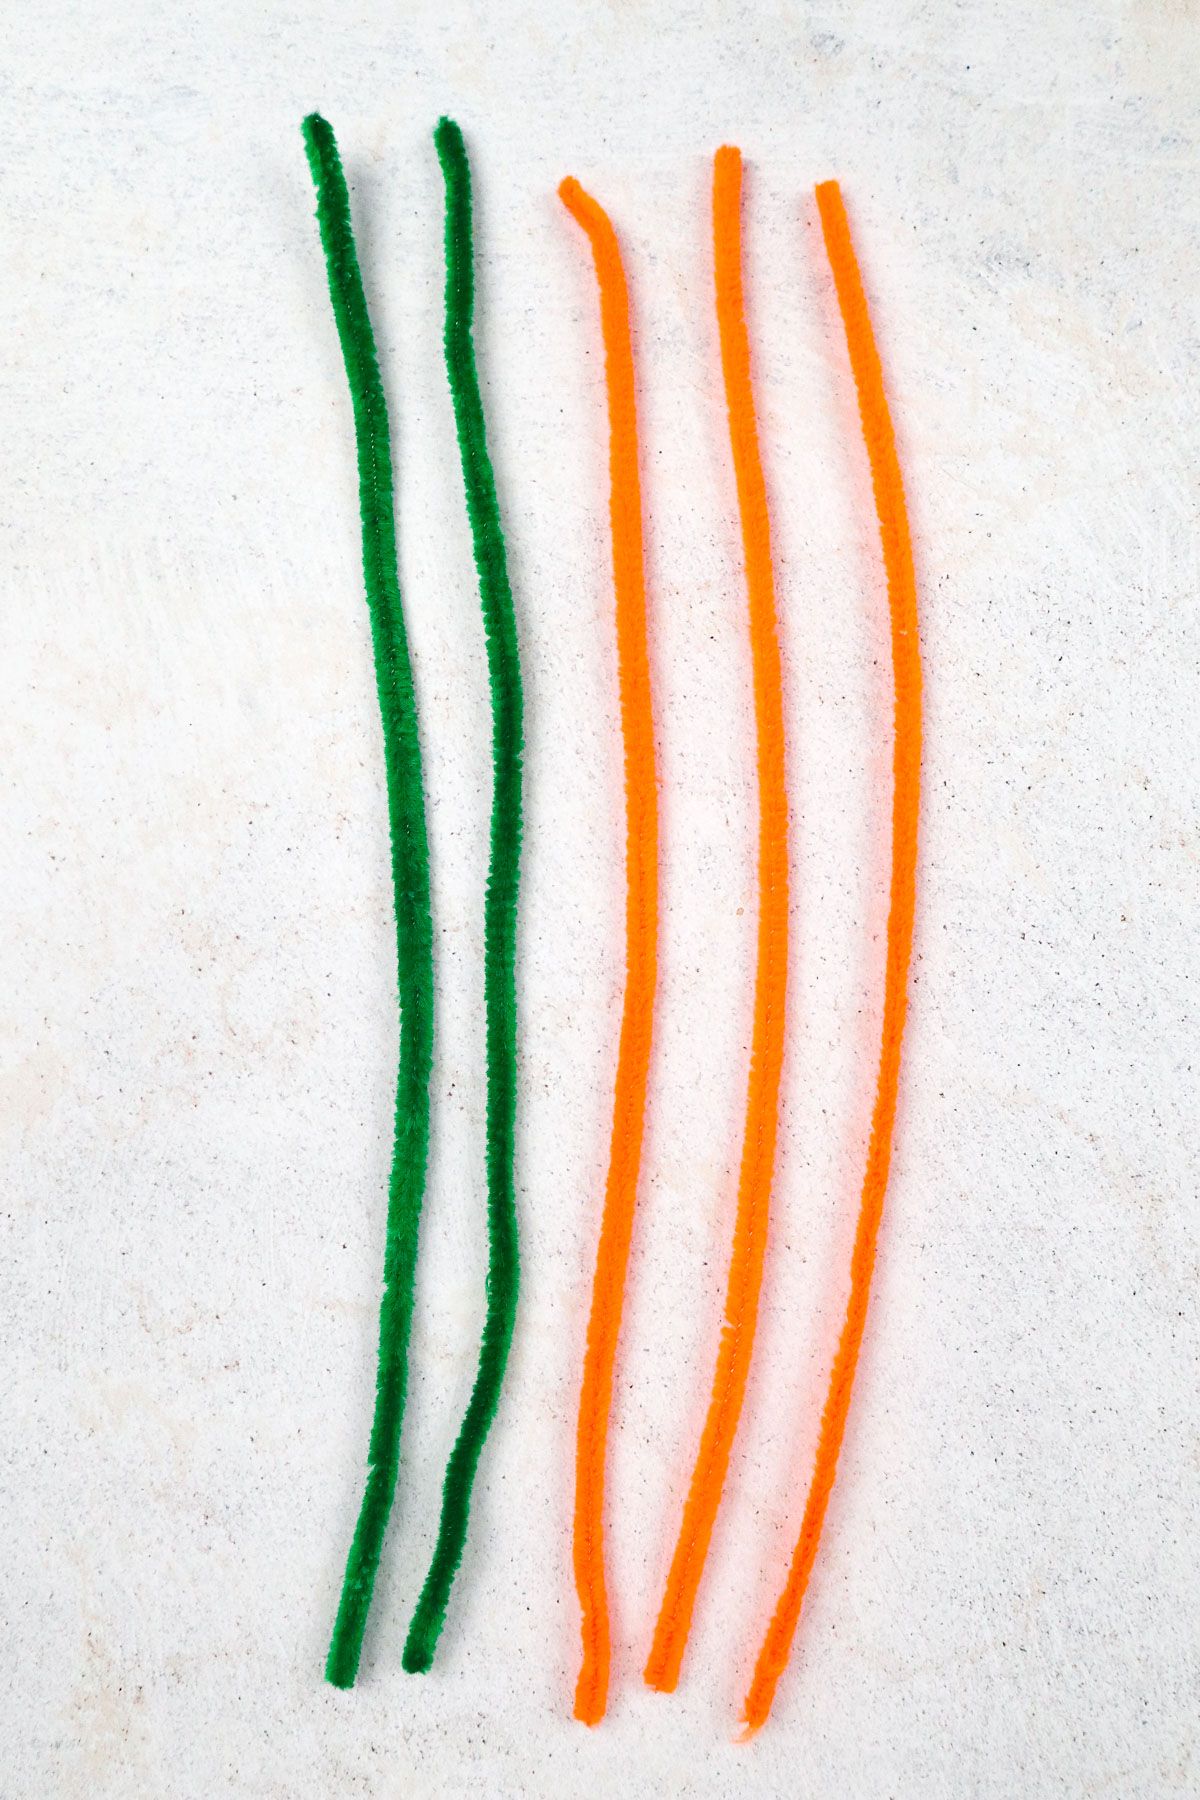
Basic supplies: colorful pipe cleaners for petals and green ones for stems and leaves.
Step 1. Start by grabbing all of your pipe cleaners dedicated to being the petals and the green pipe cleaner for the stem. Bend each one in half to create a “V” shape.
Step 2. Hold the green pipe cleaner so its “V” opening faces downward. Add each petal pipe cleaner so their folded “V” ends meet and lock into the green stem’s “V.”
Step 3. Once the petal spokes are aligned on the stem, give the green pipe cleaner a twist or two to anchor them. After twisting, the ridges of the green stem will appear to spiral in opposite directions on either side of the twist.
Step 4. Spread out the colorful spokes so they are evenly spaced around the stem. Start rolling each spoke inward toward the anchored center to form the petals.
Step 5. Continue rolling each petal spoke toward the middle. You can roll all petals in the same direction for a uniform look, or vary the rolls for a looser, more natural appearance.
Step 6. As you near the last few spokes, check that all petals sit well together. Shape and manipulate the coils to refine the flower's appearance.
Step 7. When petal formation is complete, move back toward the stem. The tail of the green pipe cleaner that sticks out to the side will be wrapped around the back of the flower to add stability.
Step 8. Wrap the remaining length of the green pipe cleaner down the stem to secure the flower head. Pinch the very end so it holds in place and doesn't unravel.
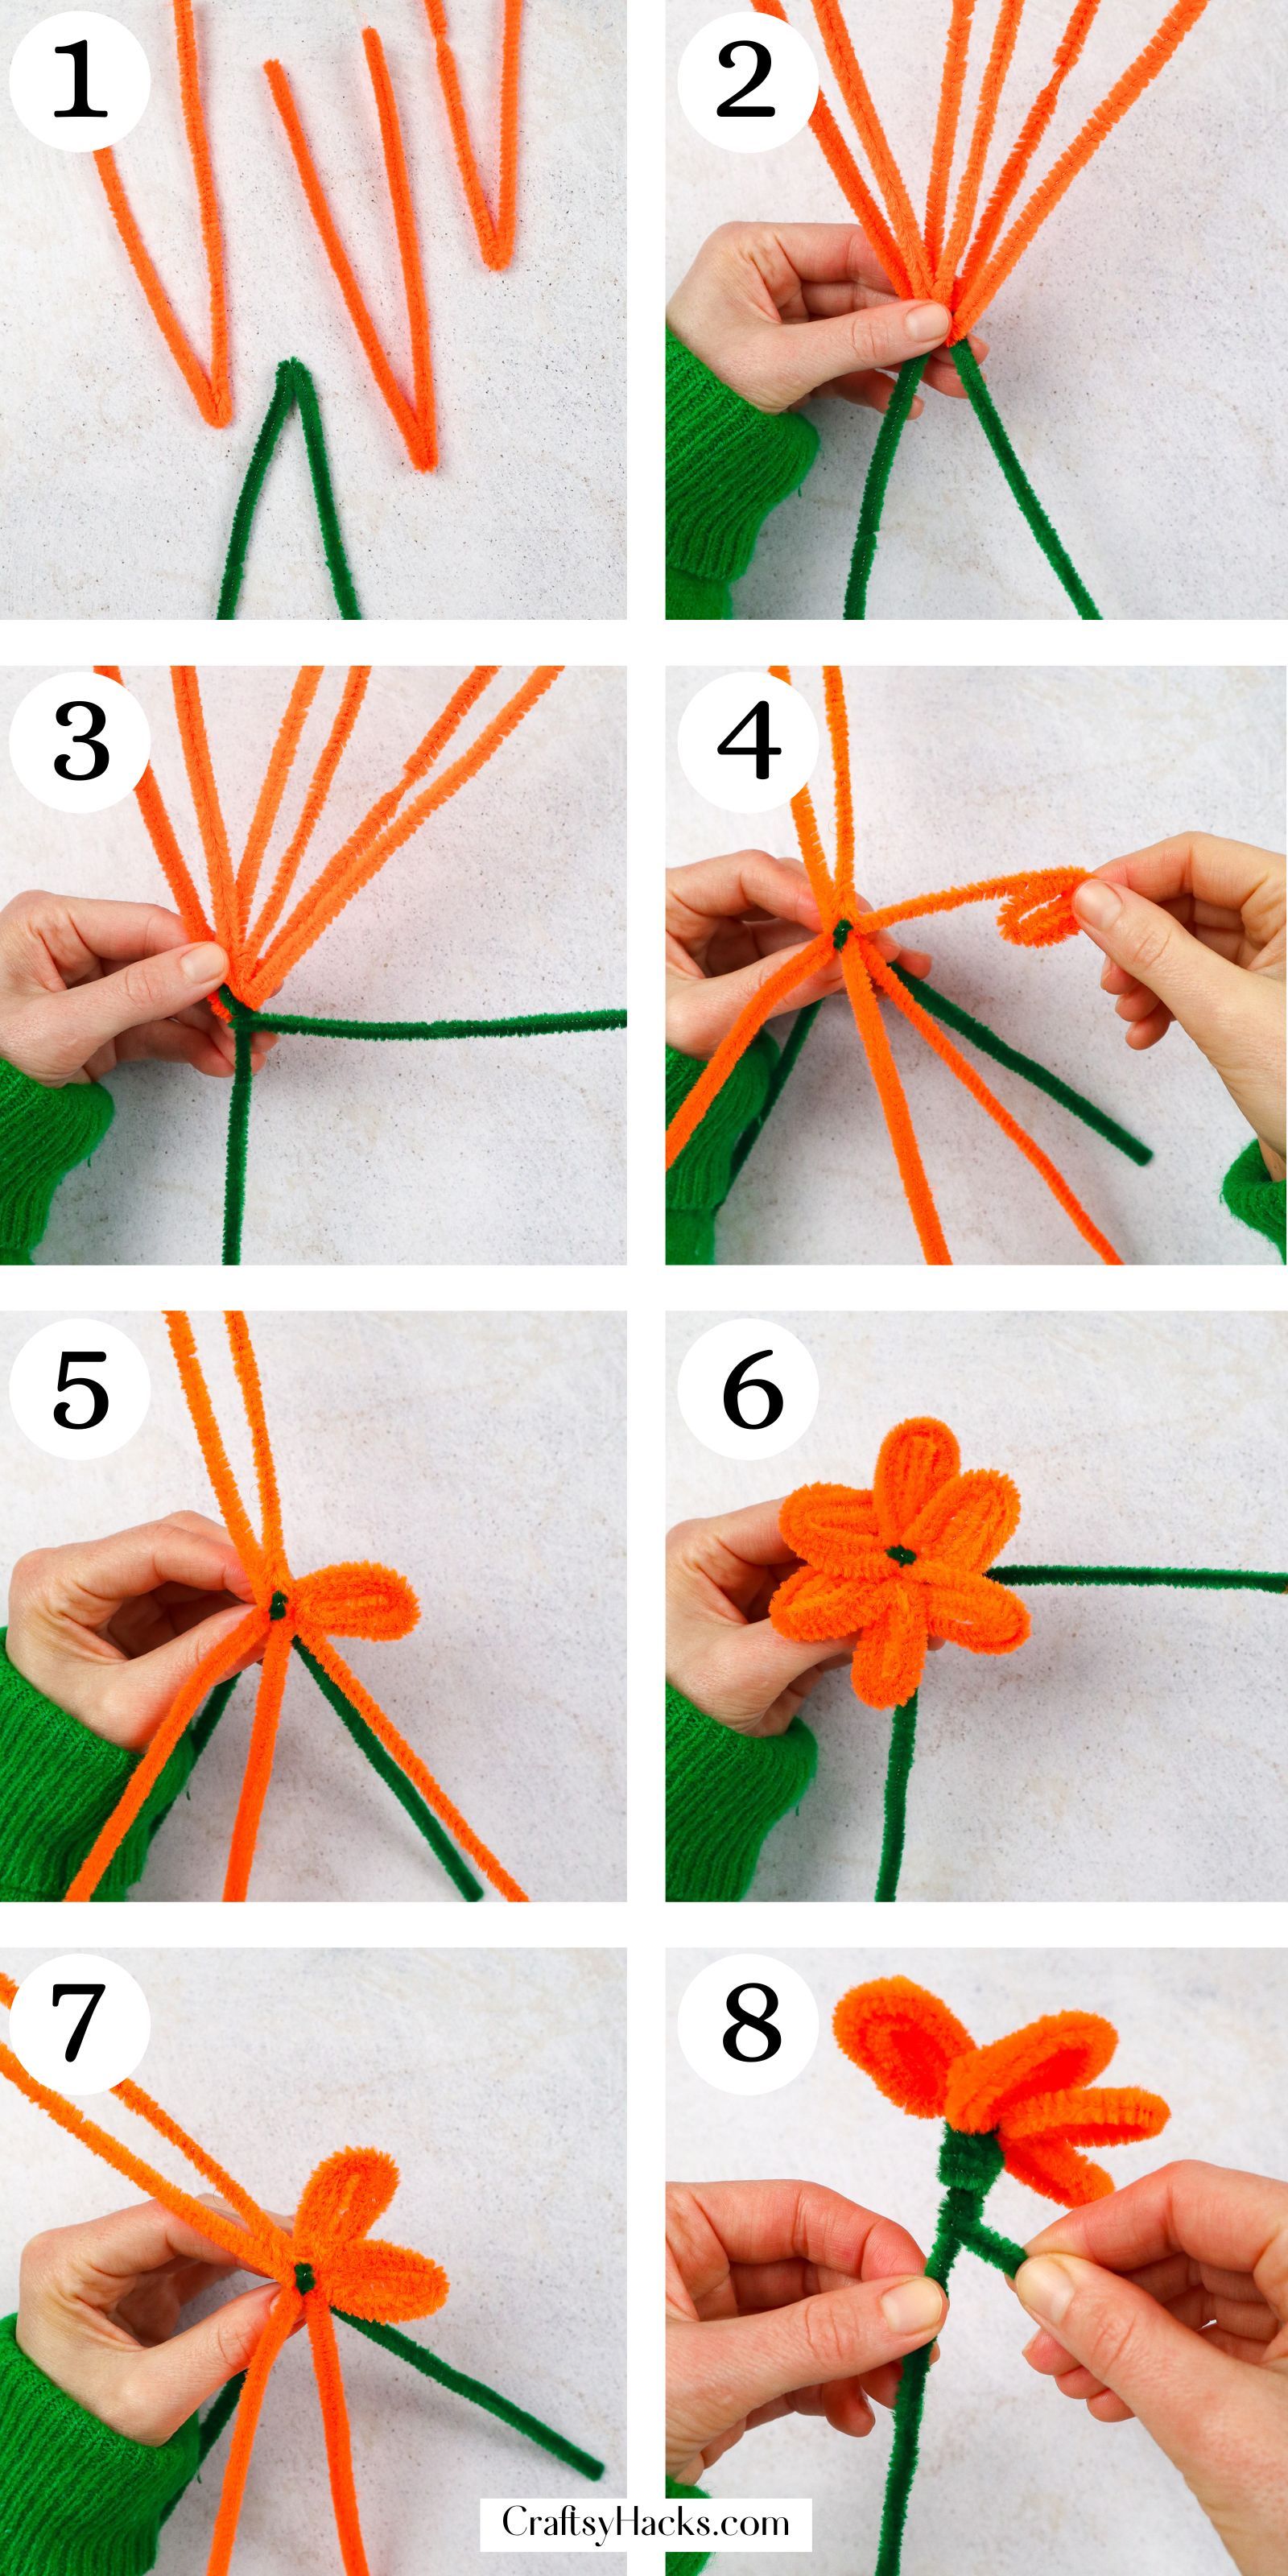
Twisting the green stem helps secure the petal spokes before you roll each petal inward.
Step 9. Reshape and tweak your petals as needed. You can leave the petals rounded or press them slightly for a flatter bloom — whatever suits your style.
Step 10. Take the second green pipe cleaner and form a leaf by bending and rolling it roughly into a paper-clip shape, leaving a short tail so it can be attached to the stem.
Step 11. Position the leaf where you like on the stem and wrap the remaining tail around the stem to hold it in place. Add more leaves if you wish.
Step 12. Finish by pinching any loose ends and making final adjustments to the petals and leaf. Your pipe cleaner flower is complete!
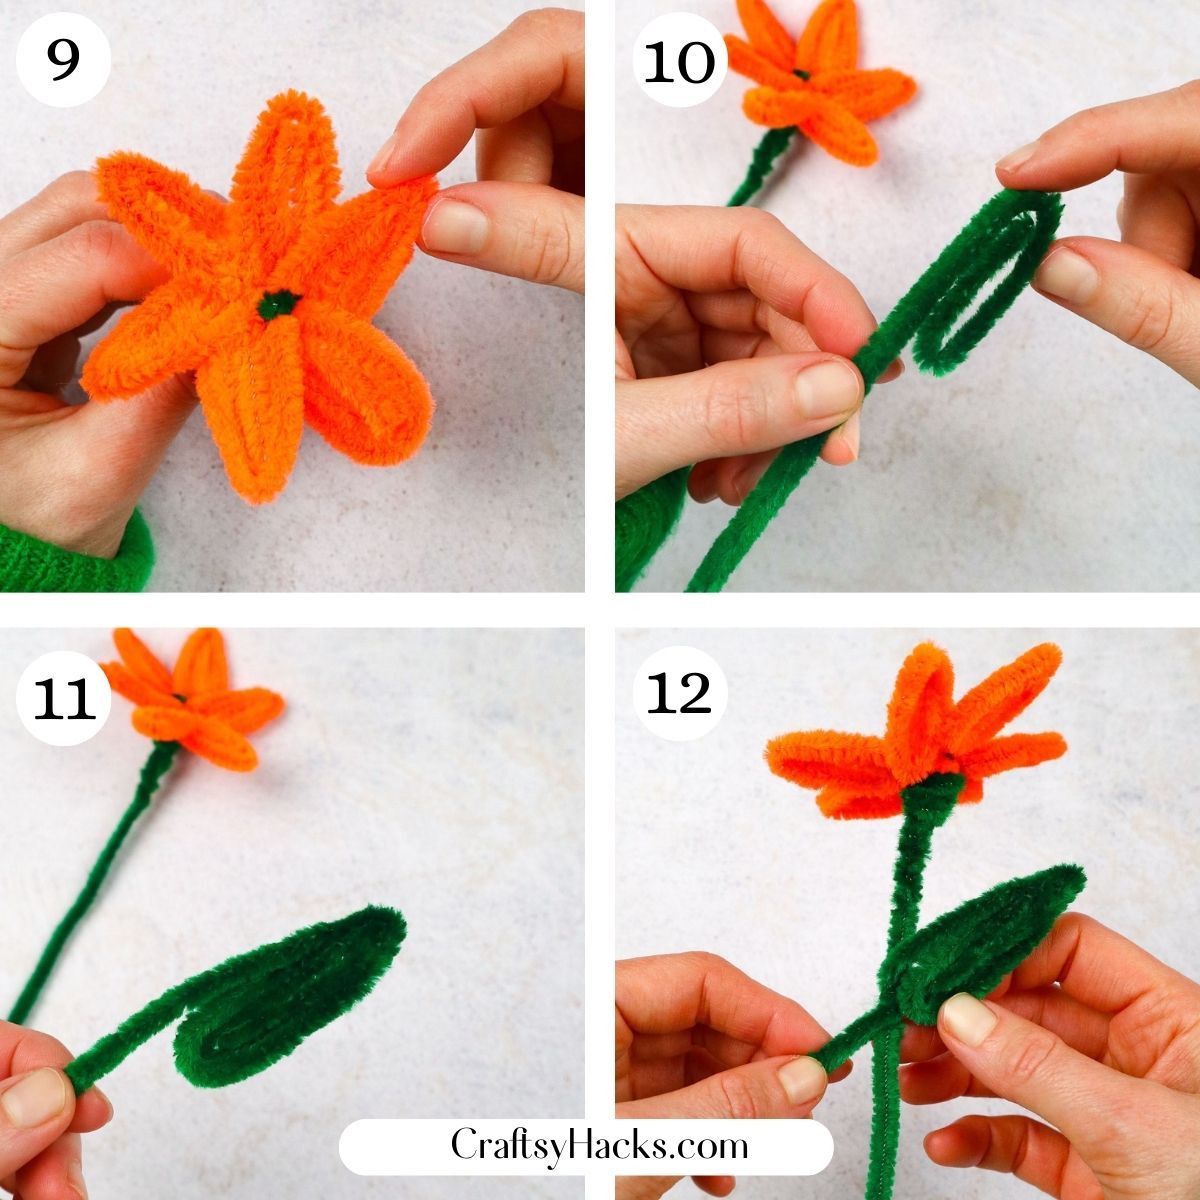
Attach a folded green pipe cleaner as a leaf and wrap its tail around the stem to secure it.
There you have it—an insanely cute DIY pipe cleaner flower!
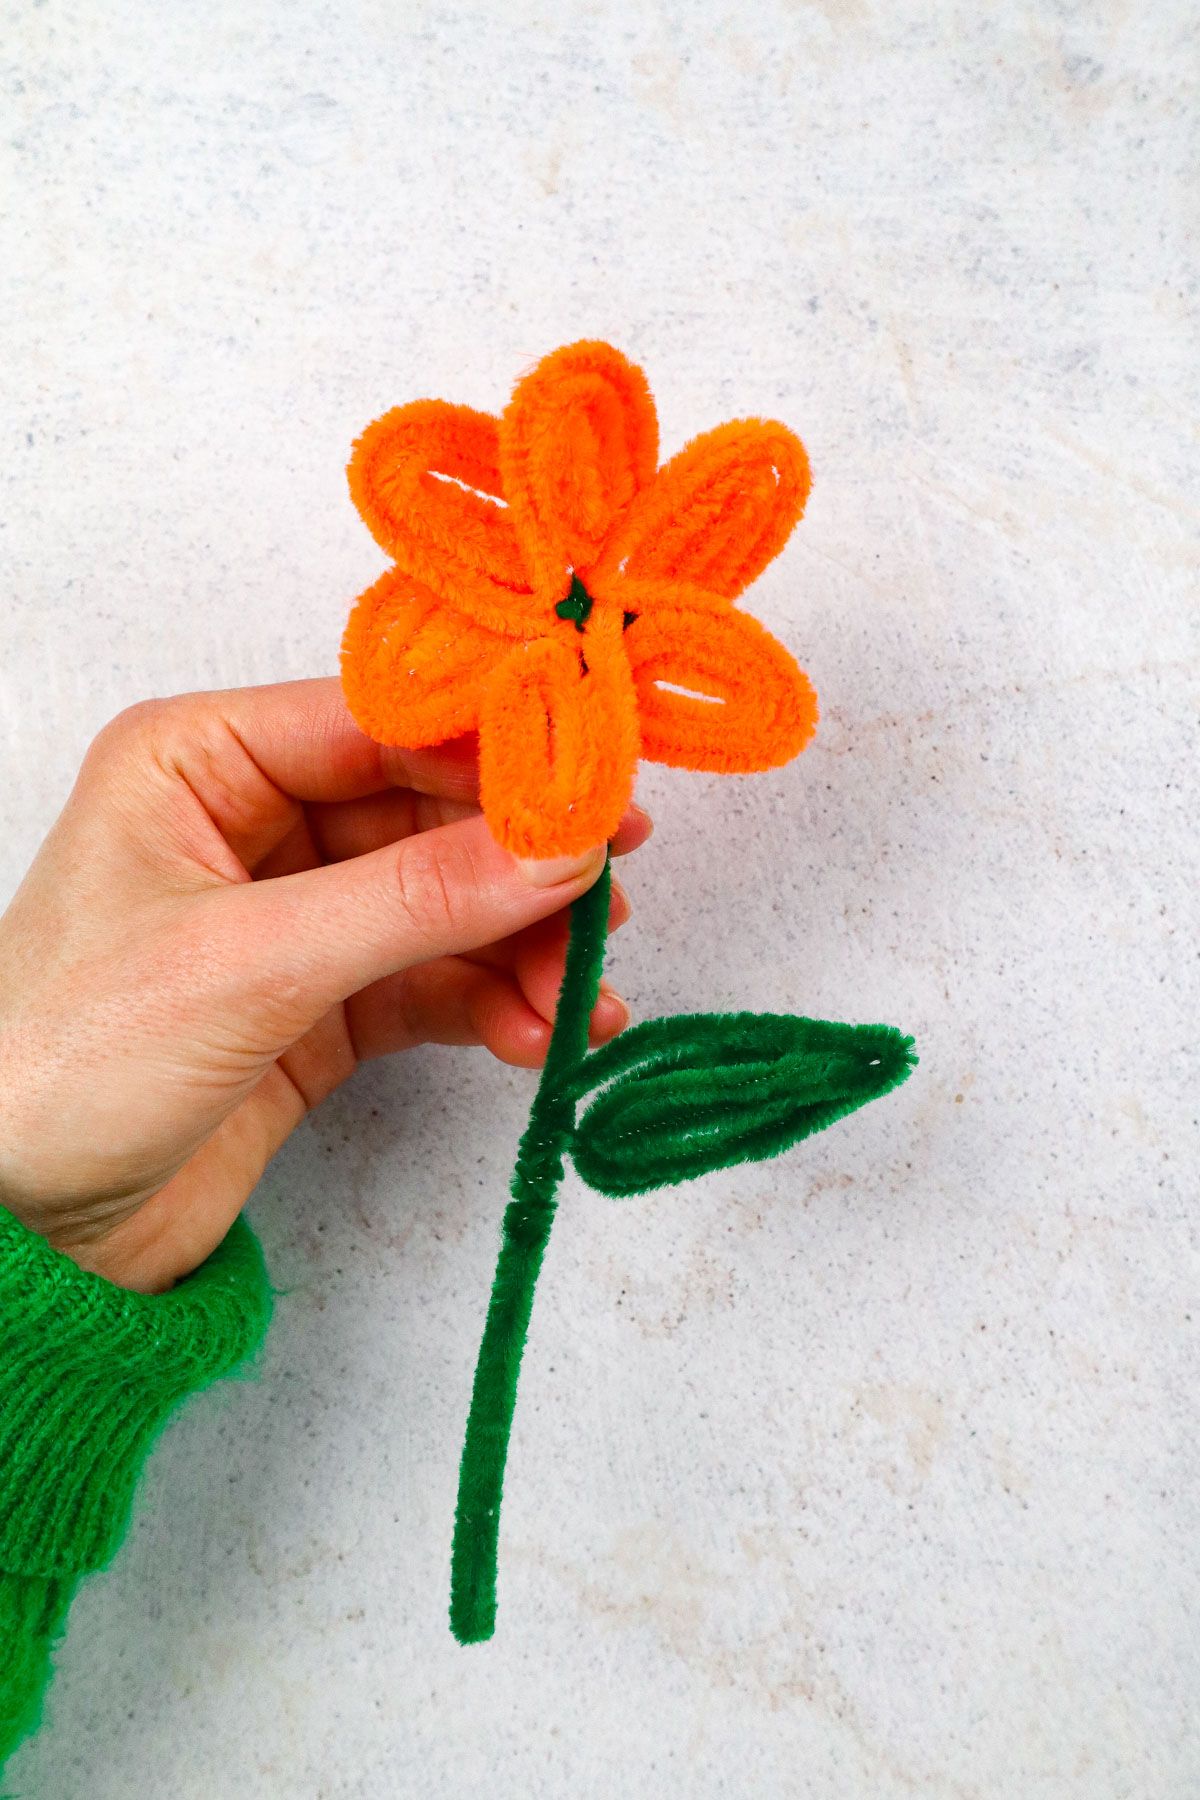
Your finished pipe cleaner flower — customize petal shapes and leaf placement to create different looks.
Quick tips: try mixing petal colors, vary the number of petal pipe cleaners for fuller or simpler blooms, and make several stems to arrange as a bouquet.