DIY Plastic Cup Crow
Creating a DIY Plastic Cup Crow can be a fun and creative project that anyone can enjoy. This adorable plastic cup crow will surely brighten up any space and is a great craft to do with kids or as a fun weekend project.
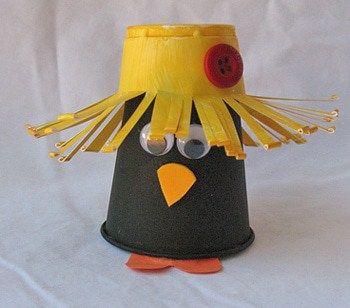
Supplies
- 2 small plastic cups bathroom size (paper or foam cups work too!)
- 2 cotton balls
- 2 medium wiggle eyes
- 1 red button
- scrap of orange craft foam
- scrap of orange construction paper
- Acrylic craft paint: black and goldenrod
- scissors
- white craft glue
Instructions
- Paint one of the cups black and the other with goldenrod. Set cups aside to dry.
- Cut a triangle from the orange craft foam for the beak.
- Cut a heart shape for the feet from orange construction paper.
- When paint is dry, use scissors to cut thin slits (fringes) halfway up the goldenrod cup, going all the way around. Bend the “fringes” upward to form the hat.
- Turn the hat over and put 2 cotton balls inside the cup. Glue hat to the bottom end of the black painted cup. Let dry.
- Glue 2 wiggle eyes and beak on to the cup under the hat.
- Glue the red button to the front side of the hat.
- Glue the heart feet to the opening of the black cup, bend the construction paper up into the sides of the cup so that just the “feet” stick out.
No comments
Write a comment