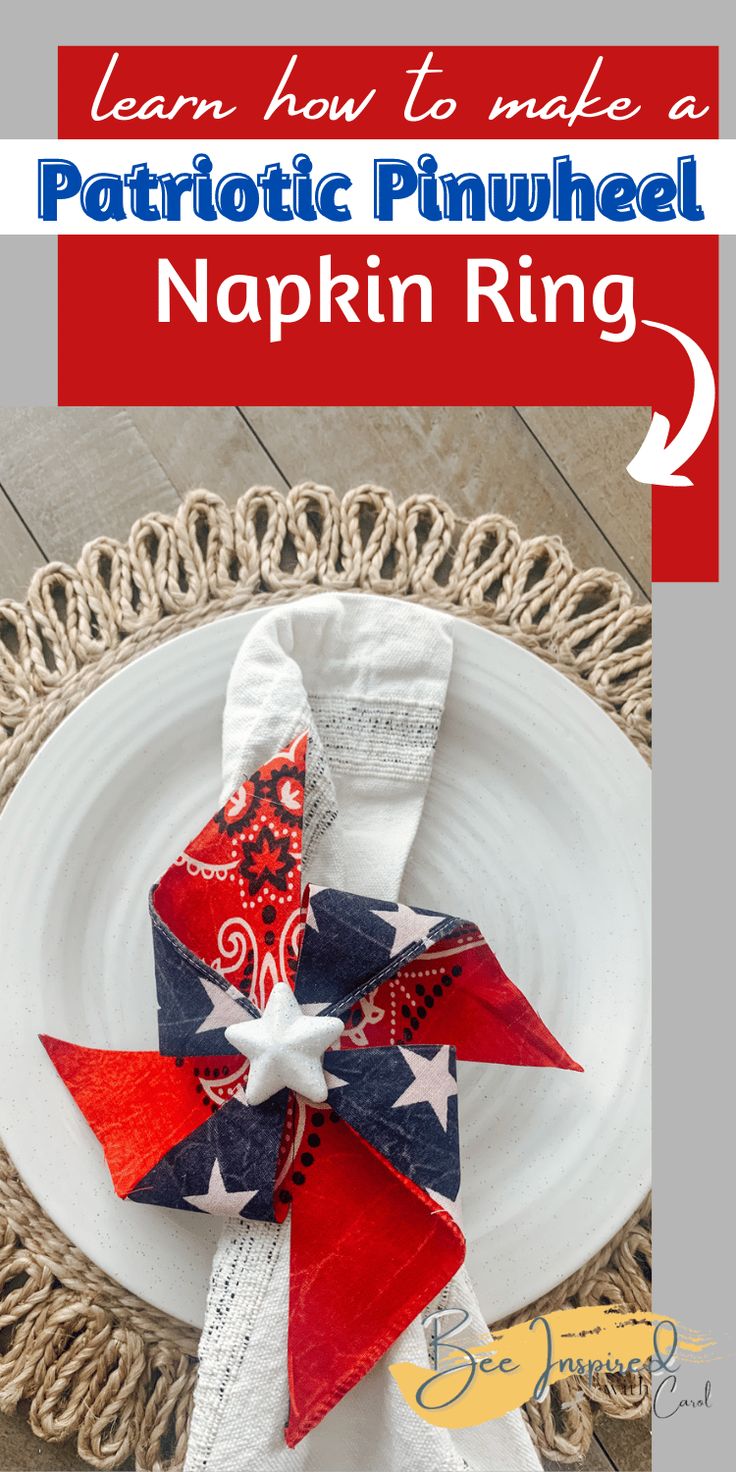
DIY Patriotic Pinwheel Napkin Rings
If you're looking to add a touch of patriotic flair to your table setting, why not try creating DIY Patriotic Pinwheel Napkin Rings? These adorable little decorations are not only simple to make, but they also add a fun and festive vibe to any gathering. Whether you're hosting a Memorial Day barbecue or a Fourth of July picnic, these napkin rings are sure to impress your guests and make your table setting pop with patriotic charm! So roll up your sleeves, get crafting, and let the creativity flow with these delightful DIY napkin rings.
Supplies:
Bandanas – Extra Large red, blue, and American flag style from Hobby Lobby
Patriotic Materials of any kind
Heat and Bond Ultra Hold
Paper Towel Roll
Clay Napkin Rings
Shower Rings
Old Thrifted Napkin Rings
Patriotic Foam Scatter – Dollar Tree
Burlap or Jute
Measuring mat & board
Rotary Cutter
Iron mat
Mini iron
Spray Adhesive
Low Temp Hot glue
Heat Gun
Baby Wipes
Puppy Pads
STEPS:
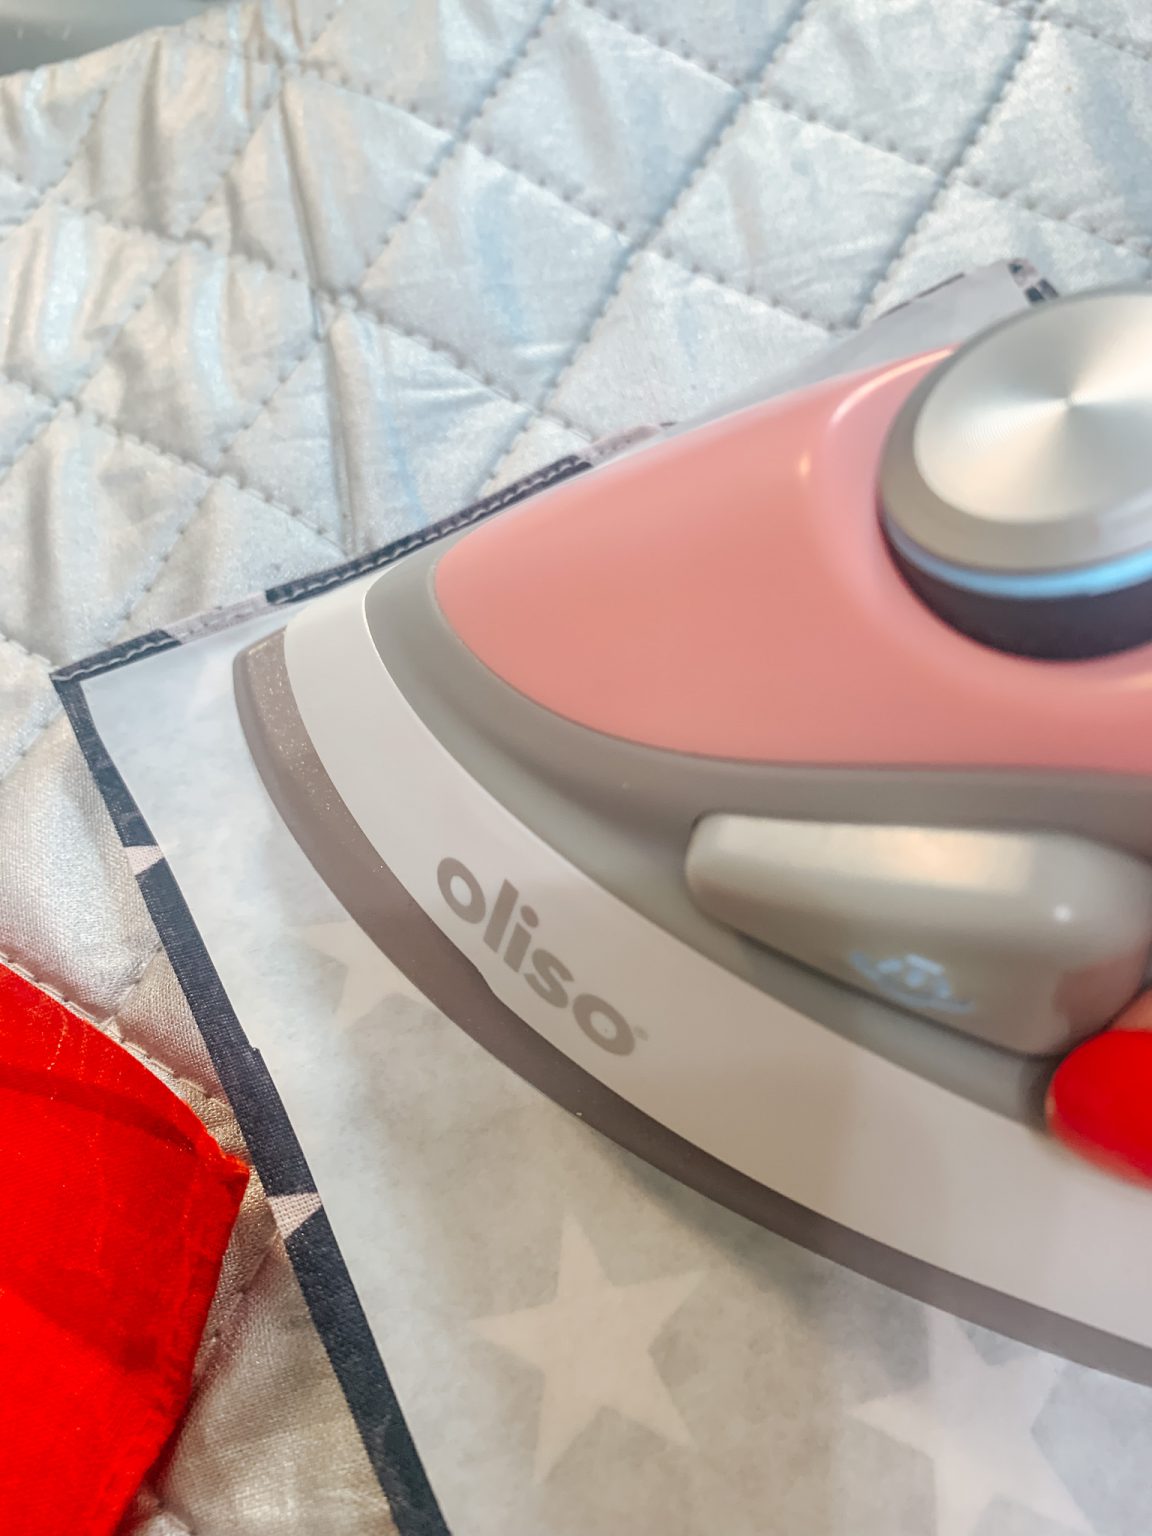
1 – Grab 2 different patriotic fabrics of your choice. I am working with my blue bandana and my flag bandana as well. Iron your fabrics to remove all those wrinkles.
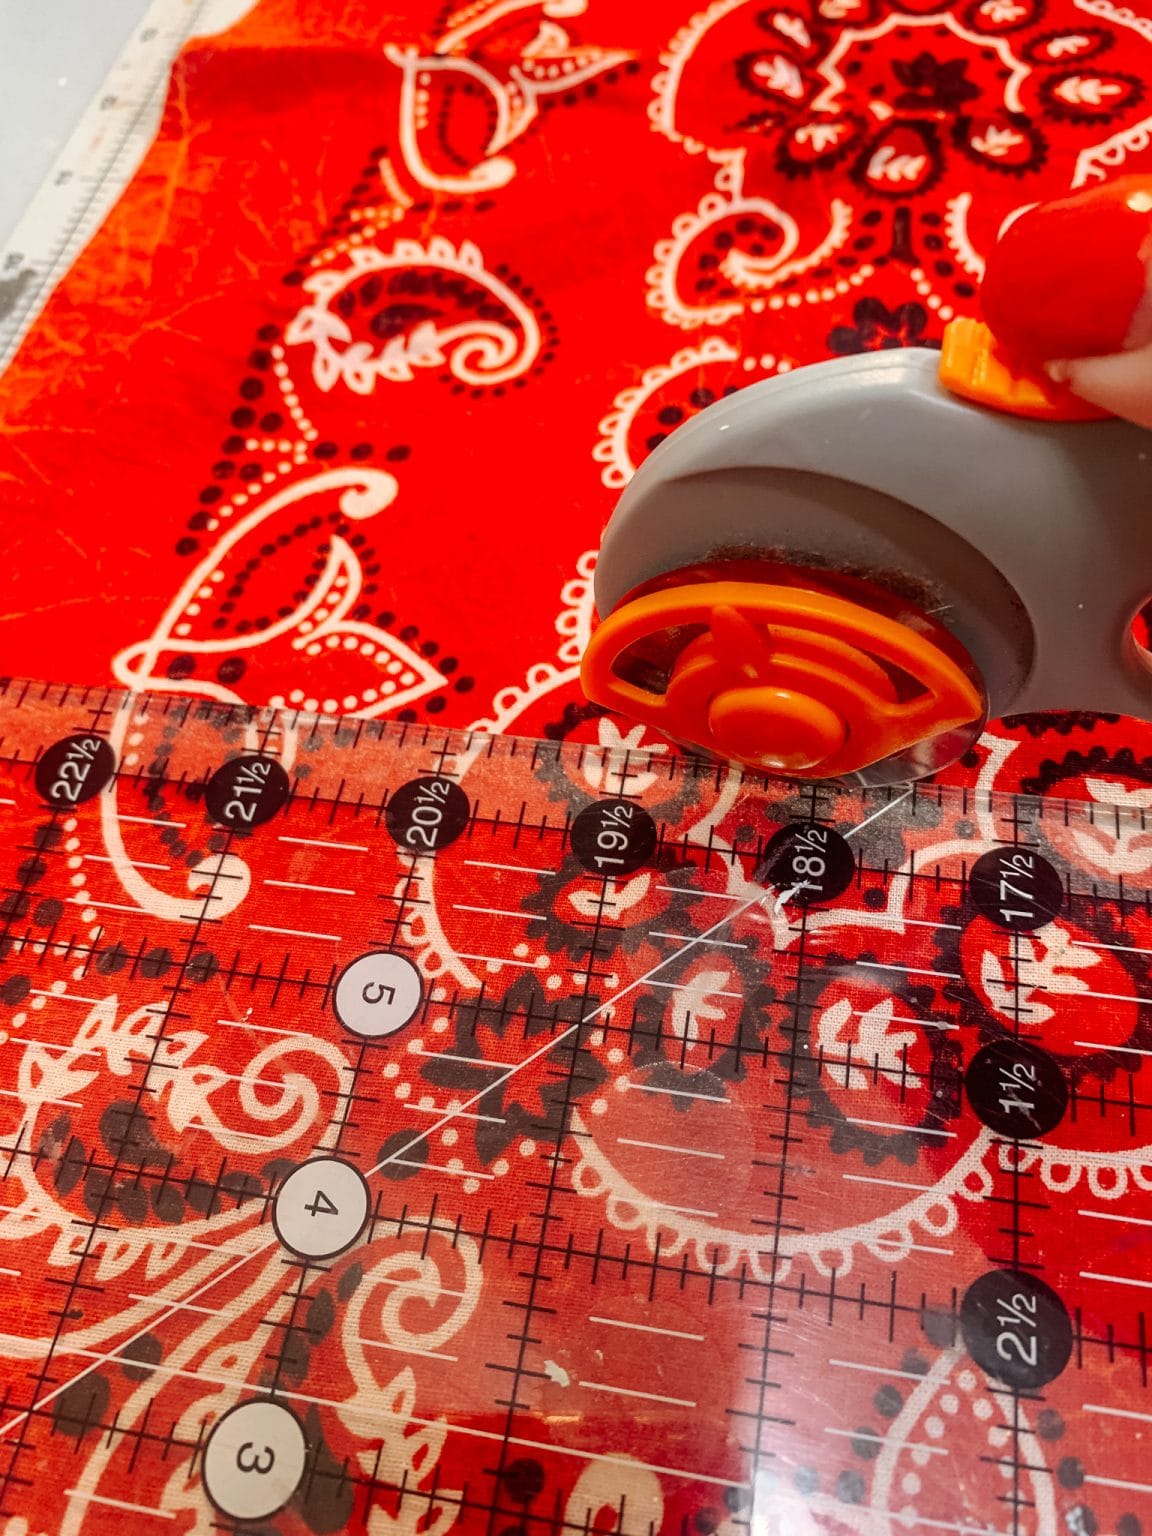
2 – Lay your bandana out flat and cut it in half with your rotary cutter so it is easier to work with. I wanted my napkin rings to be big and bold, so I cut my pieces of fabric to be 6×6”. If you want them to not be as big, just adjust your measurements a bit. Repeat so you have both of your pieces of fabric cut into 6×6” pieces.
3 – Grab your Heat and Bond and lay it out flat. We will cut this slightly less so than 6×6”. Mark with a pencil as you measure on the smooth side of the Heat and Bond as many squares of fabric as you have. Cut with regular scissors. Set aside for a bit.
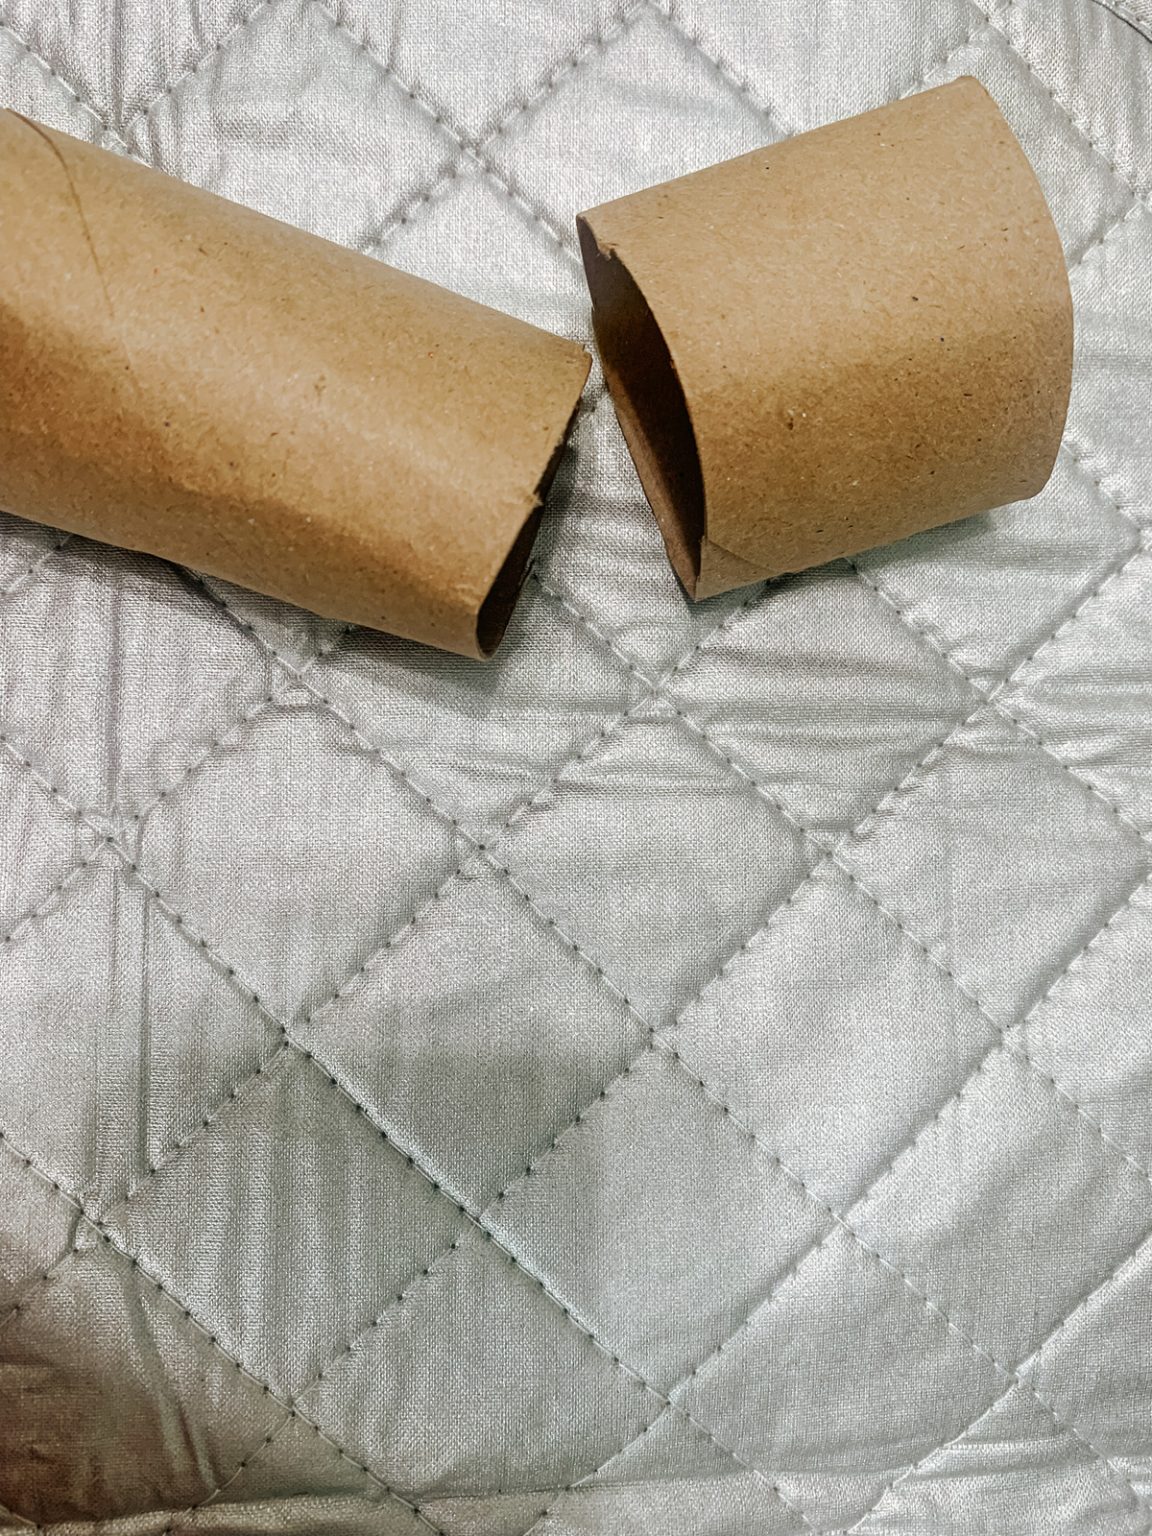
4 – Grab your paper towel roll and cut it to be about 2 “ long. It doesn’t have to be perfect. Cut as many as you need for your set of napkin rings. Tip* Use the above ideas instead of the paper towel roll for your rings. Be creative and have fun.
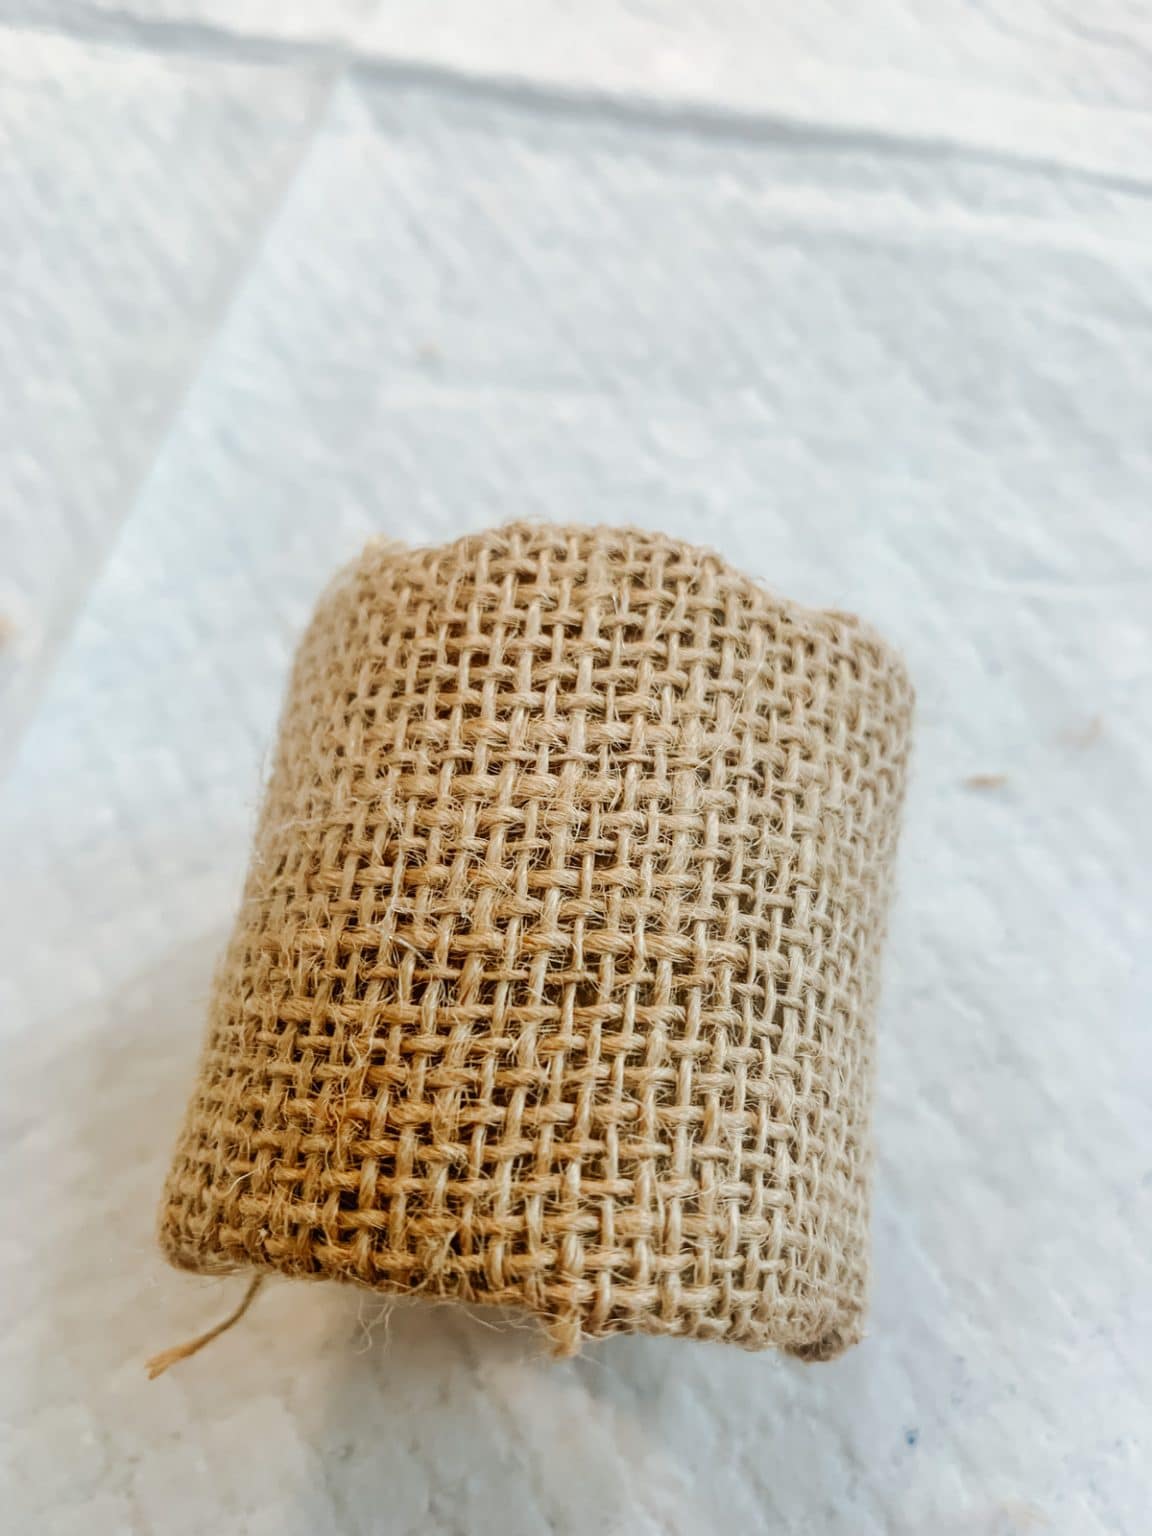
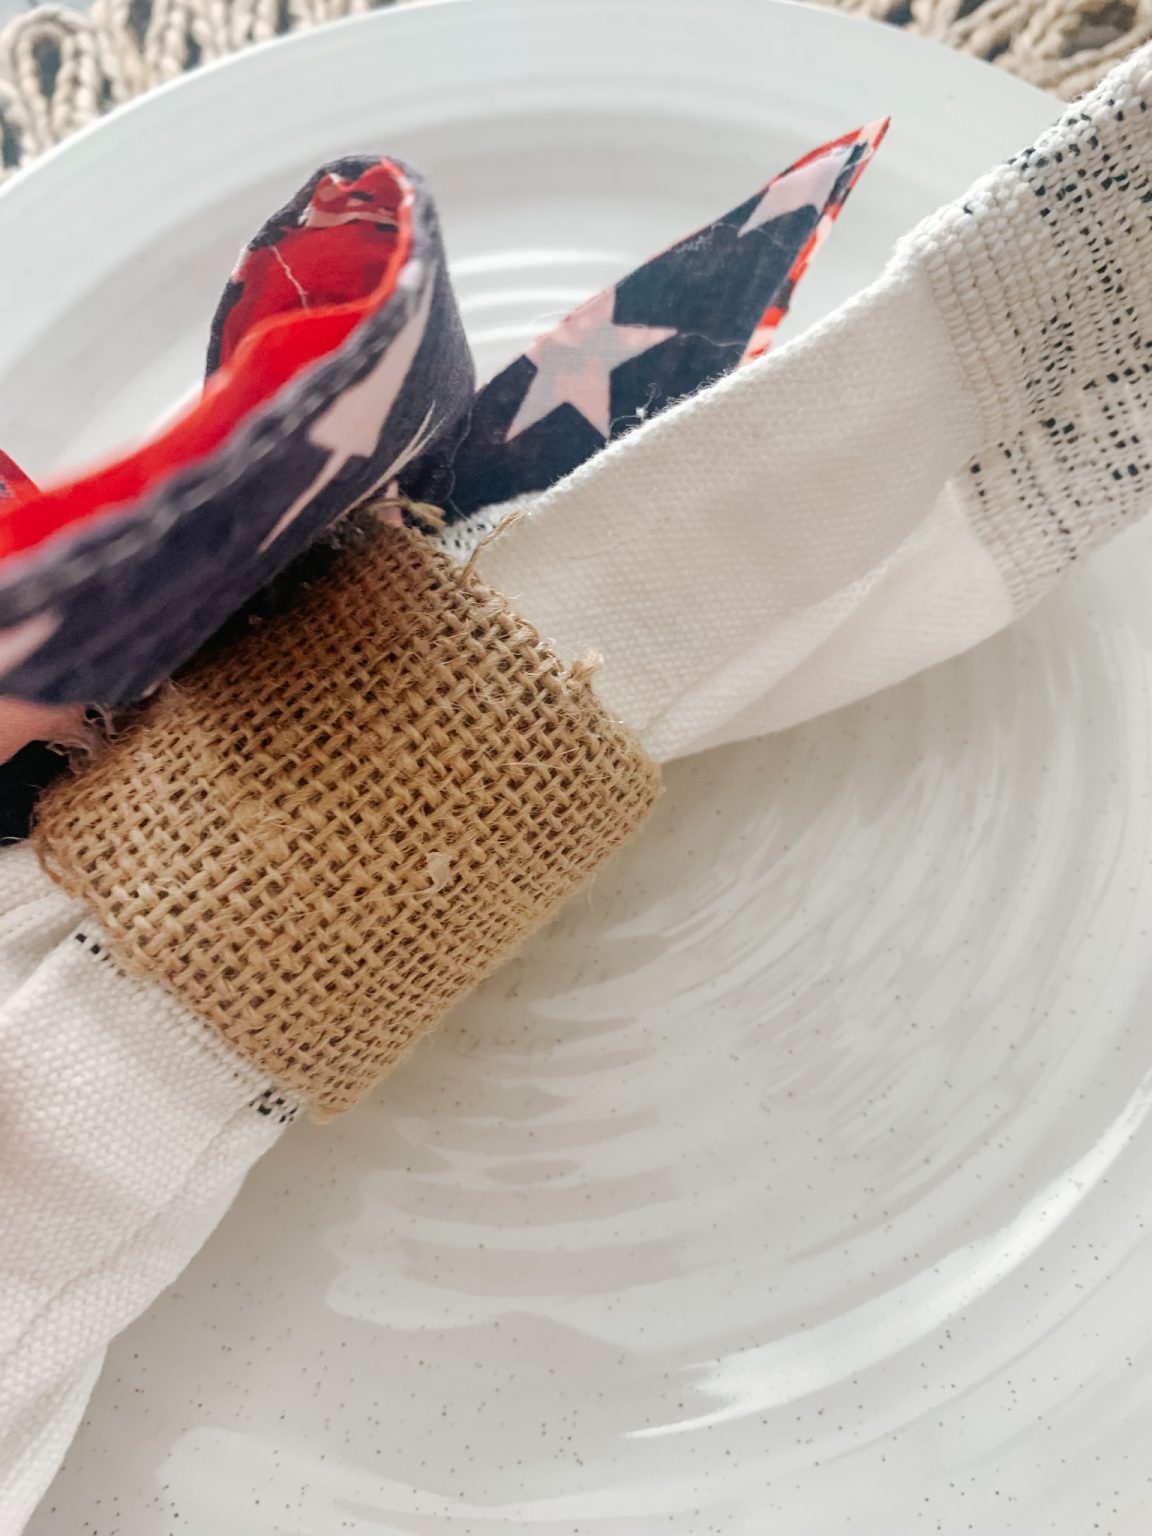
5 – To reinforce this ring, grab your burlap and measure out the amount you will need to cover your roll, being sure to leave yourself a lip on both sides. Also, have enough to overlap a bit to have it completely covered. Use your Spray Adhesive and spray to the back of your burlap. Then place your napkin ring on there and it will adhere easiest. Hot glue also works too! Tip* You can also use jute and wrap around the ring, hot gluing as you go.
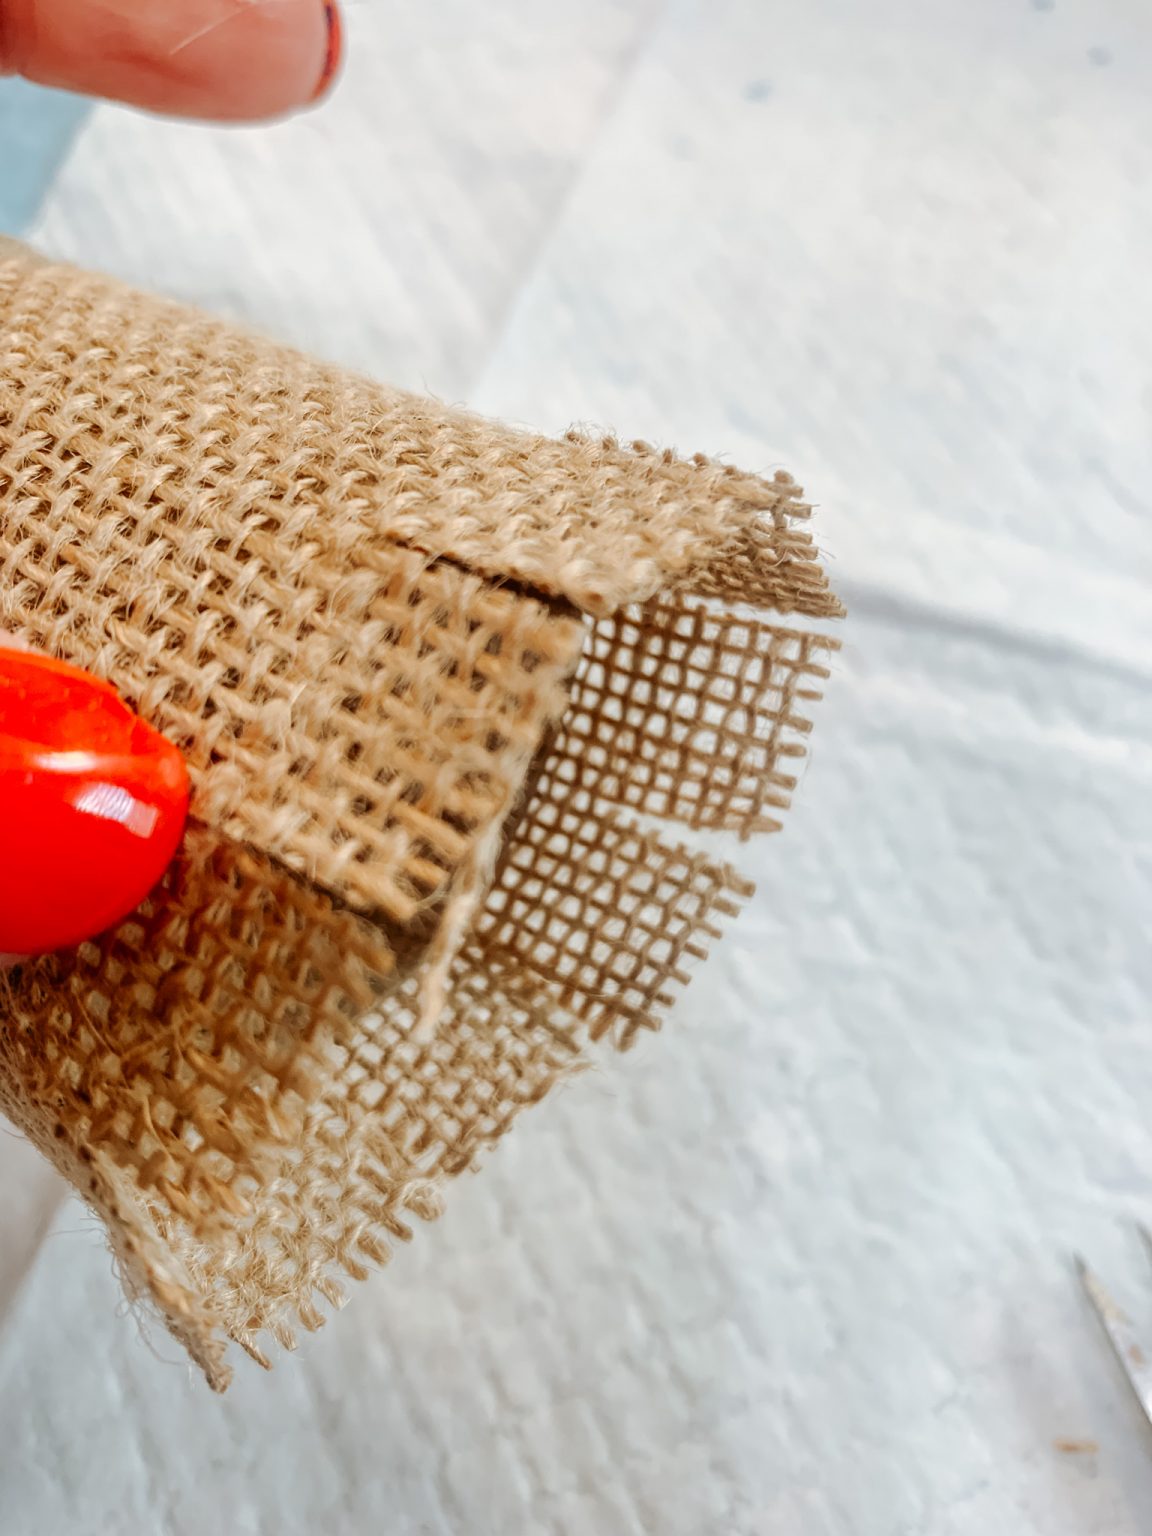
6 – With the excess on the lip of the burlap, you can simply cut a few snips into it to help you fold it inside your roll. With your low temp hot glue gun, add a bit to secure and clean it up. Repeat for as many napkin rings as you plan to make for your tablescape. Tip* If you have a regular temp hot glue gun, use your finger coverings so you don’t get burned. Set aside. Tip* You can add a strip of excess fabric around your burlap-covered ring to add a little bit of extra cuteness to it.
7 – Next grab your fabric, and your heat and bond placing the rough side down on the fabric and iron so it adheres. They will fuse together and when done, you will see the shiny side stick to your fabric as you remove the packing. Next, lay your next design of fabric on top of the shiny side of the heat and bond. Iron again. This will activate the Heat and Bond so the 2 fabrics stick together.
8 – Clean up the edges a bit with your rotary cutter and flat edge.
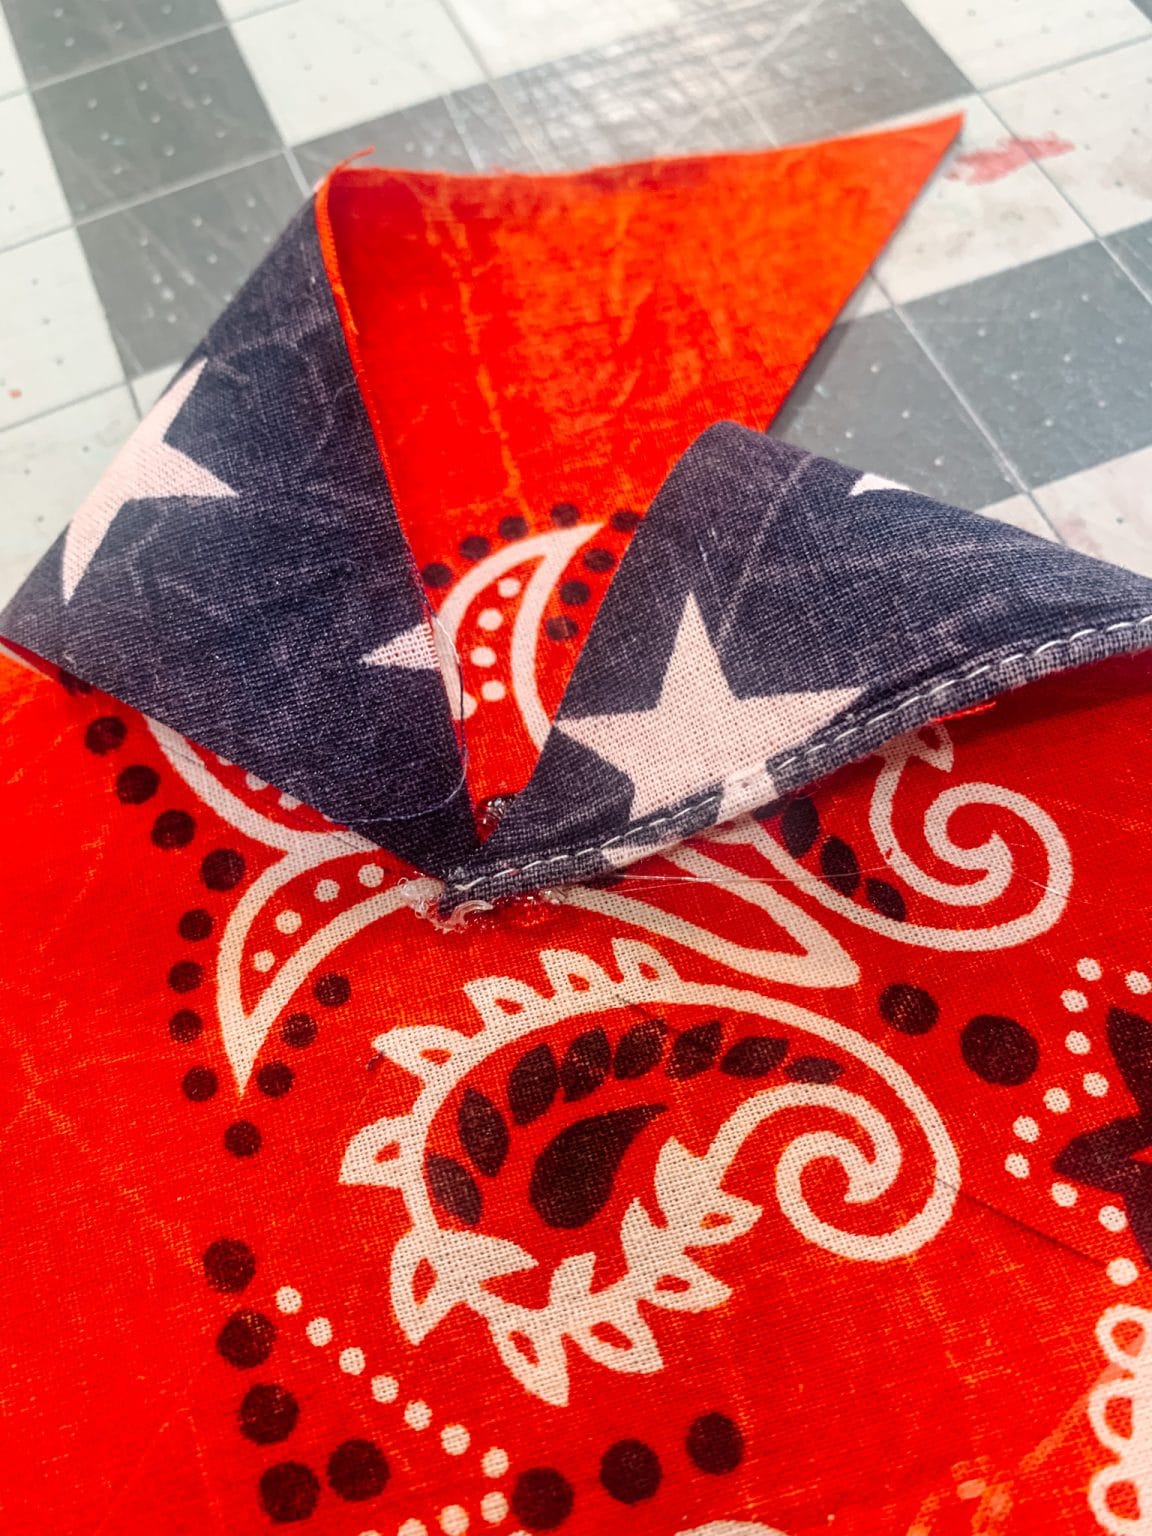
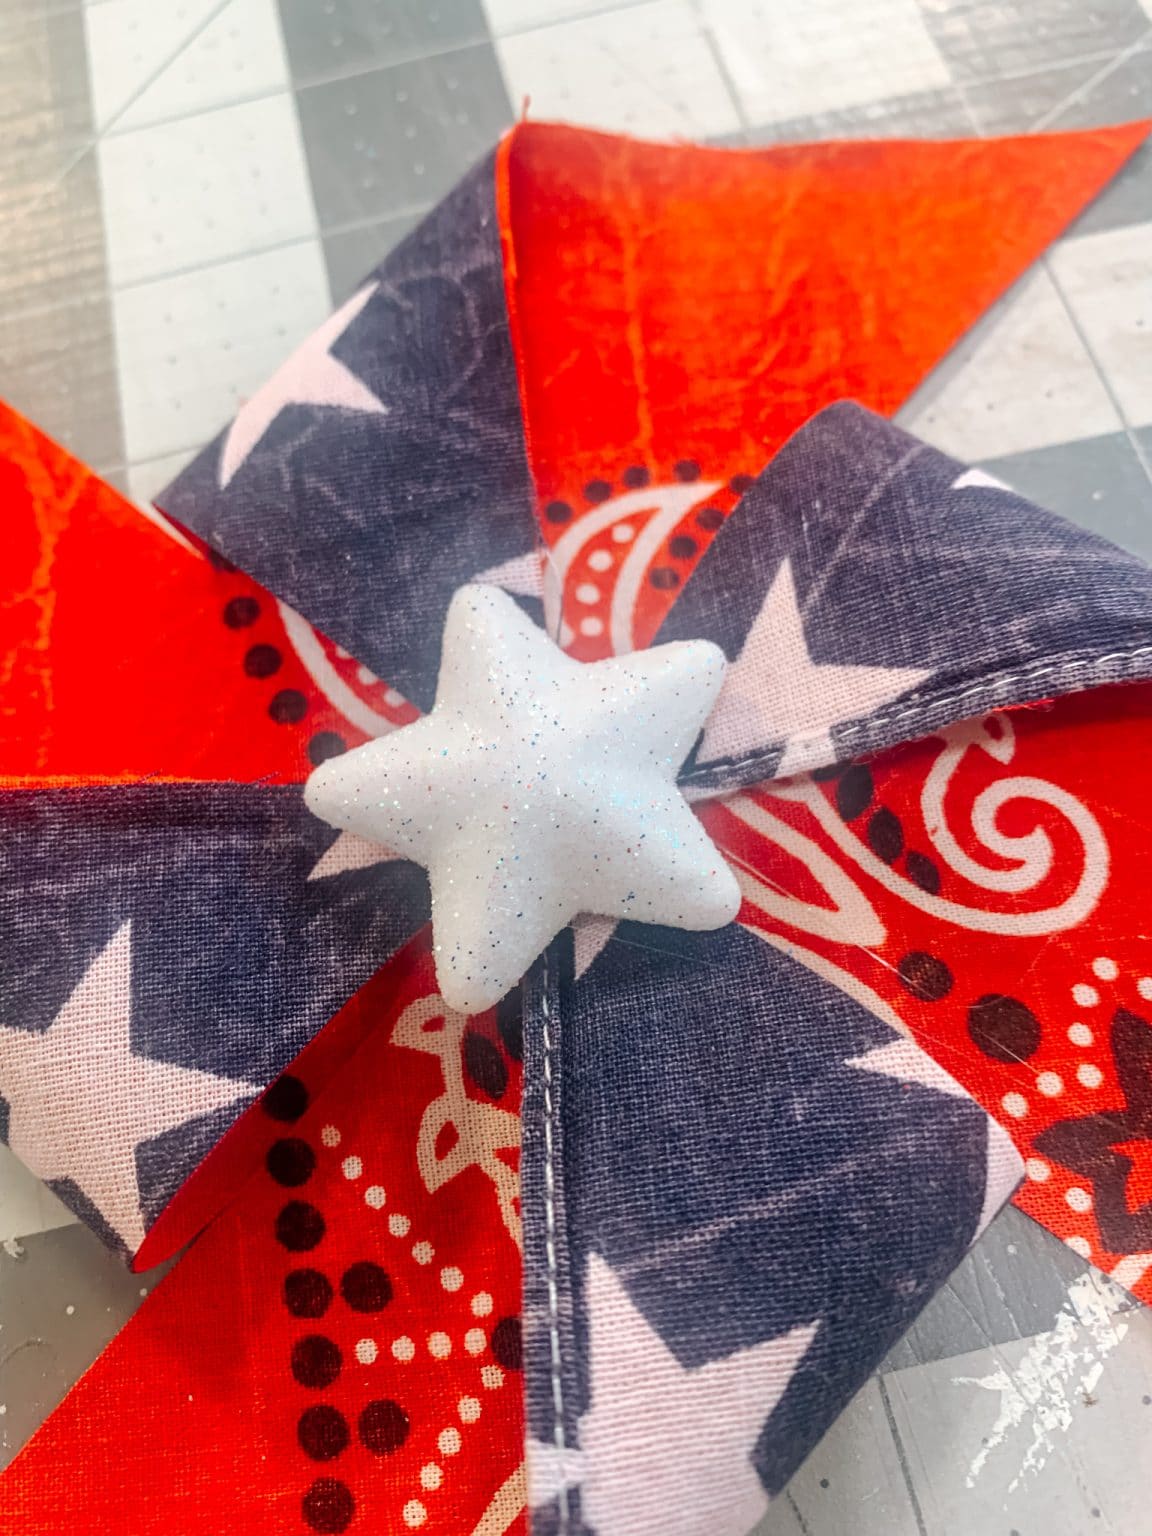
9 – Next grab your measuring mat and lay over the square at a diagonal angle, going corner to corner. With your rotary cutter, go ALMOST to the center, being sure to leave some space so you don’t accidentally cut in half. Repeat on the other side as well so you will have 4 little cuts from your corners.
10 – Next, determine which style you want your design to look. Tip* Always have a visual plan before you begin to ensure you get the desired look you like best! Grab a corner and add a dab of hot glue to the center, being careful not to crease your fabric so it creates your pinwheel look. Repeat with all of your corners. Be extra careful not to burn your fingers as you hot glue your corner flaps in place to the middle. Repeat until all 4 corners are folded!
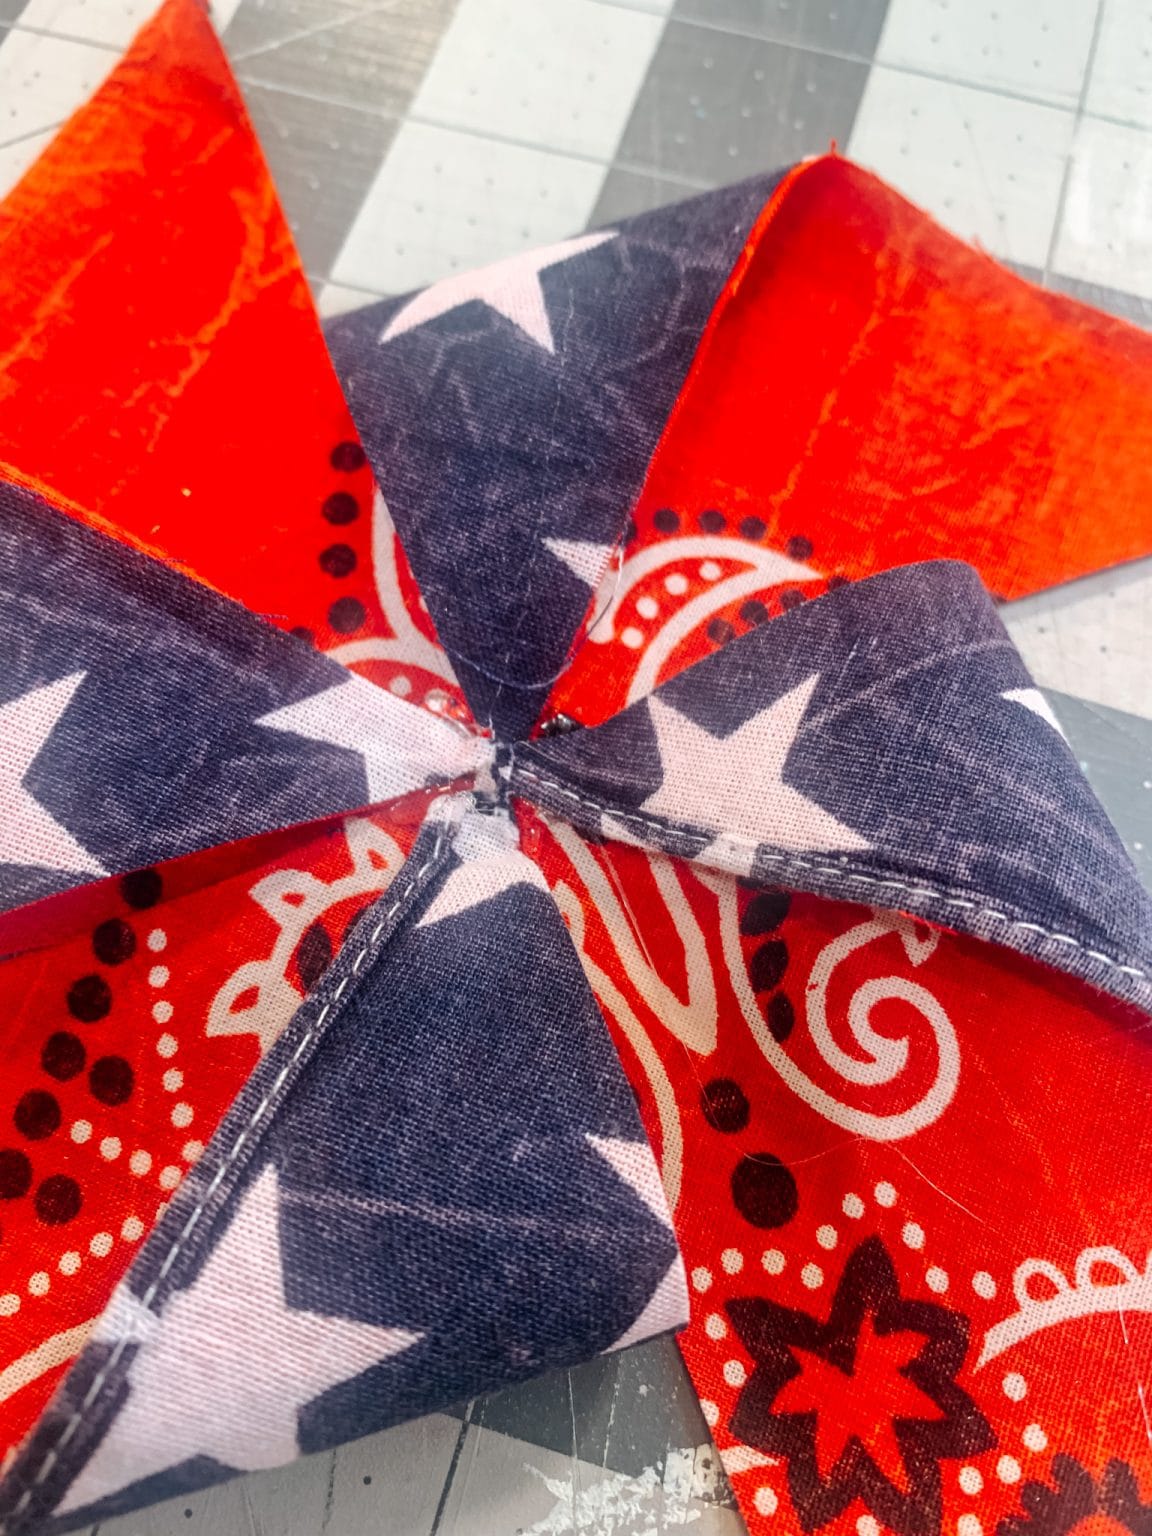
11 – To hide that center, grab your foam scatter patriotic embellishments and determine which one you want to add. Hot glue in place.
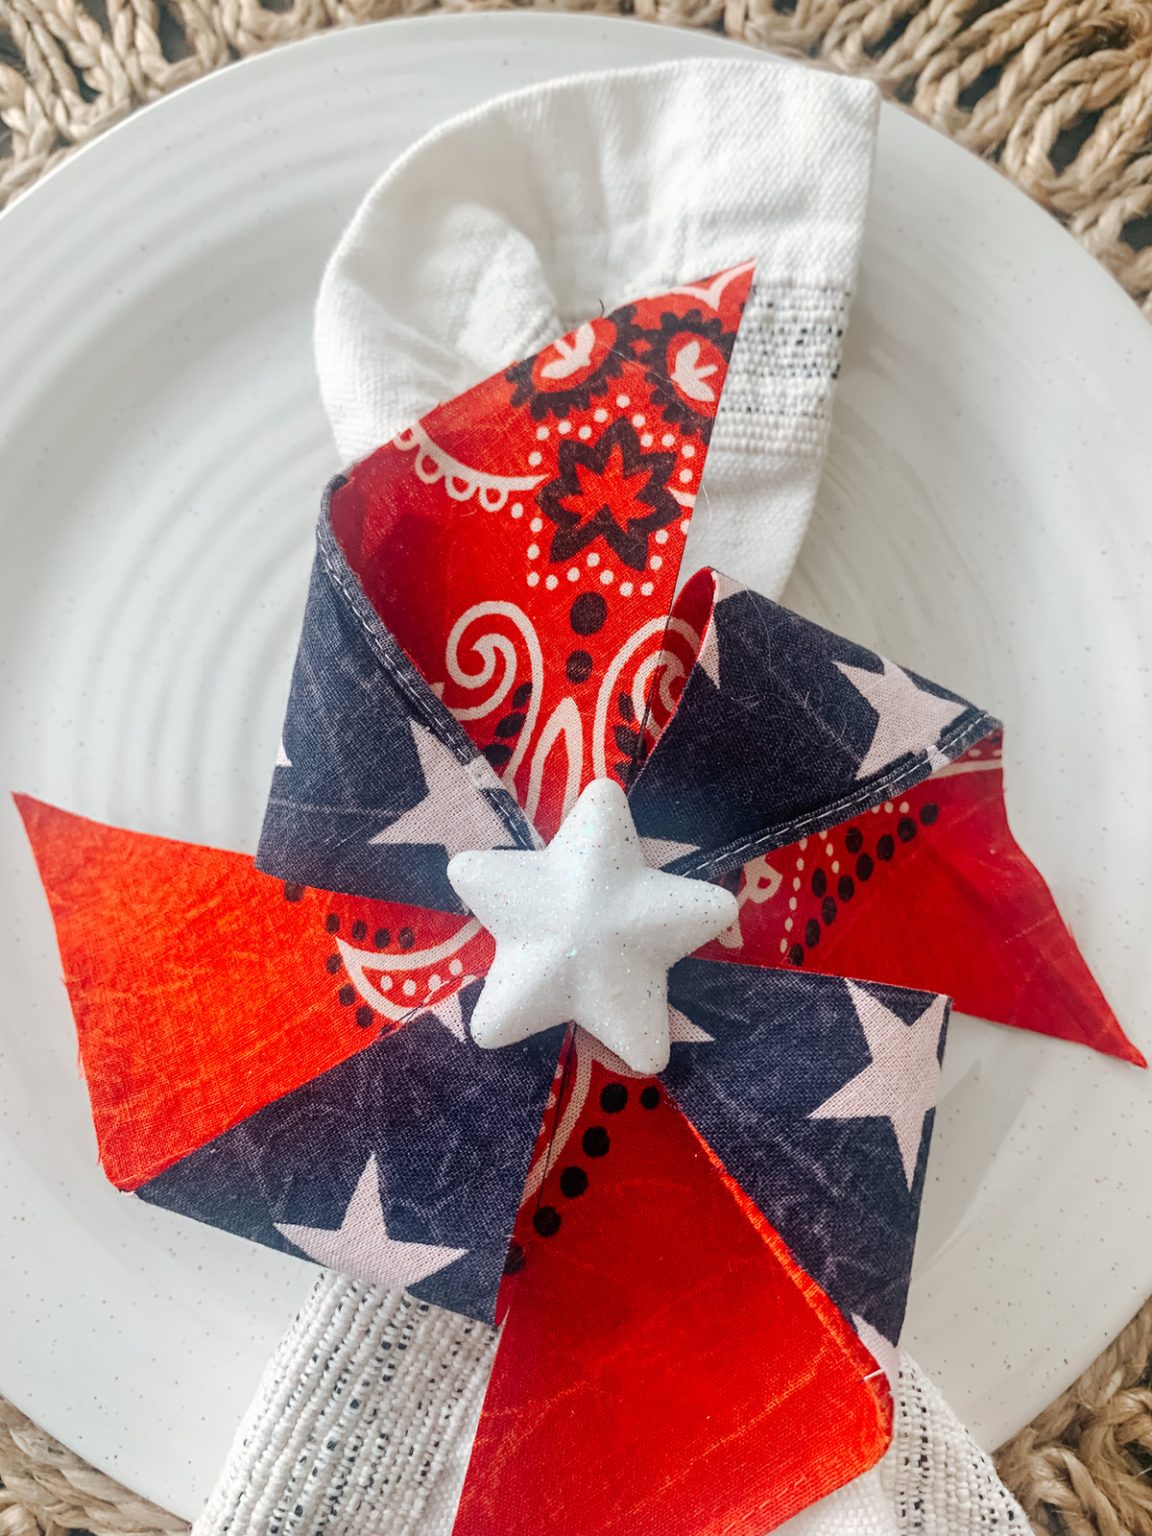
12 – Next lay your pinwheel down flat with embellishment down on your puppy pad. Find your ring and the burlap seam. Place that seam down in hot glue to the back of your pinwheel to hide that seam. Don’t forget to remove your hot glue strings/flyaways. Use a heat gun or blow dryer to help with that.
13 – Next insert your favorite napkin into your new adorable DIY Patriotic Pinwheel Napkin Rings. Be prepared to hear all your friends and family tell you how much they love them! Because they will. They most definitely will.
No comments
Write a comment