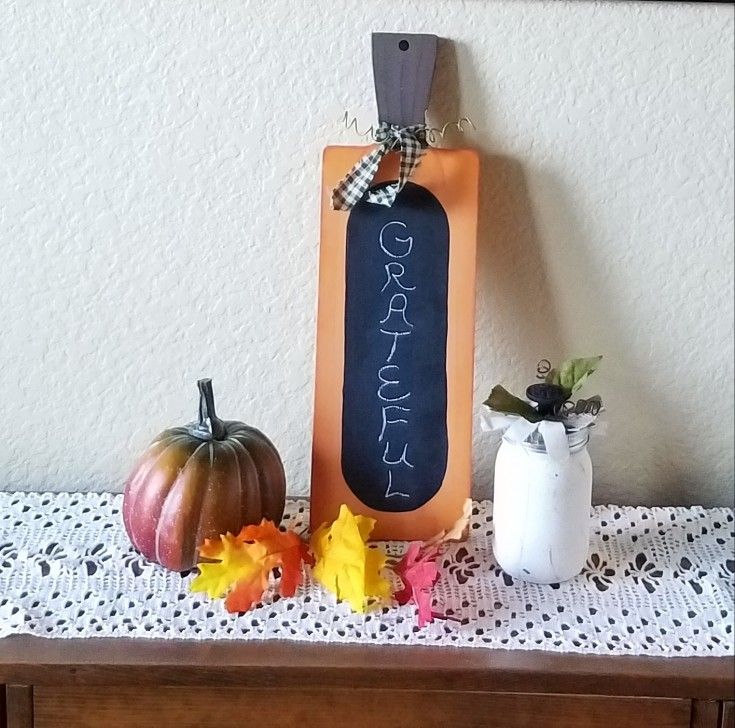
Make a Chalkboard Pumpkin from a Cutting Board
Creating a chalkboard pumpkin from a cutting board is a fun and easy DIY project that will bring a festive touch to your fall decor! This craft is perfect for adding a personalized and charming touch to your home during the autumn season. Have fun crafting and let your creativity shine with this simple and delightful project!
Supply List for Pumpkin Chalkboard
To start I cleaned the cutting board, then gave it two coats of pumpkin chalk paint. I love chalk paint because it sticks to pretty much anything without any prep work. I found this pumpkin color at Walmart.
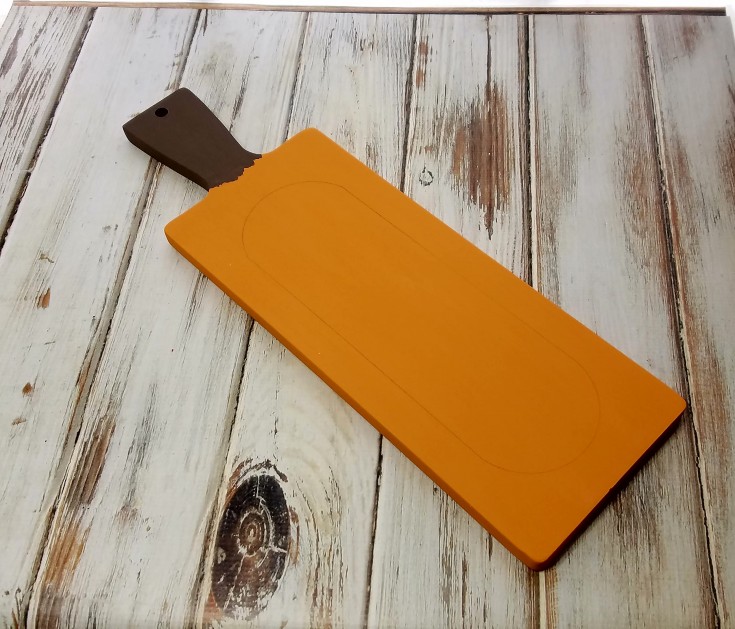
To make this cutting board pumpkin into a chalkboard as well. I drew an oblong circle in the center of the cutting board.
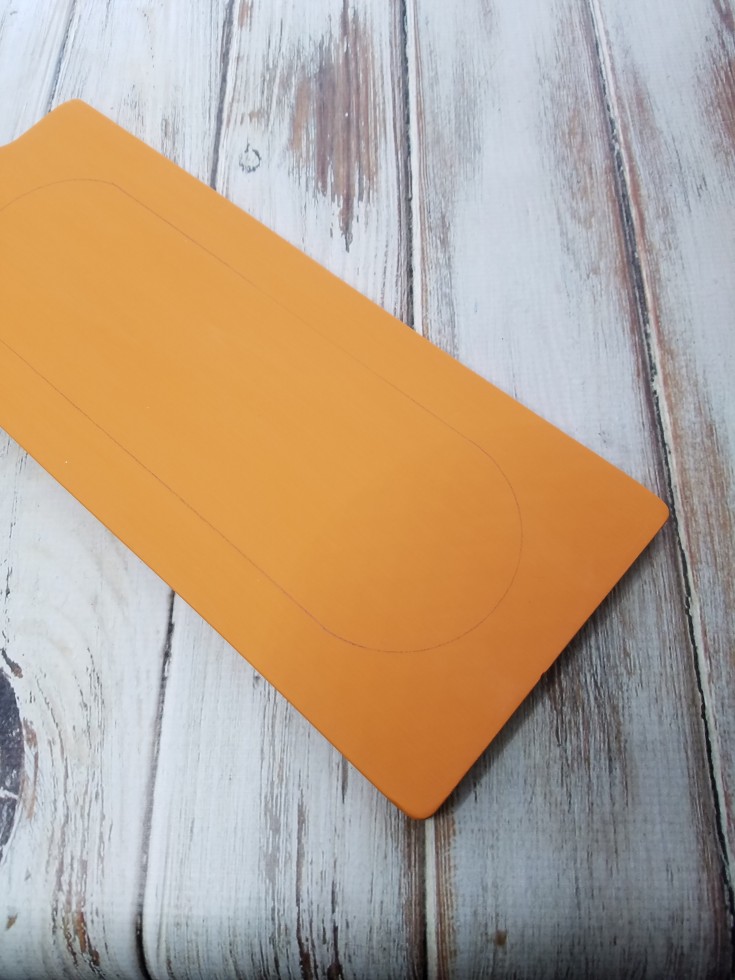
Then filled that area in with three coats of chalkboard paint. Letting each coat dry thoroughly.
Using cadmium orange acrylic paint I floated around the edges of the pumpkin.
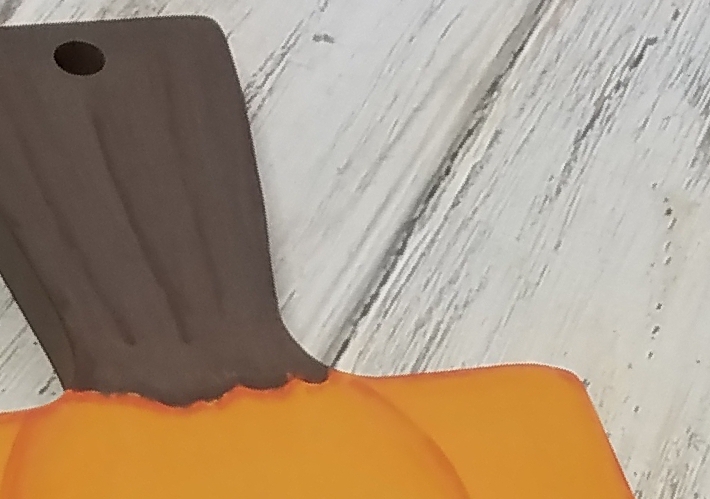
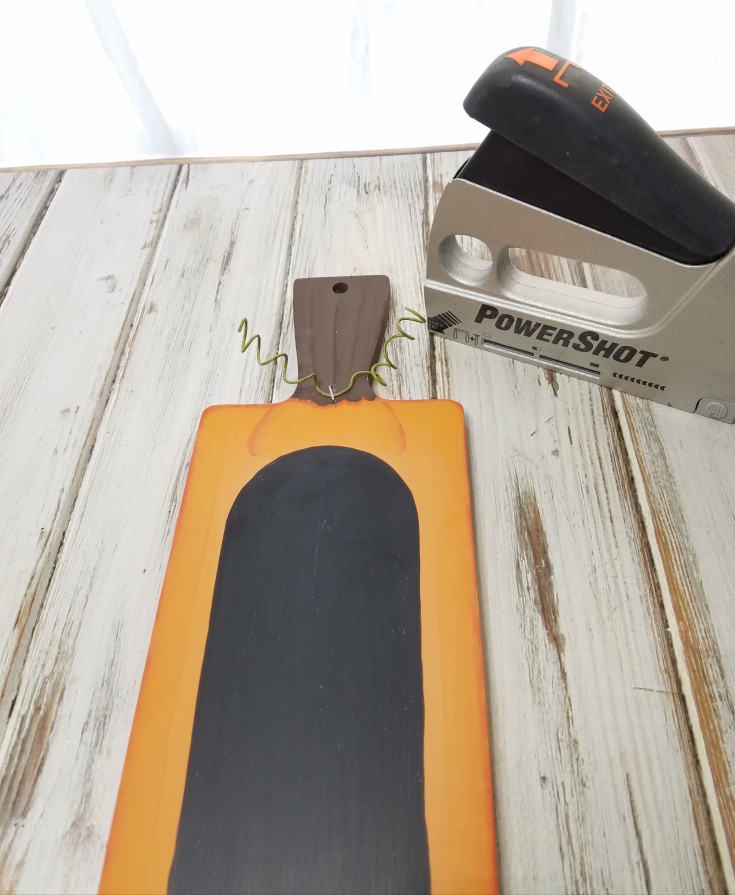
For the stem I used burnt umber to float around the edges, and added a few lines down the stem.
Annealed wire was used to make a tendril by wrapping it around the end of a paint brush to form a coil. I used a Q-tip to add some Moss metal patina giving the tendril a green color.
The tendril was attached to the chalkboard pumpkin with my heavy duty stapler.
The chalkboard area was seasoned by laying a piece of chalk on it’s side and coloring in that area with the chalk.
Then wiping it off.
To finished it off I tied a stripe of fabric around the stem over the tendril.
That is how to make a chalkboard pumpkin from a cutting board. Easy peasy!