DIY Dollar Tree Jack-O-lantern
Creating a DIY Dollar Tree Jack-O-lantern is a fantastic way to add some spooky charm to your fall decor without breaking the bank! This project is not only budget-friendly but also a fun and creative way to get into the fall spirit. Enjoy making your own unique Jack-O-lantern with a touch of personal flair and have a spook-tacular time decorating!

Supplies for Jack-o-lantern
Hanging slated wooden sign from Dollar Tree
Chalk paint black, and orange
Rust Red, Black, and white acrylic paint
Paintbrushes
Old toothbrush
Stylus tool
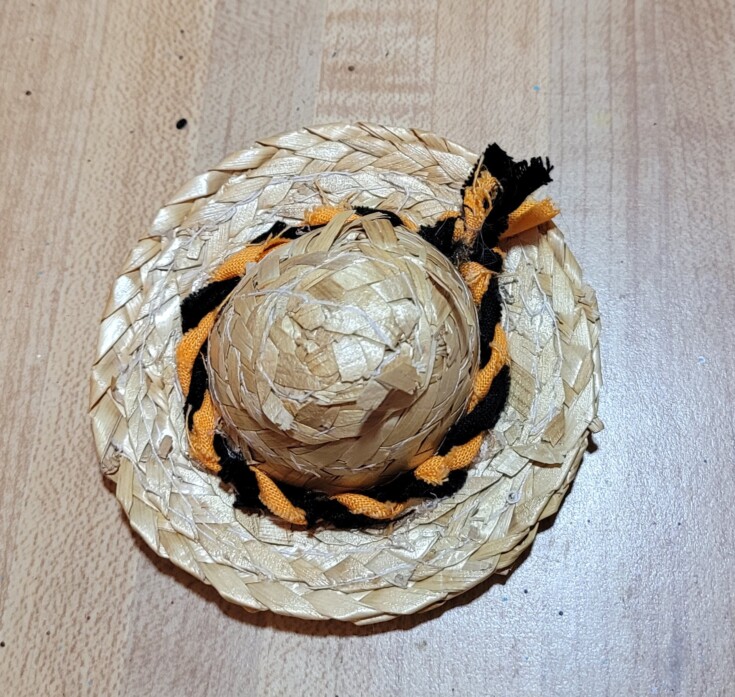
Small straw hat
Halloween colored twine or fabric
Hot glue
Dollar Tree Jack-o-lantern
I started off by giving my slated wood sign a coat of black chalk paint.
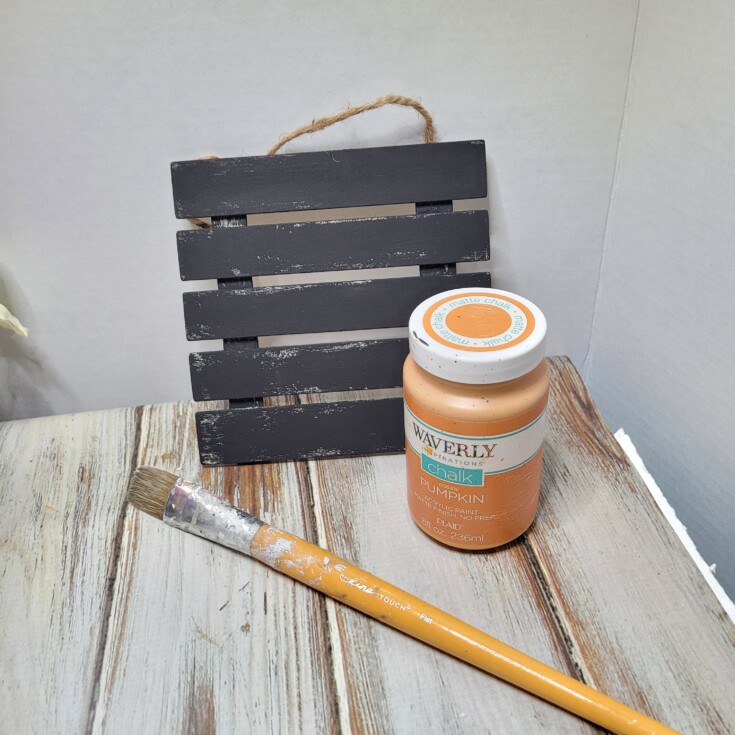
Next, I gave it a coat of orange chalk paint letting some of the black show through. Then using a homemade stencil I added the face of the Dollar Tree Jack-o-lantern. Use some Rust Red paint and an old toothbrush to stipple on the rosy cheeks. A stylus tool was used to add the dots on the cheeks, and the commas in the eyes.
An old toothbrush and black paint were used to splatter the jack-o-lanterns face.

He looks a little bare so I dug through my craft stash and came up with this little straw hat that will work but needs some color. So, I used some of the fabric remnants left from the Halloween Garland from repurposed light bulbs to make some Halloween colored twine.
Then I hot glued the twine on the hat.
No comments
Write a comment