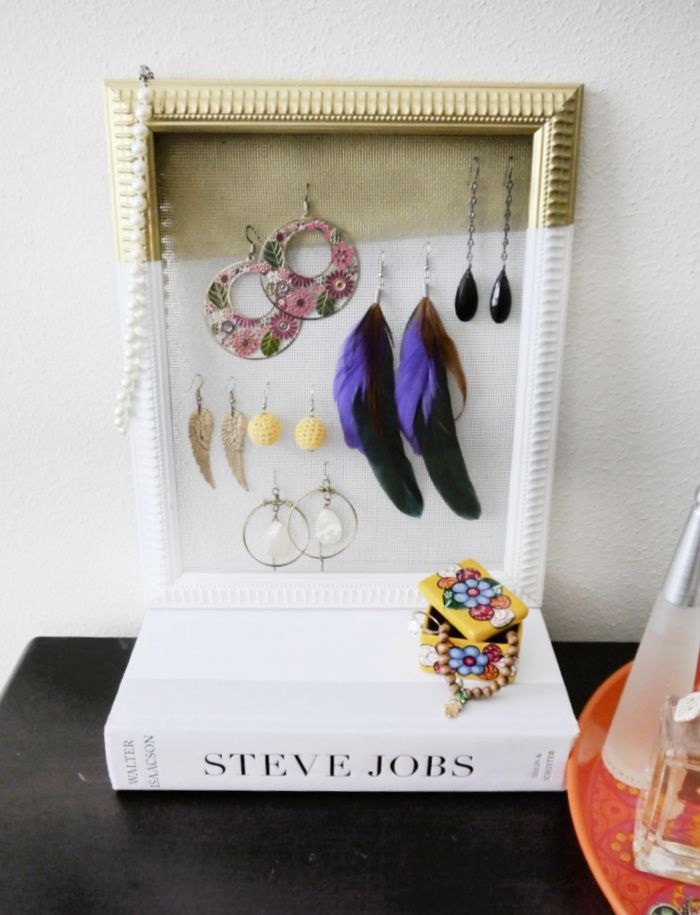
DIY Earring Organizer
Creating your own DIY earring organizer can be a fun and practical way to display your favorite earrings while adding a personal touch to your space. You can repurpose materials like old frames, mesh, or even tree branches to design a unique organizer that suits your style. Get creative with adding hooks, shelves, or compartments to keep your earrings neatly organized and easily accessible. Not only is this a great way to declutter your jewelry collection, but it also makes a cute and functional decor piece for your room. So roll up your sleeves, grab your craft supplies, and let your imagination run wild as you embark on this delightful DIY project!
Here’s what you need to make an earring organizer
Any size picture frame
Scissors
Spray paint
Painters tape
Window screen (I bought an old screen at Habitat Re-Store for $1 and cut it up.)
How to make an earring organizer
Step 1- Hunt down a window screen
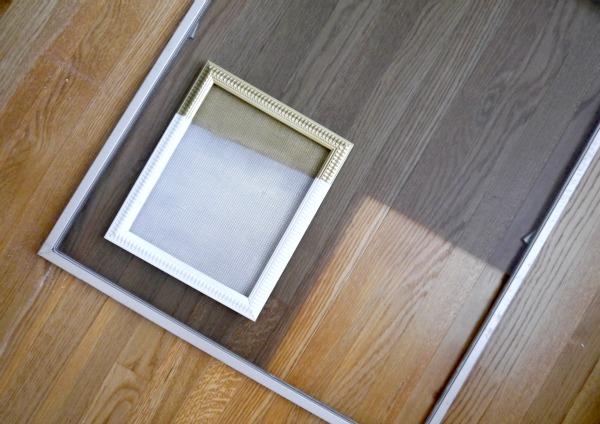
The window screen is easier to find than you might think. If you live in a big city, check out your local Habitat Re-Store for an old window screen. Here’s the one I bought for this project. Use a pencil to trace your frame and cut the screen out. I’ll probably make a few more earring organizers as gifts for friends at some point.
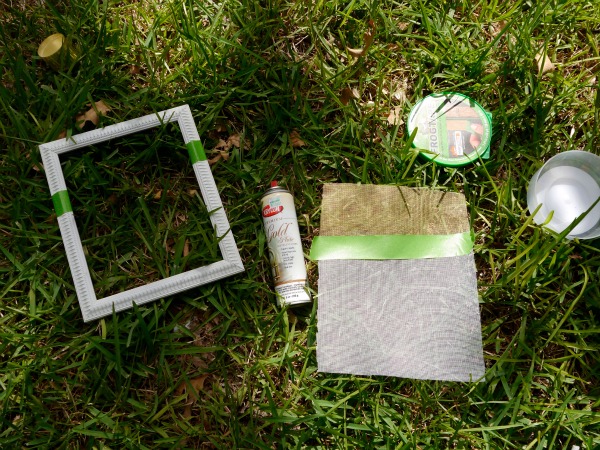
Step 2- Spray paint
After you cut the screen, it’s time to spray paint. I used Frog Tape to make nice crisp lines with my spray paint, like so…
Step 3- Staple the screen
Then, staple the screen to the back of the picture frame. You can’t use a regular stapler for this project. You need an
Step 4- Hang
No comments
Write a comment