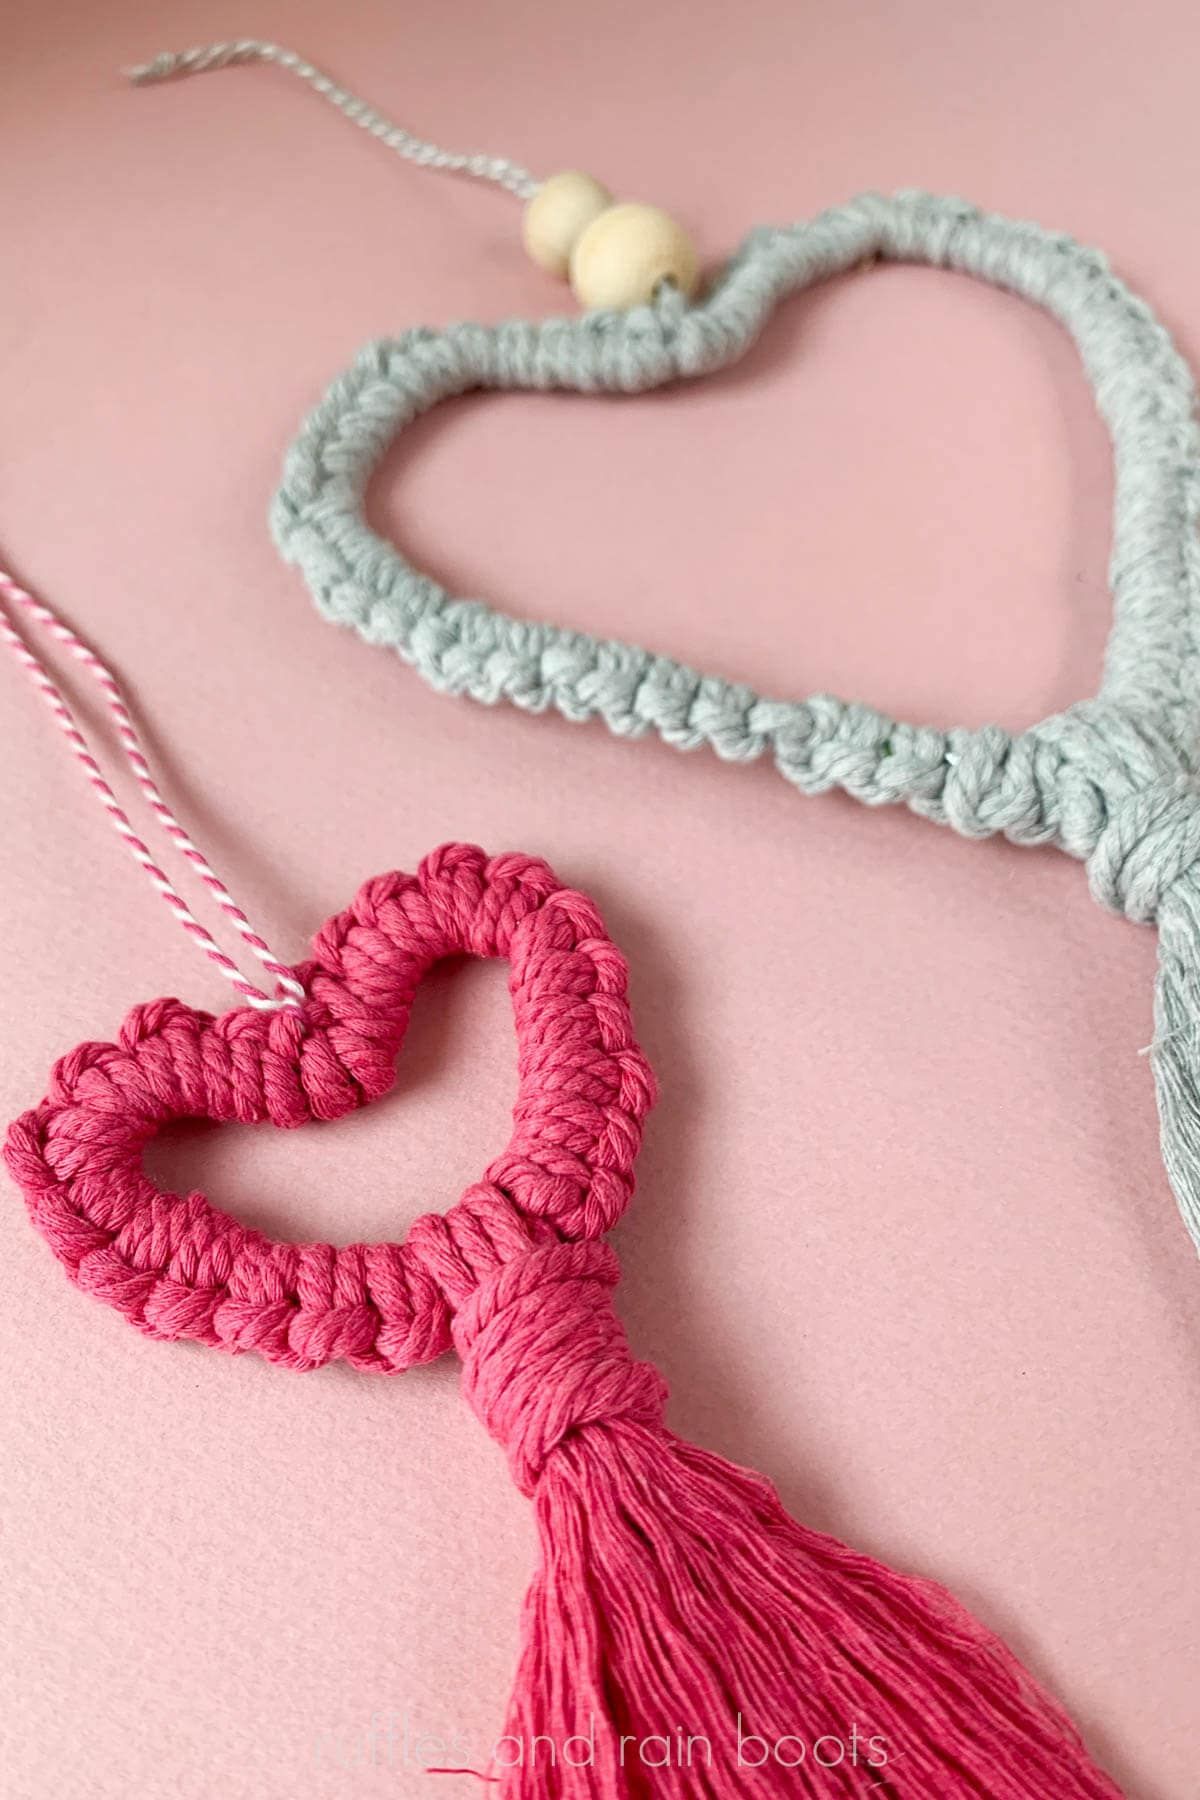
DIY Macrame Heart
Creating a DIY macrame heart can be a fun and rewarding project for those looking to add a touch of charm to their space. With just a few basic supplies like macrame cord and a hoop, you can weave together a lovely heart-shaped decoration. The process might seem a bit daunting at first, but with some patience and a bit of practice, you'll soon master the art of macrame. Plus, the beauty of making your own macrame heart is that you can customize it to your liking, whether you prefer a small and delicate design or a larger statement piece. Get ready to dive into the world of knots and creativity – your handmade macrame heart is sure to be a wonderful addition to your home decor!
Materials Needed for This Craft
Although I used macrame cord, I want to emphasize that this project works with yarn, as well. Anything mid- or medium-weight is great and will work up fairly quickly.
macrame cord (3,4, or 6 mm; I used three colors from this set)
wire (I used these floral wires)
masking tape and scissors
twine, needle, and beads optional
Terms Used In This Tutorial
Wire: the wire that is taped to the table
Stable Cord (aka Filler): the yarn that is to the left of the wire that we’ll be building all knots upon
Working Cord: the yarn that will be to the right of the wire and the stable cord that will be used to create all knots
Prepare Wire and Cord
First, tape down the wire after bending over a small portion at the top. I add another piece of tape over top to minimize the wire turning.
Cut a length of cord that is 80 inches, 105 inches, or 180 inches in length. Measure 14, 15, or 16 inches of that wire and slip it under the wire, pulled to the left of the wire.
This is our stable cord.
You can roll or wad up the remaining cord to the right of the wire.
Create a Knotted Wire
Tie a knot to cast onto the wire (a basic single knot is fine or repeat the following step twice).
Align the stable cord and wire next to each other. These will be together the entire time – think of them as one piece.
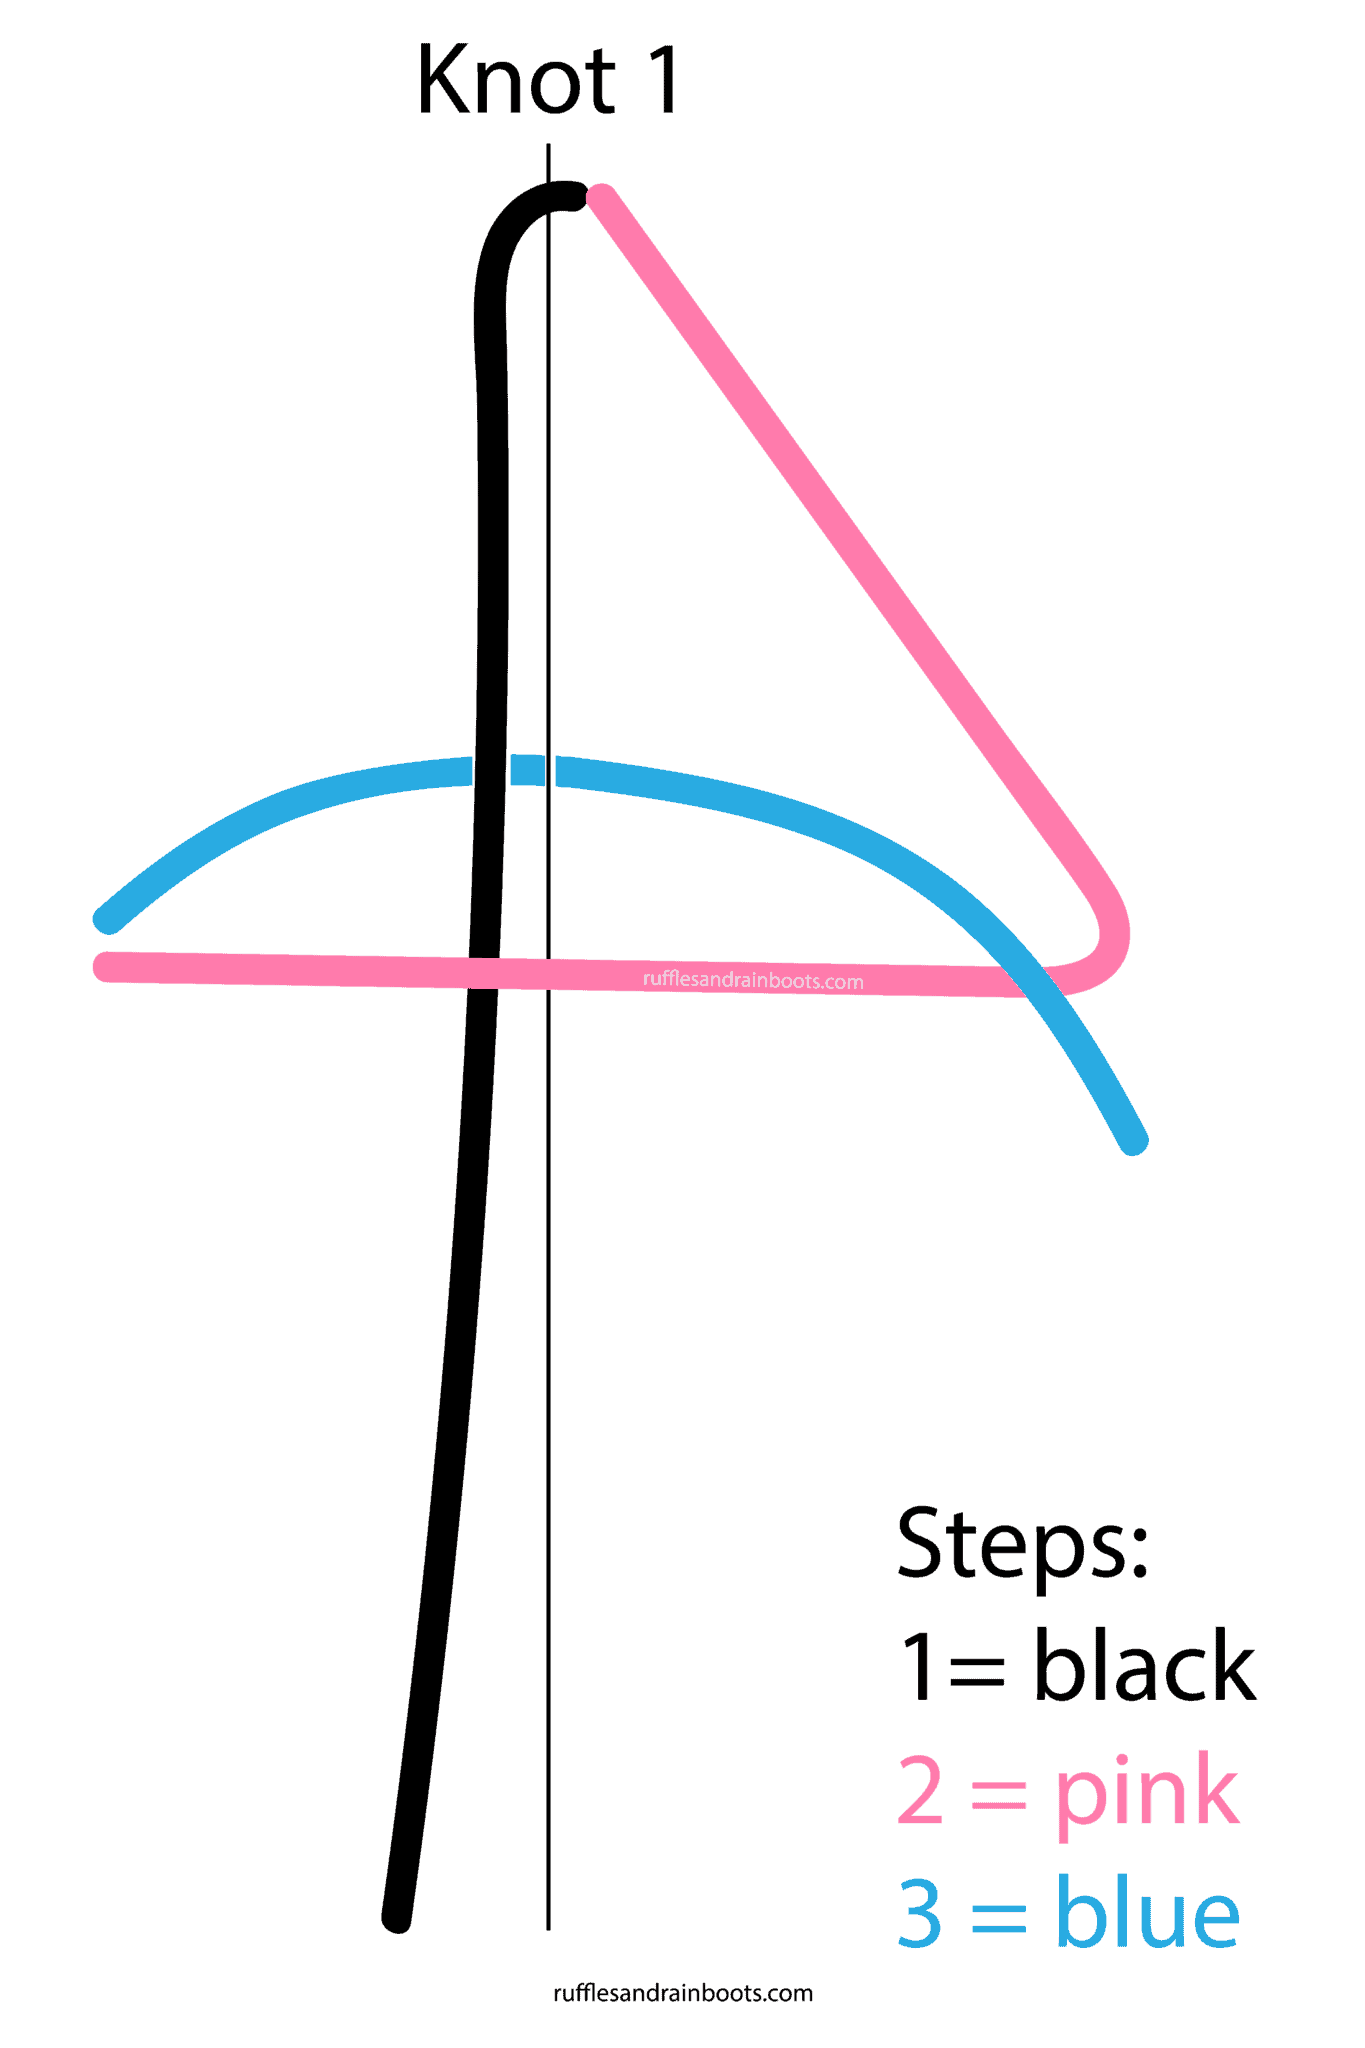
Knot 1: Lift the working cord OVER the stable cord and wire, forming a P or backwards 4 on the left side of the cord and wire combination.
Bring the working cord under the stable cord and wire. Pull the working cord up and out through the P or 4 opening. Pull the working cord up to the top of the stable cord creating a knot below the cast on knot.
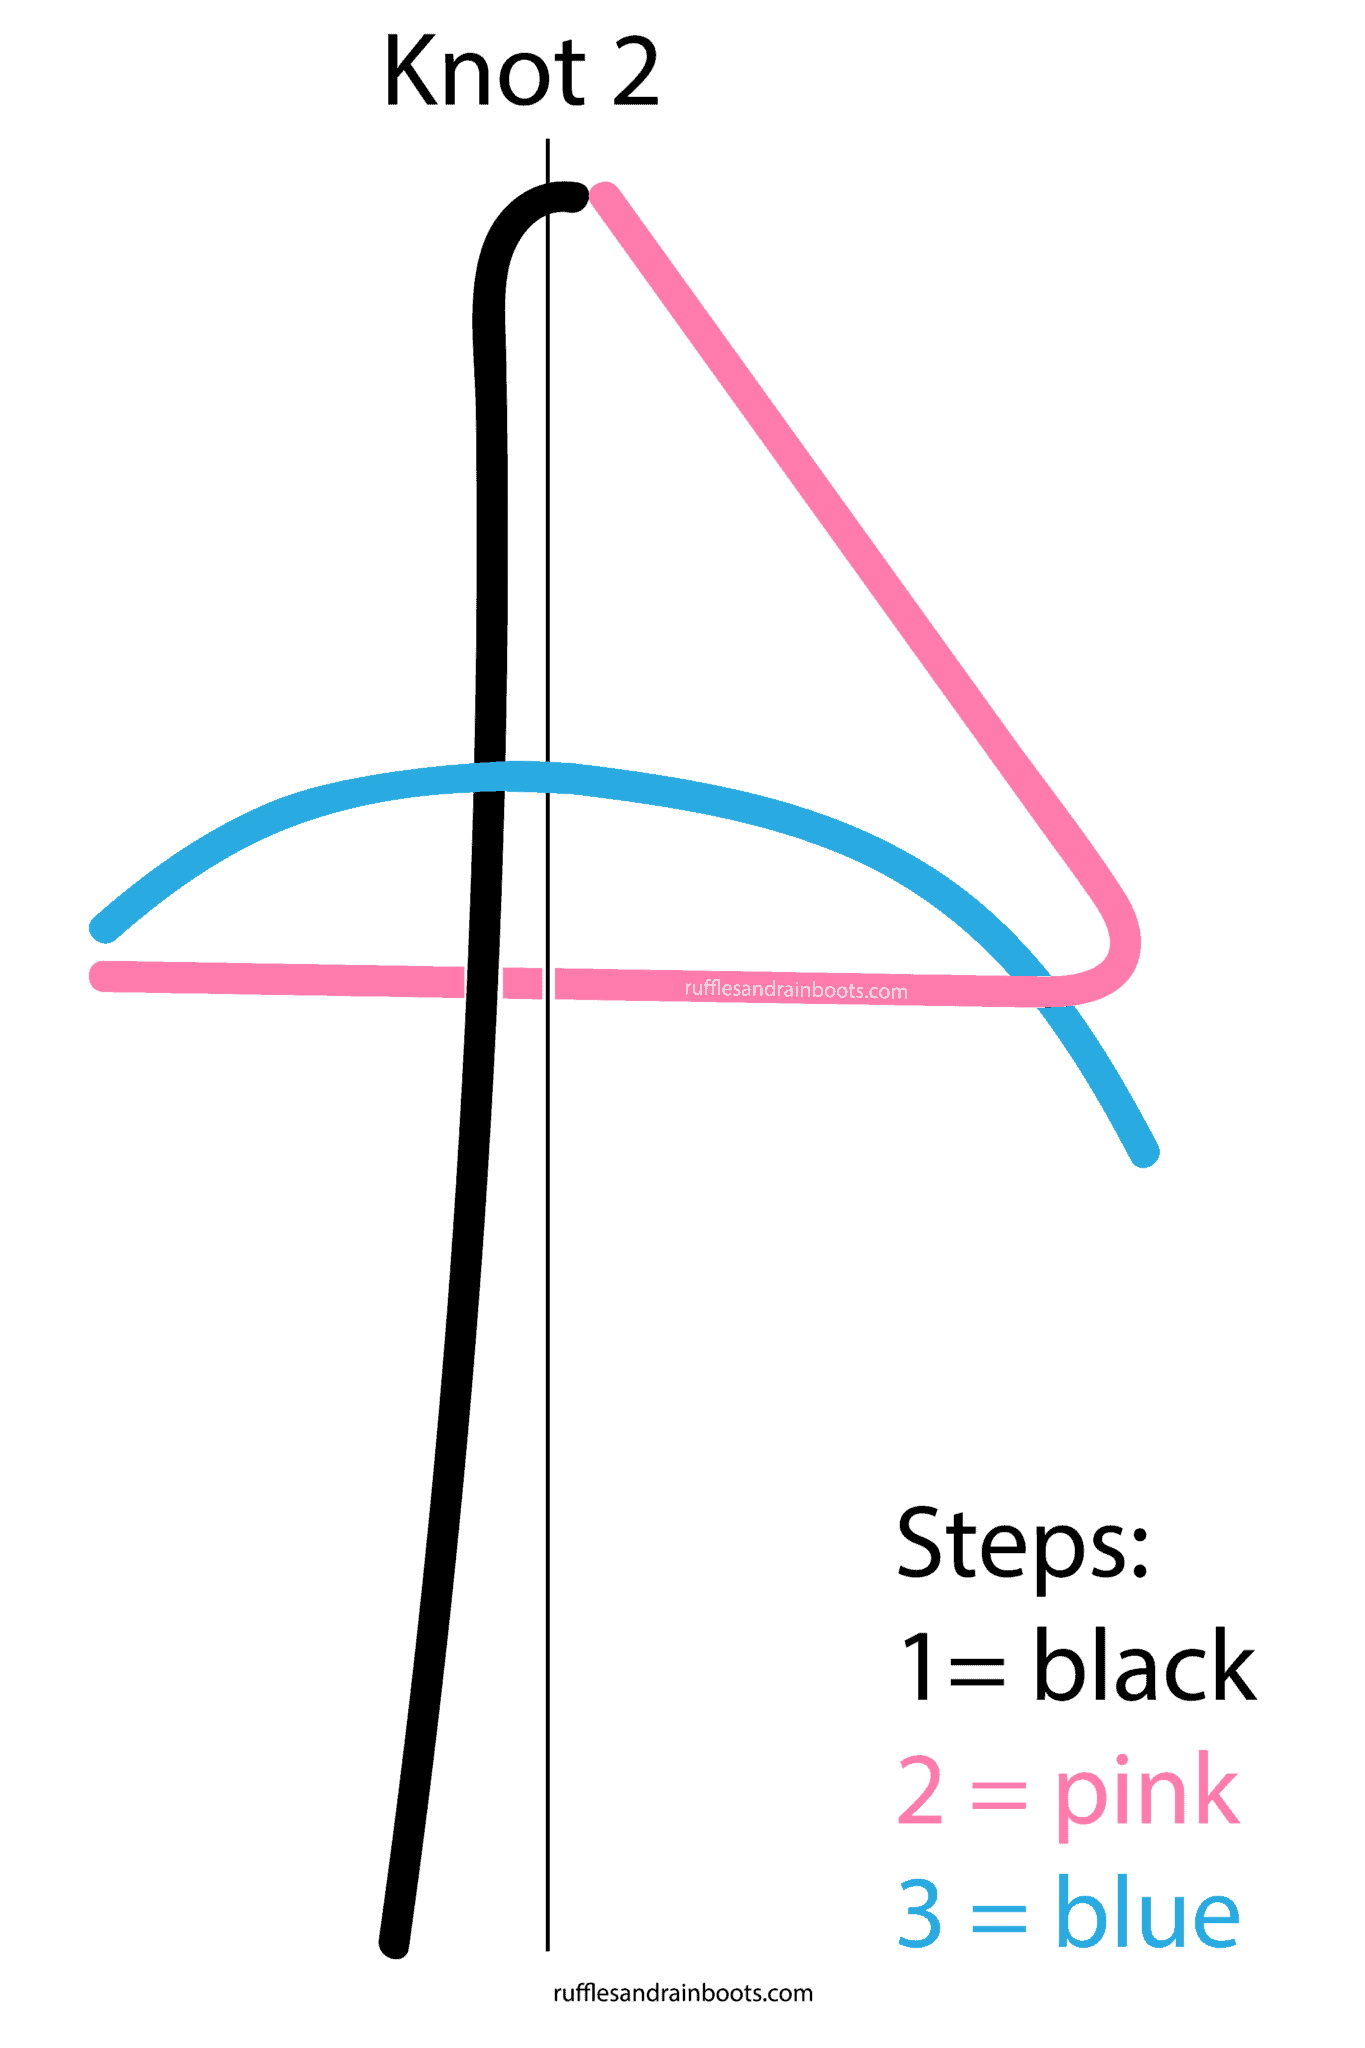
Knot 2: Bring the working cord UNDER the stable cord and wire, forming a P or backwards 4 on the left side of the cord and wire combination. Note: this opening of the P/4 is on the SAME side as before.
Bring the working cord over the stable cord through and under the P or 4 opening. Pull the working cord up to the top of the stable cord, creating another knot below the first knot.
Repeat knots 1 and 2 for as long as you would like. Note that you should leave 1.5-2 inches to tie a simple not at the end of the knot 1 and 2 combination.
Finish and Shape
Once the knot has been tied at the end of the cord, remove the wire from the tape and bend into a heart shape.
Twist the wires at the bottom of the heart to secure. You can stop here or add a tassel.
To finish differently, use the leftover wire from smaller hearts to create a bouquet or planter accent. You could also add a piece of twine or string for a hanger.
No comments
Write a comment