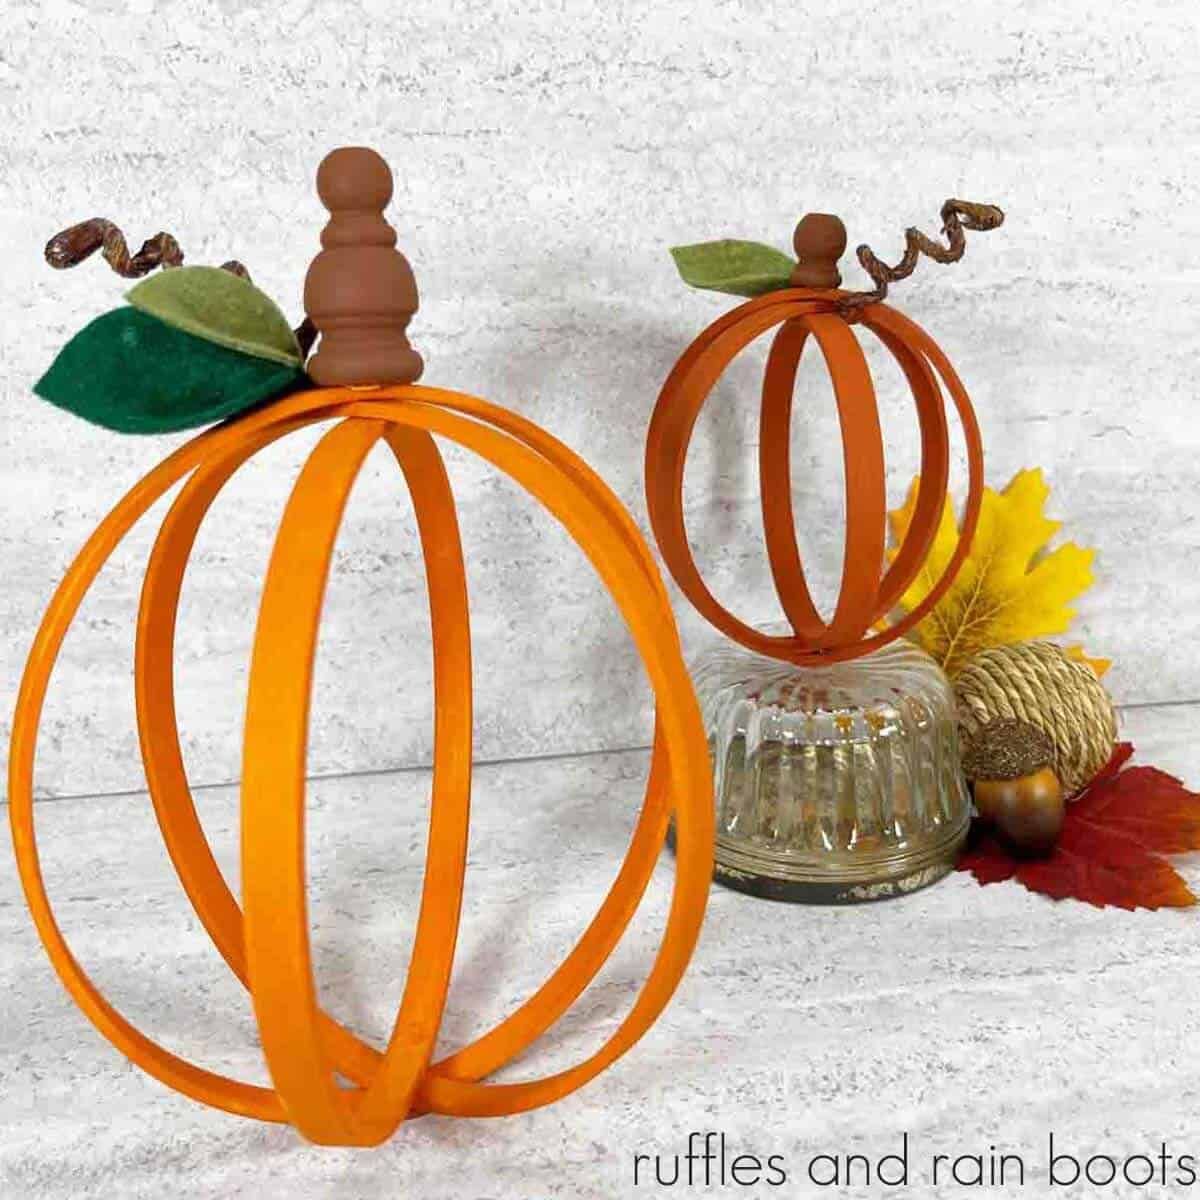
DIY Embroidery Hoop Pumpkins
DIY Embroidery Hoop Pumpkins are a delightful and charming craft project that's perfect for adding a touch of fall to your home decor. To make these adorable pumpkins, you'll need embroidery hoops in various sizes, orange fabric, green felt, stuffing, and hot glue. These DIY Embroidery Hoop Pumpkins are not only fun to make, but they also make fantastic decorations that will bring a warm and cozy feel to your space during the autumn season.
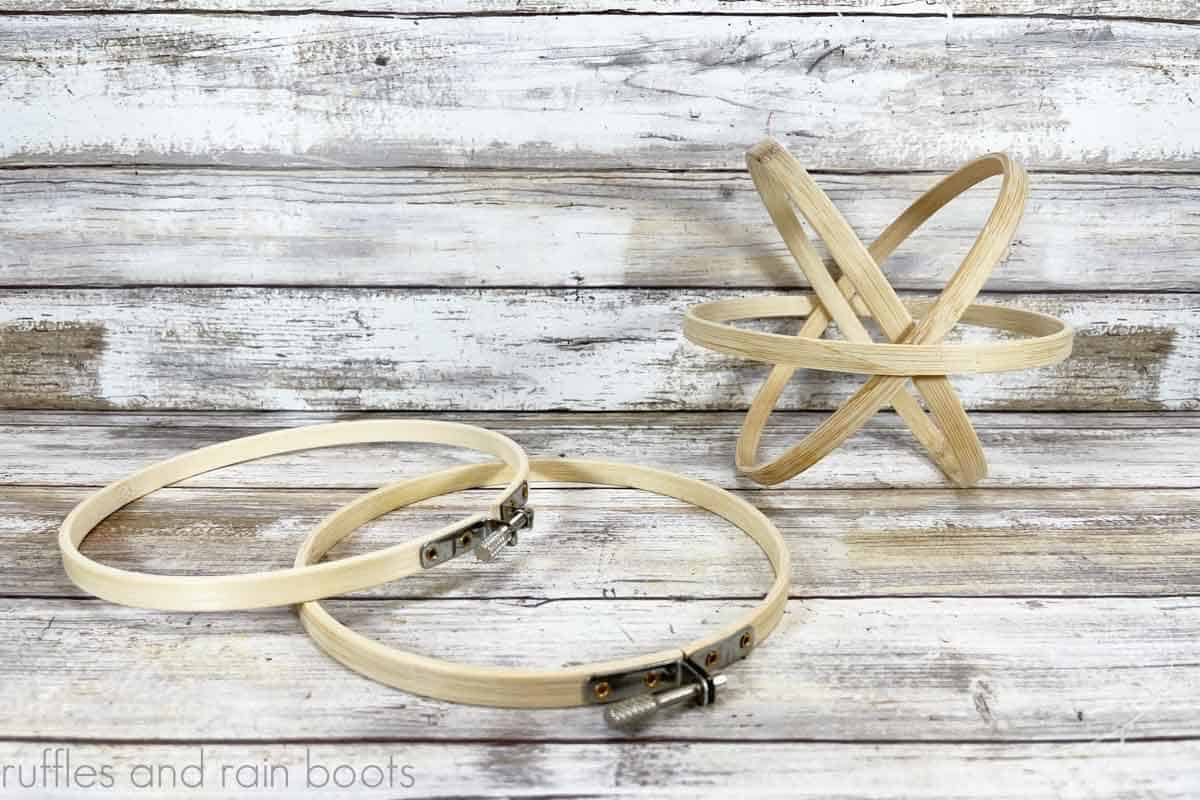
Loosen the hoop hardware and separate the inner and outer hoops. You will use 3 of the 6" and 3 of the 4" for this project.
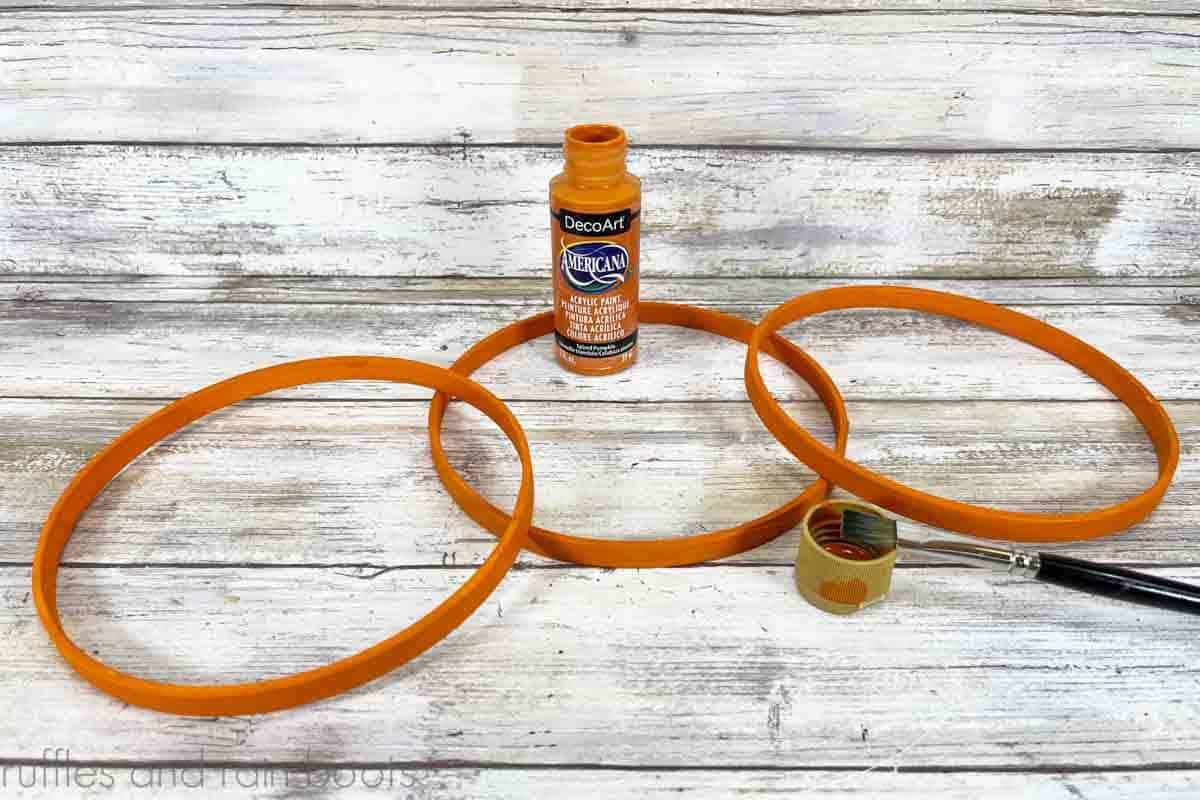
Paint three 6" hoops orange and three 4" hoops orang (I used two colors of orange for each pumpkin) and let dry. Apply a second coat and let dry, if needed.
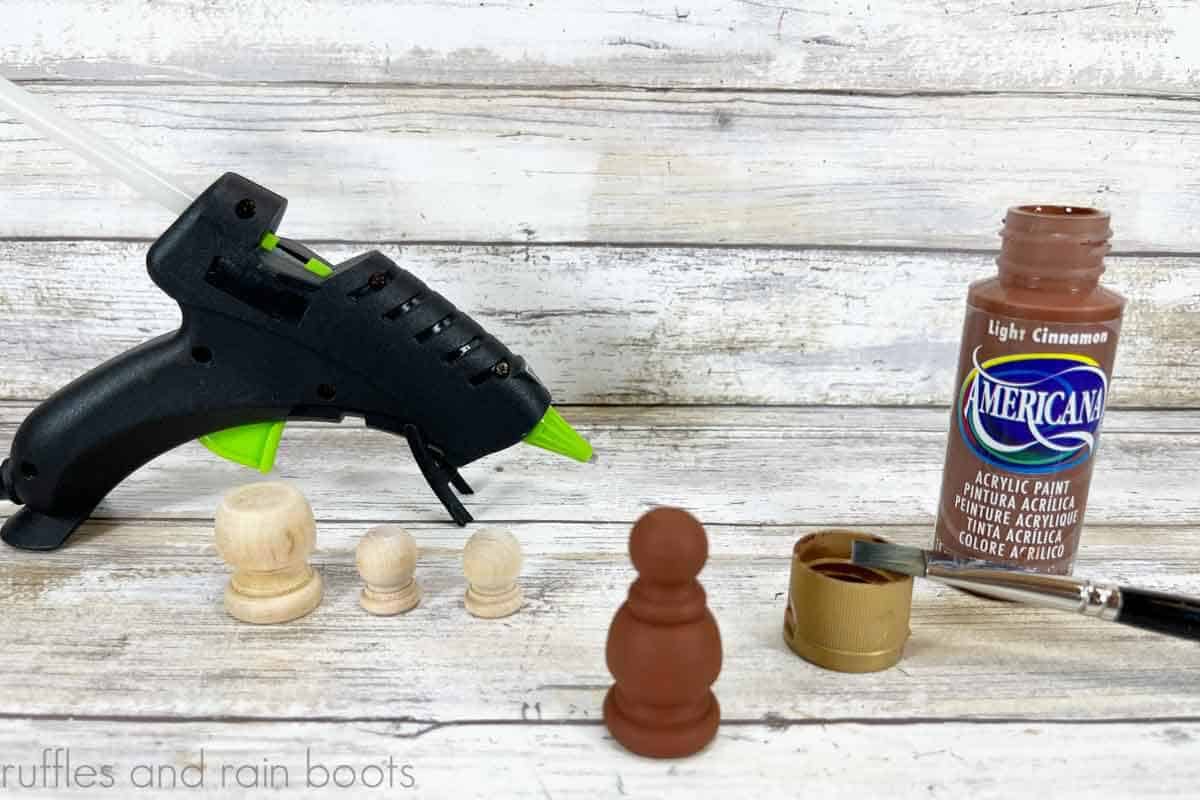
Create the larger stem by gluing one small finial to the top of the medium finial. Paint all finials brown.
Assemble the pumpkins. Insert one 6" hoop inside another to form an X-shape. Slide the third 6" hoop over the two, forming a line through the X-shape you just made. Repeat with the 4" hoops to assemble the smaller pumpkin.
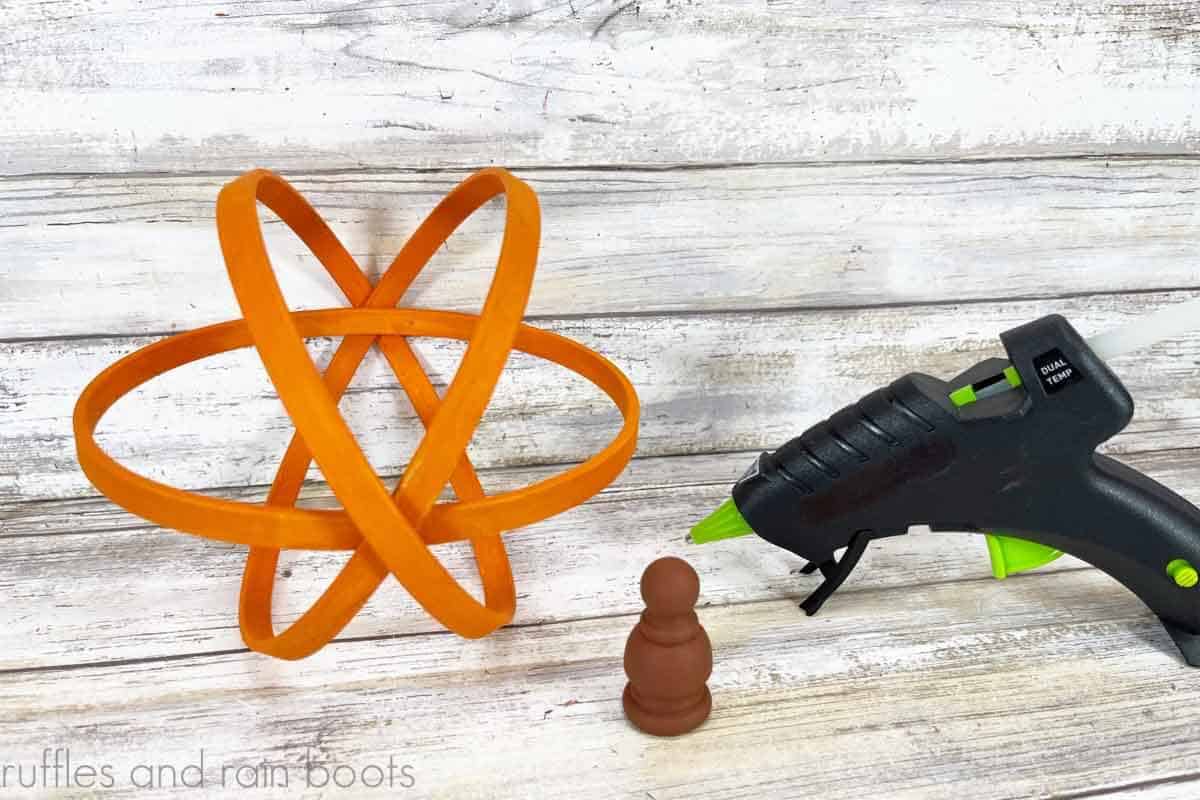
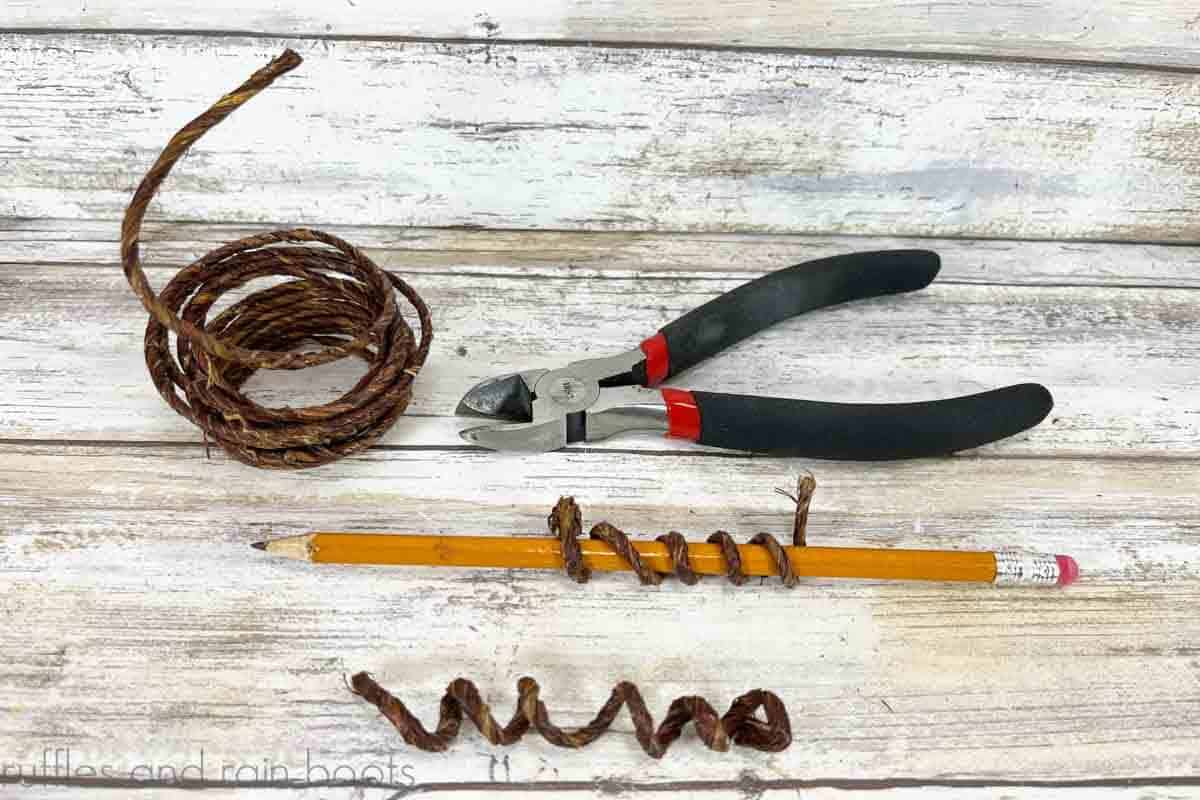
Glue the large finial to the 6" hoop pumpkin and the small to the 4" inch pumpkin. Wrap a 12" and an 8" length of wired twine around a pencil to make them curly. Slide off the pencil and the coil becomes a pumpkin vine you can glue to the stem.
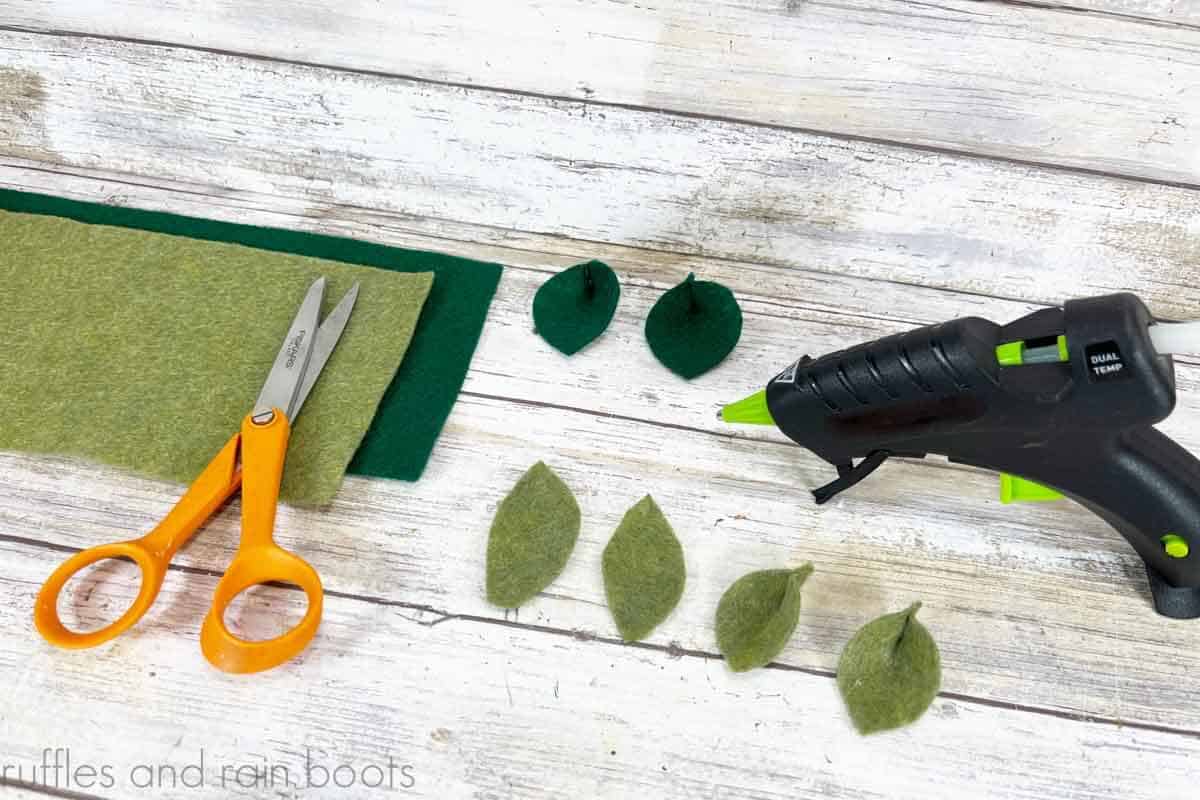
Cut leaf shapes from the dark and olive green felt and hot glue to the pumpkin stem. To create a fun look, glue the bottom of each leaf together to create dimension. Note: if you have a faux leaf, glue that on instead of the felt.