Cute DIY Easter Baking Party Invitations — Mini Whisk Favors Made from Straws & Pipe Cleaners
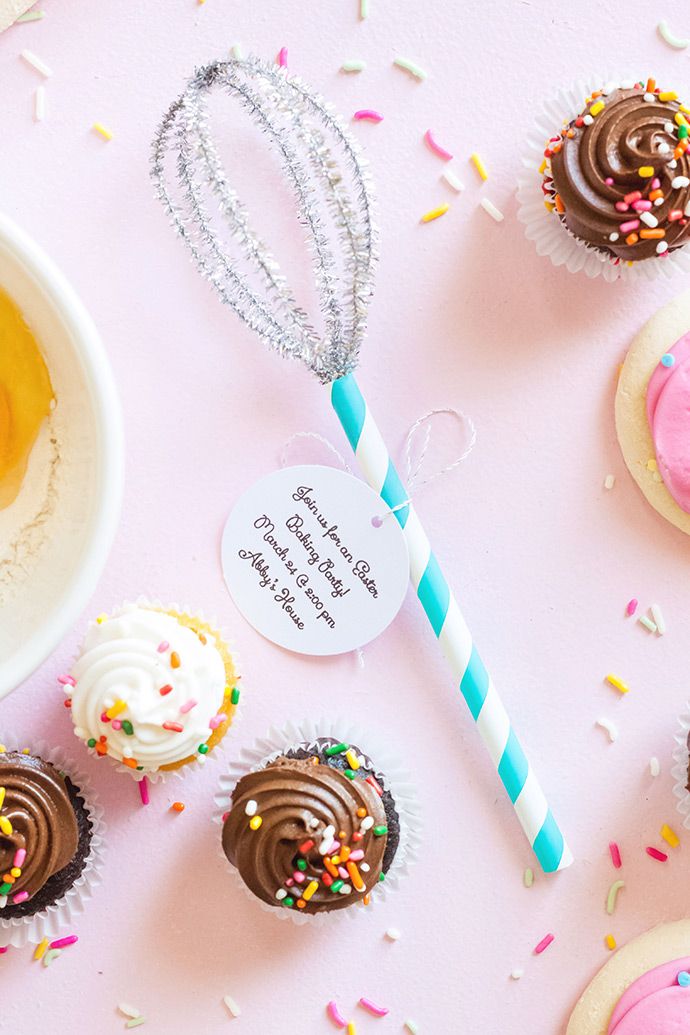
Make adorable, budget-friendly Easter baking party invitations that double as mini whisk favors. These easy-to-make invitations use jumbo disposable straws, white electrical tape, and pipe cleaners to create a tiny whisk you can attach a punched cardstock invitation to — a fun take-home favor for guests.
Hey there! Planning an Easter Baking Party? How exciting! Sending out some fun and festive invitations is a great way to get everyone in the baking spirit. Create invitations that scream Easter with pastel colors, adorable bunny designs, or maybe some cute chicks. Make sure to include all the necessary party details like the date, time, location, and any fun baking theme you might have in mind. Don't forget to add a sprinkle of excitement to your invites, so your guests can't wait to join in the Easter baking fun!
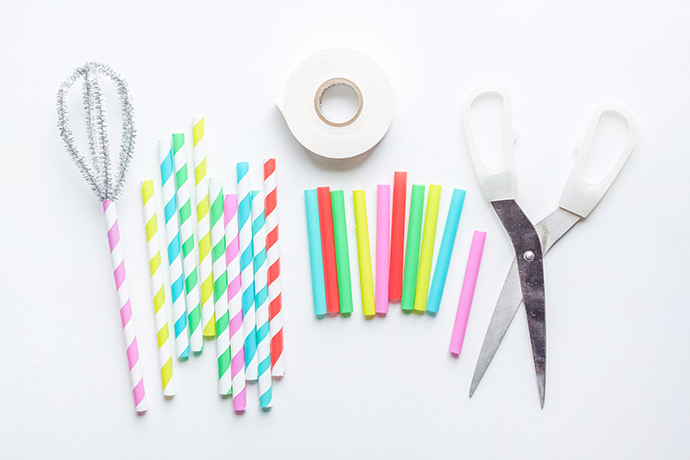
Materials needed:
• Jumbo disposable straws (often called milkshake, smoothie, or sundae straws)
• White electrical tape
• Pipe cleaners
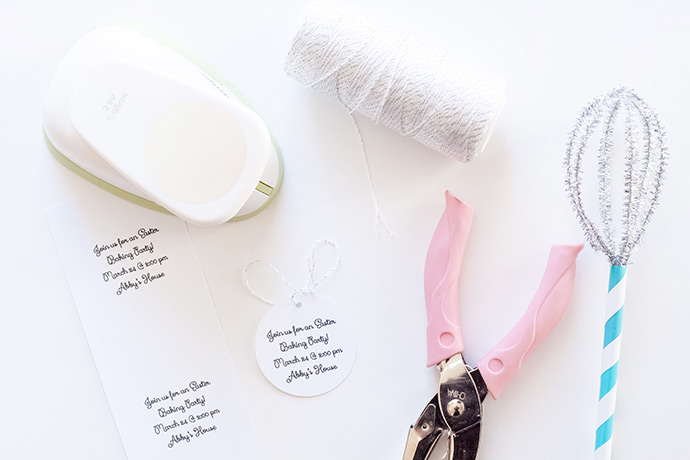
• Cardstock
• Printer, alphabet stamps, or marker
• Circle punch or cutting machine
• Small hole punch
• Baker’s twine
• Scissors
• Metal ruler
• Box cutter or craft knife
• Cutting mat (not pictured)

Step 1
Stick an 8 ½ – 9 inch strip of electrical tape to your cutting mat as straight as possible. Use a metal ruler and pen to mark half the width of the tape on both ends. Line the ruler up on the two dots, and use your craft knife to cut the tape in half.
Step 2
Cut your jumbo straw down to 5 ½ inches. Peel up a piece of the cut electrical tape, and stick one end of it to the top of the straw at a 45 degree angle, and twist it all the way around the straw until you reach the bottom. Cut the tape off as close to the end of the straw as possible, and fold any excess into the inside of the straw if necessary. You can skip this step if you have some paper sundae straws on hand, since they already have stripes…but they are harder to come by, and plain straws need a little jazzing up!
Step 3
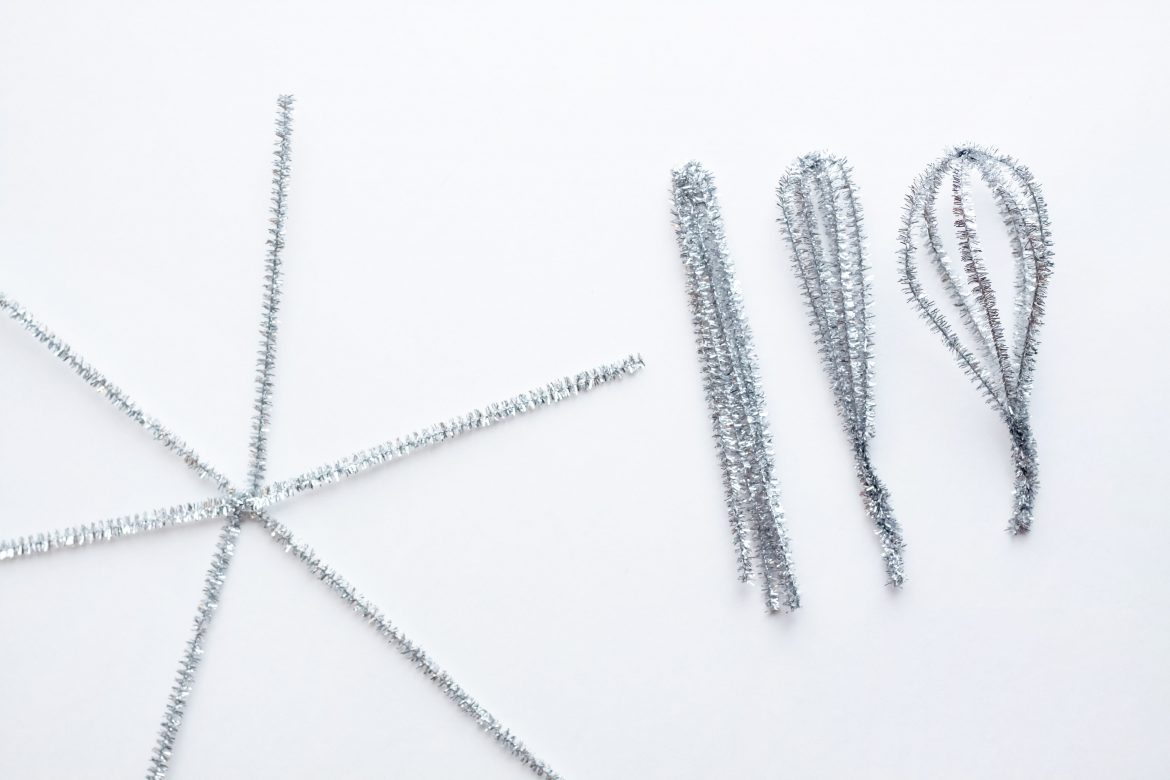
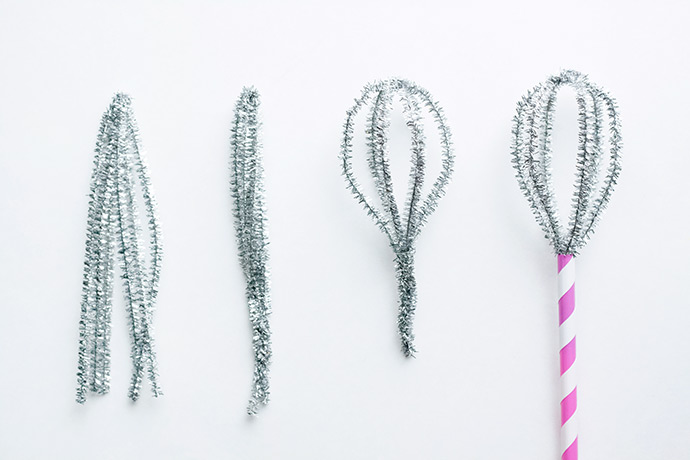
Place one pipe cleaner on top of another, centered and perpendicular to each other, and fold one over the other. Place a third pipe cleaner over the center of your cross, and fold it over the other two. Spread out the “spokes” so they are evenly spaced. Now gather the ends of the spokes together, folding them in one by one. Holding them all together at the tips, push the top down where they are all folded together, and pull the pieces out in the center a bit until it begins to have a whisk-like appearance. Now twist all of the ends together tightly, and make any necessary adjustments to maintain that whisk-look.
Step 4
Insert the twisted end of the pipe cleaners into one end of the straw, and leave about 3-3 ½ inches of the pipe cleaners sticking out (the head of the whisk). You may have to reshape your whisk once again.
Step 5
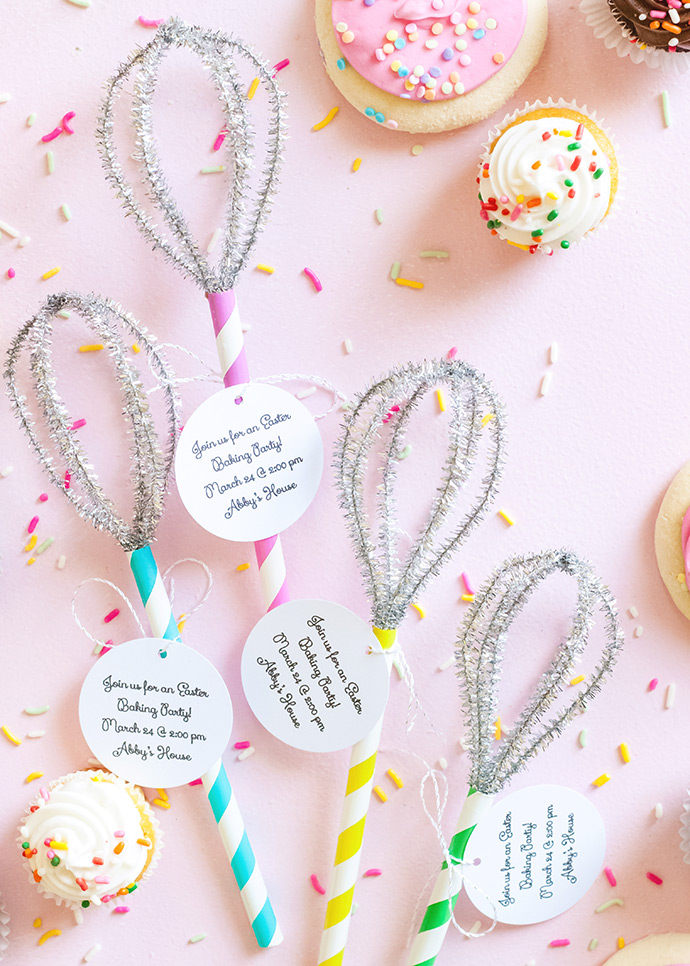
Create a small invitation to attach to the whisk with baker’s twine, using cardstock and a printer, paper cutter, alphabet stamps, or the media of your choice. We printed our invitation onto cardstock, cut it out with a large circle punch, and used a small hole punch and baker’s twine to attach it to the whisk.
Variations & tips:
• Use patterned or colored straws if you have them to skip wrapping tape.
• Change pipe cleaner colors to match your party palette.
• Punch different shapes for the invitation tags (hearts, eggs, or circles).
• Write RSVP and party details clearly on the back of each punched tag or print directly onto cardstock.