DIY Painted Mosaic Pinch Pots — Cute Mini Clay Treasure Jars for Kids
Make small, painted mosaic pinch pots to hold tiny keepsakes — an easy, hands-on clay project that's perfect for creative afternoons with kids or for crafting thoughtful homemade gifts. These simple pinch pots are formed by hand from air-dry clay, decorated with beads and sequins, and finished with colorful paint to turn each piece into a one-of-a-kind miniature treasure jar.
Below you'll find a short materials list and step-by-step instructions with photos to guide you through forming, decorating, and finishing your pinch pots.
Painted mosaic pinch pots for little treasures are a delightful and creative way to spark joy in both children and adults. These charming miniature pots not only make for a fun and engaging crafting activity but also serve as perfect storage for tiny keepsakes. By incorporating colorful paints and mosaic patterns, each pot becomes a unique masterpiece, ready to hold those special trinkets and memories. Whether you're crafting these pots with your little ones or making them as a thoughtful gift, the process is bound to bring smiles and endless possibilities for creative expression.

What You Need
Air dry clay
Old placemat (provides a clean, flat surface that you can move around)
Container of water
Plastic knife
Toothpicks
Paint brush
Paint (I used gold, pink, black, and white)
Random assortment of colorful sequins and beads (or your child’s tiny treasures)
How-To
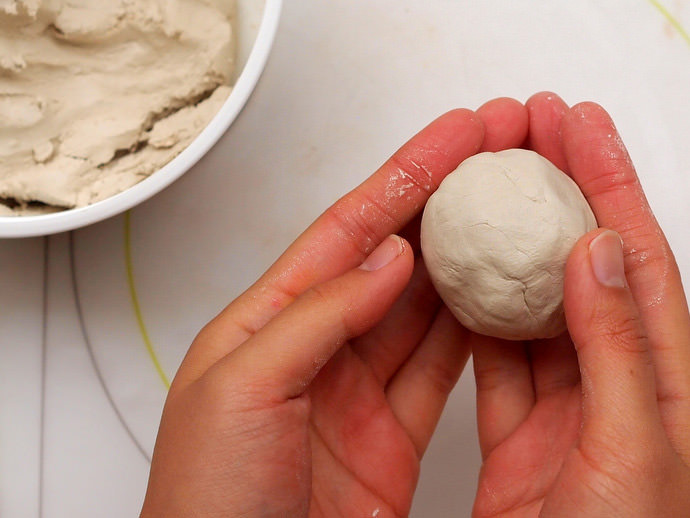
Step 1
Take a handful of air dry clay and roll it into a large ball.
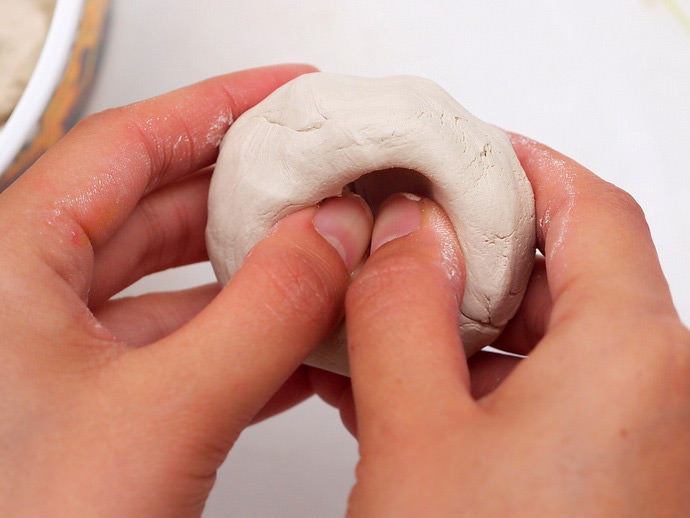
Step 2
Poke both thumbs into your ball to create a hole. Keep turning the ball in your hands while pinching with your fingers to widen the hole and flatten out your pot. Squash the pot onto your placemat to flatten the base.
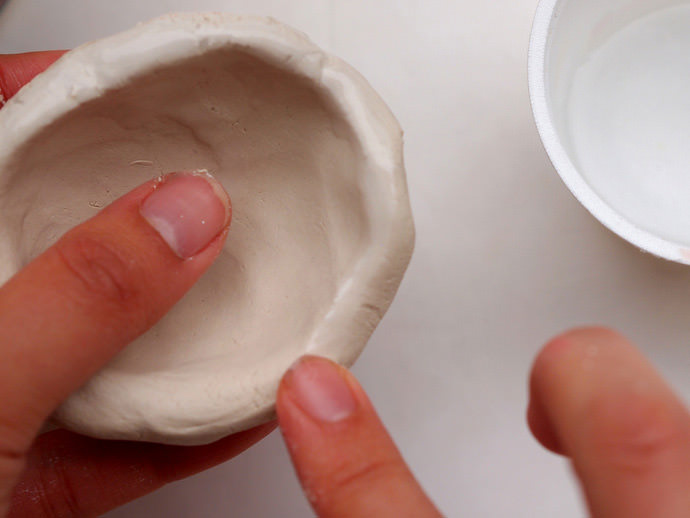
Step 3
Dip your finger into the water and use it to smooth out any cracks or bumps.
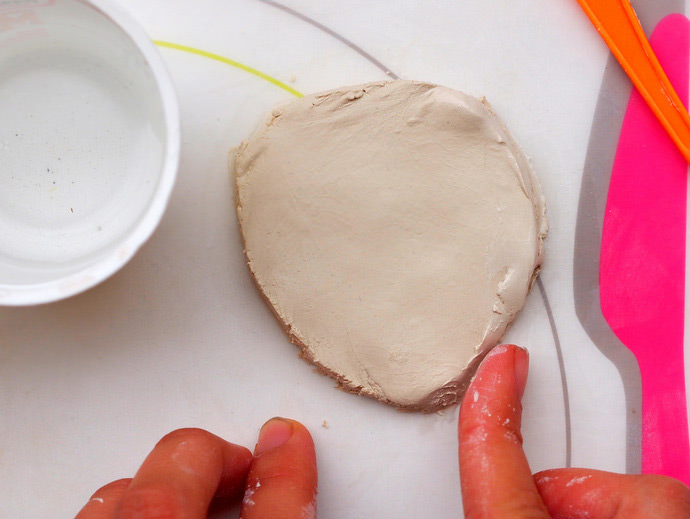
Step 4
Now you’ll make the lid. Roll another ball out and flatten it against your place mat. Use your knife to cut out a circle shape. Use your finger to smooth out any rough edges. (To make sure that your lid is about the same size as the opening, lift your pot up and place it upside down to match the opening of your flattened circle.)
Note: If you decide to create a mosaic lid, make sure that your lid is thick enough to push beads inside without breaking through the clay. I made my lid slightly over a ¼-inch thick and it turned out fine.
Step 5
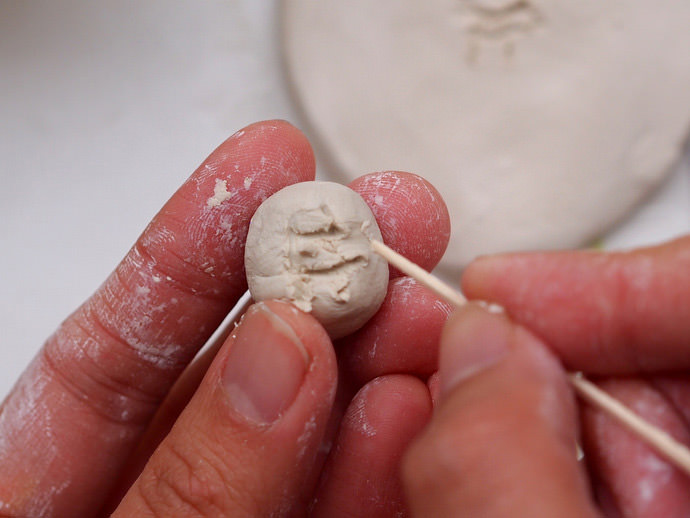
Roll out a tiny ball of clay. This will act as the lid’s handle (and the nose, for the face pots.) To securely adhere the ball to the lid, use a toothpick to score the tiny clay ball and the center of your lid. Then, squish the ball on top.
Step 6
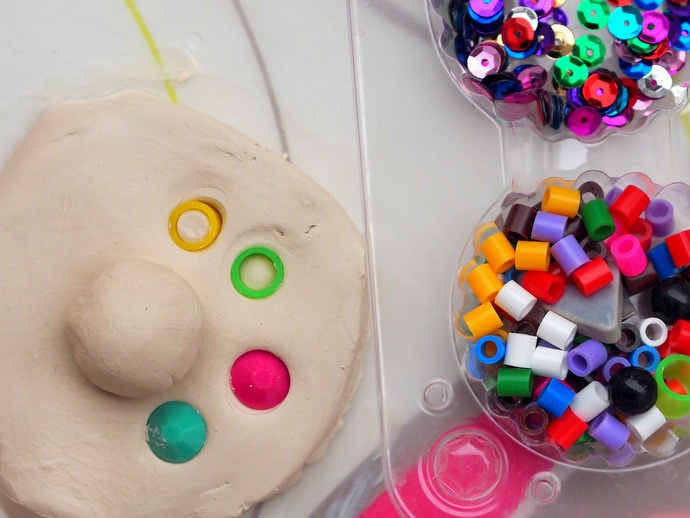
Leave the lid as is, or add beads and sequins. If you add colorful details, make sure they are securely pushed into the clay. Also, you may need to recheck the size of the lid to make sure that it still matches your pot’s opening.
Step 7
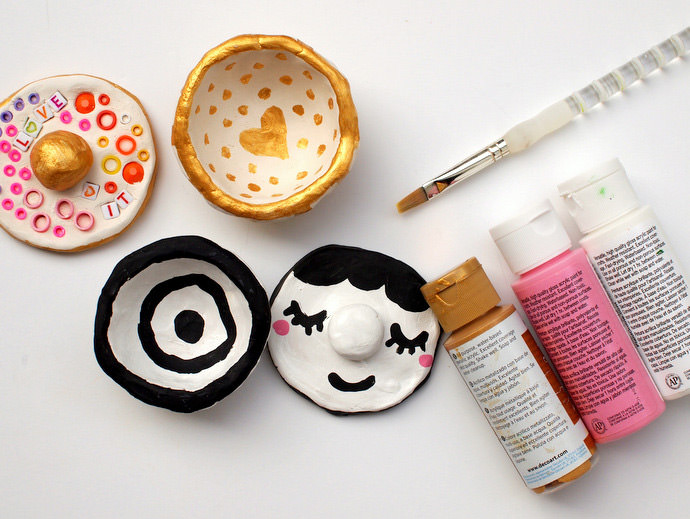
Wait for your clay pots to dry and then paint! I knew my pots were dry because the clay turned a nice, bright white and felt heavy, solid, and firm. This took about 3-5 days depending on the size and thickness of my pots.

Voila! You’re done!
Quick tips: work on a washable or disposable surface, keep a small bowl of water nearby for smoothing, and press beads and sequins firmly into the clay before drying so they stay in place. Allow painted pieces to dry fully before handling.