Ice Cream Paper Ornament
In the delightful world of DIY crafts, creating an Ice Cream Paper Ornament is a fun and creative way to add a touch of whimsy to your space. These charming ornaments can be made with colorful paper, glue, and a sprinkle of imagination. Get your creative juices flowing as you cut the paper into the shape of a sweet ice cream cone, layering different colors to mimic delicious flavors. Add a sprinkle of glitter for that extra sparkle, and don't forget a vibrant ribbon for hanging. The best part? You can customize each ornament to match your style or give them as thoughtful gifts to brighten someone's day. So grab your supplies, get crafting, and let your creativity scoop up some smiles!

I added some more DIY ornaments to our Christmas tree. I'm having trouble adjusting to the thought of winter; can you tell? These ice cream cones are made from tissue paper and a grocery bag.

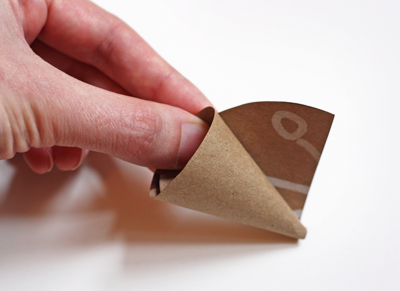
To make the cones, cut circles from a brown paper bag. Mine were about 4 1/2 inches in diameter. Cut each circle in half. Shape the semicircles into cones, cutting off any extra paper you don't need (the section that's sticking out in the photo.) Secure the cone with hot glue.
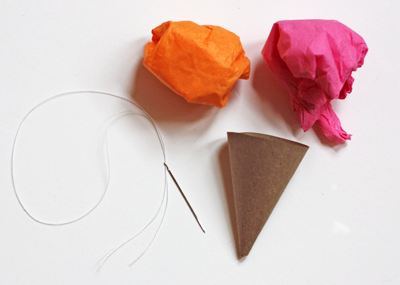
Wad a couple pieces of tissue paper into balls. I used chunks that were roughly 6" x 12", folded them in half, and crumpled them up.
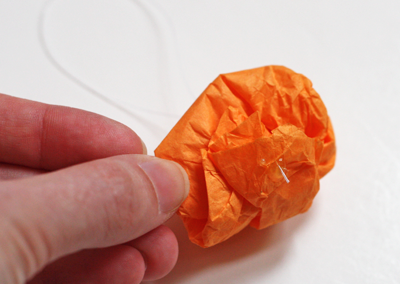
If you plan to hang the ice cream cones, thread a needle with a doubled piece of thread. Poke the needle down through the top of the ball that will be the top scoop, so that a loop of thread sticks out of the top. Secure the loose ends on the underside with a dab of hot glue and trim off the excess.
Line the inside rim of the cone with hot glue and push the bottom scoop into the cone. Spread glue on the underside of the top scoop and add it to the cone. Let the glue dry for a minute and hang it on the tree.