Crochet Adorable Cube
Crocheting adorable cubes is such a delightful and satisfying craft project! The beauty of creating these cute little cubes lies in the endless possibilities for customization. From choosing your favorite yarn colors to experimenting with different stitch patterns, each cube is unique and special. Whether you're a seasoned crocheter or just starting out, making these charming cubes is a wonderful way to relax and unleash your creativity. So gather your yarn and hooks, and get ready to crochet some irresistibly charming cubes that are sure to bring joy to anyone who sees them!
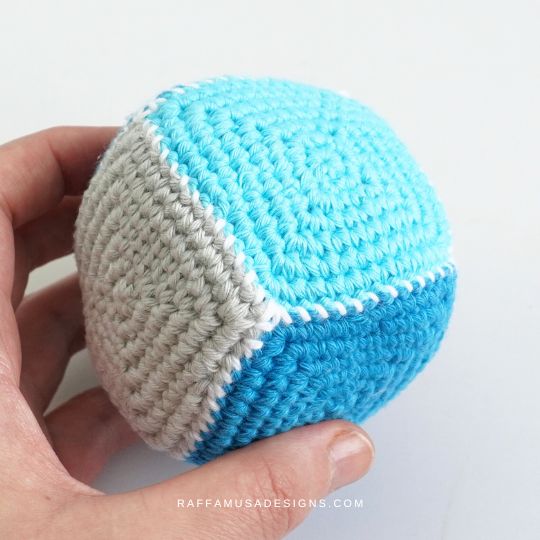
(Make 2 squares in each of three colors of choice)
Materials
- Aran (4, Medium) Weight Yarn
- 3.5-mm (E/4 US, 9 UK) Crochet Hook
- Polyfill or Cotton Stuffing for Amigurumi
- Tapestry Needle
- Optional: Small Rattling Balls or Squeakers
Yarn
About 360 yds (330 m) of DROPS Loves You 8 (93 yds / 85 m, 50 g) in different colors and 0.14 yds (12.6 cm) of white for seaming.
Size
All geometric shapes are about 2.8″ (7 cm) in the largest dimension.
Gauge
5.5 sc for 6 rows in 1″ (2.5 cm).
Abbreviations (US Terms)
- Ch – Chain
- Inc – Increase
- MC – Magic Circle
- RS – Right Side
- Sc – Single Crochet
- St – Stitch
- Yo – Yarn Over
Special Stitches
Increase (Inc)
One increase consists of 2 sts worked in the same indicated st.
Invisible Join
Magic Circle (MC)
Ultimate Finish
Learn how to close the last hole of Amigurumi with the ultimate finish
Whip Stitch
See how to sew crochet parts together with the whip stitch
Patterns Notes
- If the pattern says “sc 2”, you need tosc 1 in each of the next 2 sts.
- (…) – Repeat the instructions within parenthesis for the indicated number of times.
- *… – Repeat the instructions from * for the indicated number of times.
- […] – Repeat the instructions within square brackets all in the same indicated st.
- Crochet in the round in a continuous spiral.
- The pattern does not specify any colors. For each geometric shape, feel free to use your colors of choice.
- Make your geometric shapes sturdier by reinforcing the flat parts with some paperboard (see photo below).
Make a MC.
Round 1. Sc 6 in MC. (6 sts)
Round 2. Sc inc 6. (12 sts)
Round 3. ([Sc 3], sc 2) 4 times. (20 sts)
Round 4. Sc 1, ([sc 3], sc 4) 3 times, [sc 3], sc 3. (28 sts)
Round 5. Sc 2, ([sc 3], sc 6) 3 times, [sc 3], sc 4. (36 sts)
Round 6. Sc 3, ([sc 3], sc 8) 3 times, [sc 3], sc 5. (44 sts)
Round 7. Sc 4, ([sc 3], sc 10) 3 times, [sc 3], sc 6. (52 sts)
Fasten off leaving a long tail, make an invisible join, and weave in your ends.
Assembly
Let’s call the six squares S1, S2, S3, S4, S5, and S6. RS facing up, place your squares as shown in the photo below.
With a length of white, sew sides a, b, c, and d of square S1 to the corresponding sides of squares S2, S3, S4, and S5 (see dashed line in the photo below).
Fasten off and weave in your ends.