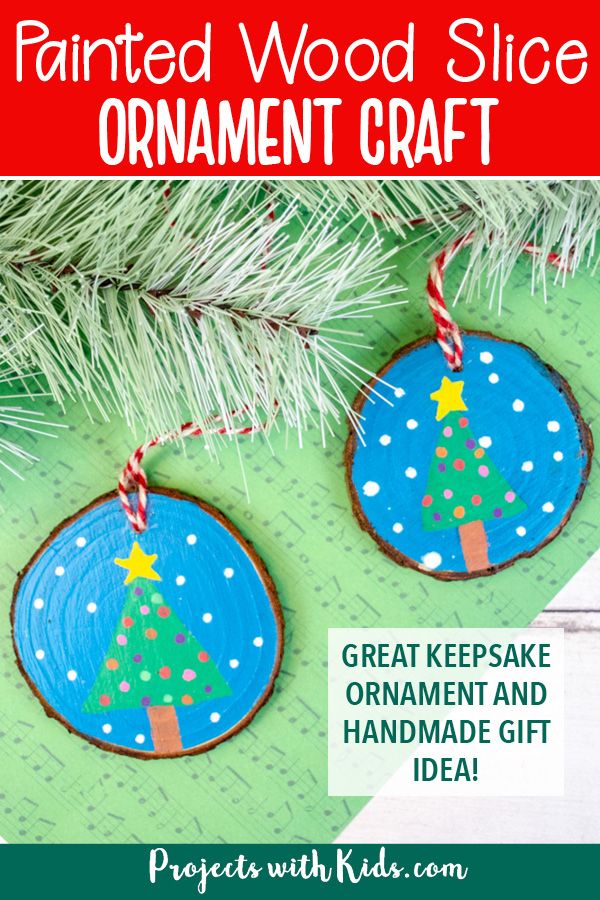
Wood Slice Christmas Tree Ornament
Wood slice Christmas tree ornaments are a charming addition to any holiday decor. Crafted from rustic wood slices, these ornaments bring a touch of nature into your home during the festive season. They are often adorned with intricate designs, glitter, and festive colors, making them a delightful sight on your Christmas tree. Whether you buy them ready-made or decide to DIY, creating your own wood slice ornaments can be a fun and creative activity for the whole family. These ornaments add a cozy and nostalgic feel to your tree, perfect for adding a personal touch to your holiday decorations. So, go ahead and hang up these adorable wood slice Christmas tree ornaments to bring some woodsy warmth to your home this holiday season!
Supplies
- Wood slices
- Blue acrylic paint
- Paint pens (fine point or medium point would work well. I used a mix of both.)
- Paintbrush
- Pencil and eraser
- Paint palette
- String or ribbon
- Mod Podge
Instructions for your Christmas tree ornament craft
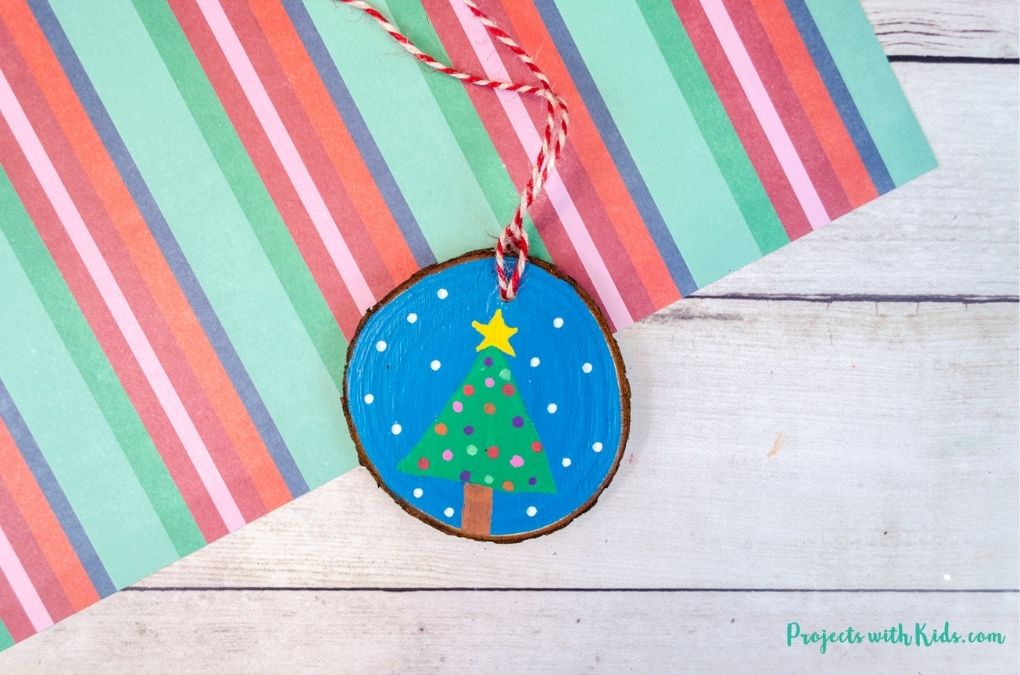
1. Make sure your wood slice is free of any dust or wood bits. Paint the wood slice with blue acrylic paint and let it dry completely. Depending on the type of paint you are using, you may need a second coat.
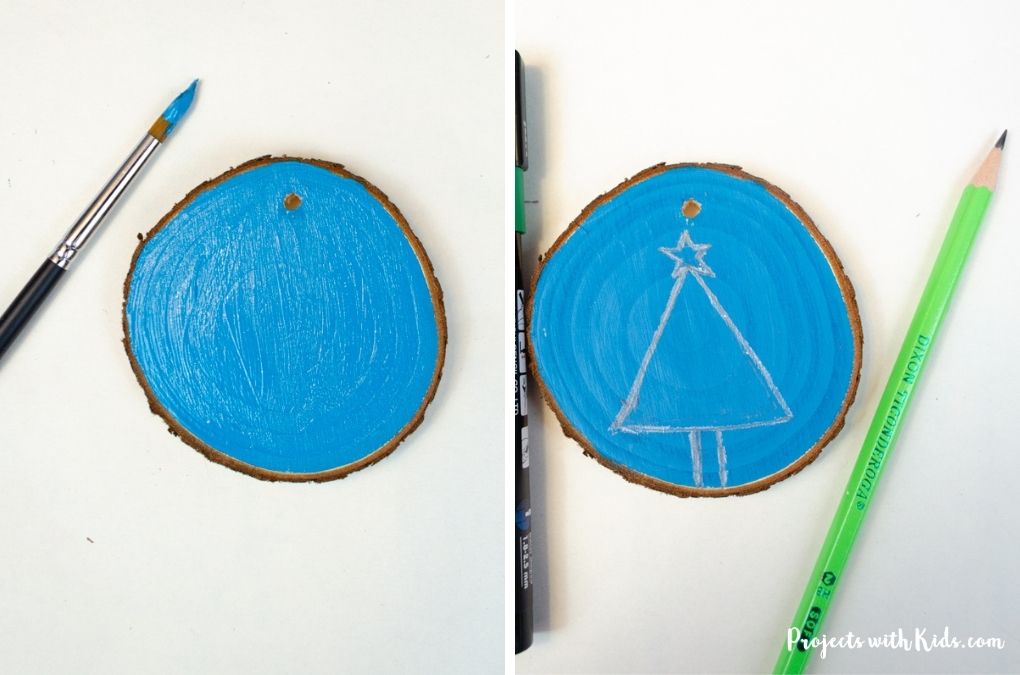
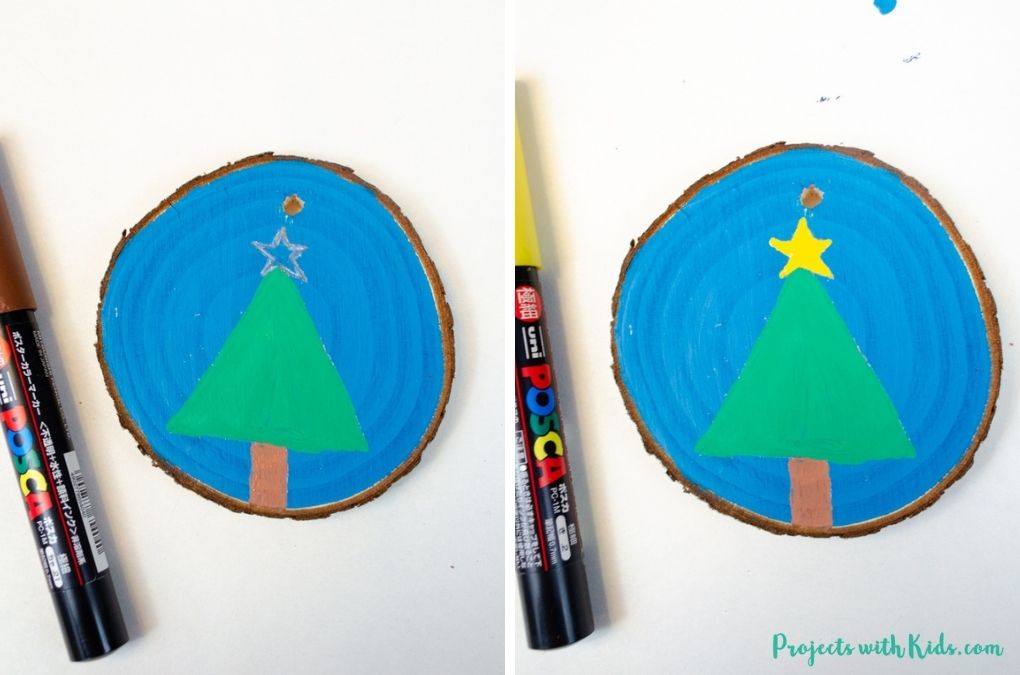
2. Use a pencil to draw on a simple triangle for the tree, a tree trunk, and a star at the top of the tree. Younger kids might need help drawing on the star.
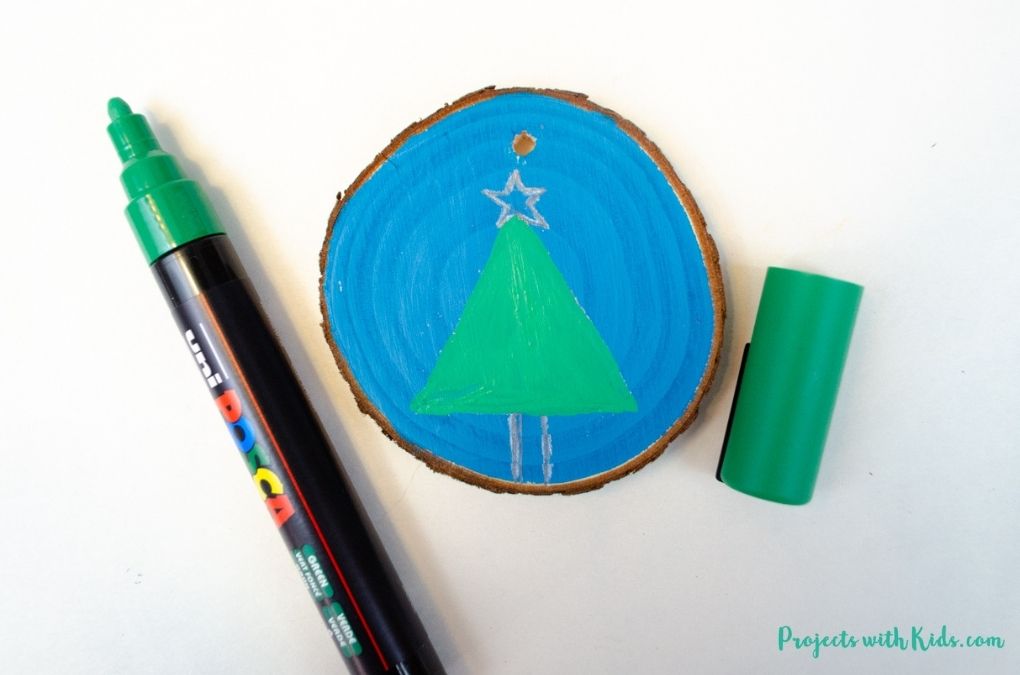
3. Use a green paint pen to color in the tree. Let this dry and then color in another coat if needed. When using paint pens, it’s important to let the first coat really dry completely otherwise you could scratch it off with the second coat.
4. Color in the tree trunk with brown and the star with yellow. Let the colors dry and then add in a second coat. Depending on the type of paint pens you use and how dark your pencil lines are, your star may need a third coat.
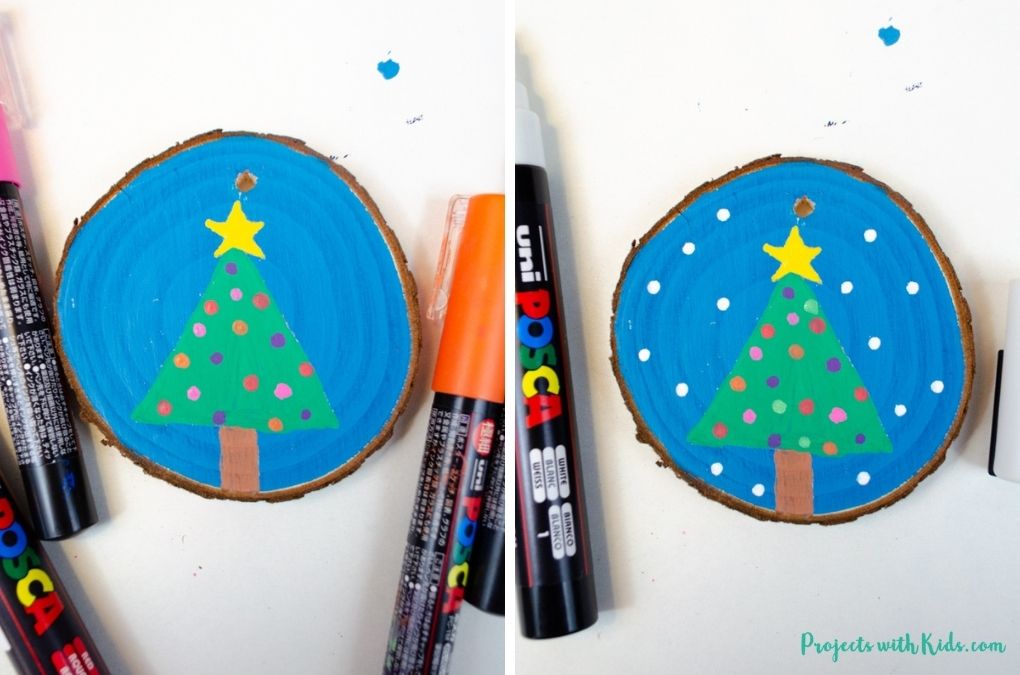
5. Decorate your tree with colorful dots using paint pens. Kids can choose just a couple colors to decorate their tree or use multiple colors for their tree decorations. Remind kids to go slow with this step so they don’t smudge any of the dots.
6. Use a white paint pen to dot on some snow in the background. Some kids might even like to try drawing on small snowflakes if there is enough space.
7. Once everything is completely dry, paint on two coats of matte Mod Podge, letting each coat dry in between.
8. Have kids sign and date the back of their ornament with a black marker or paint pen. Tie on a string or a ribbon to finish off the ornament!