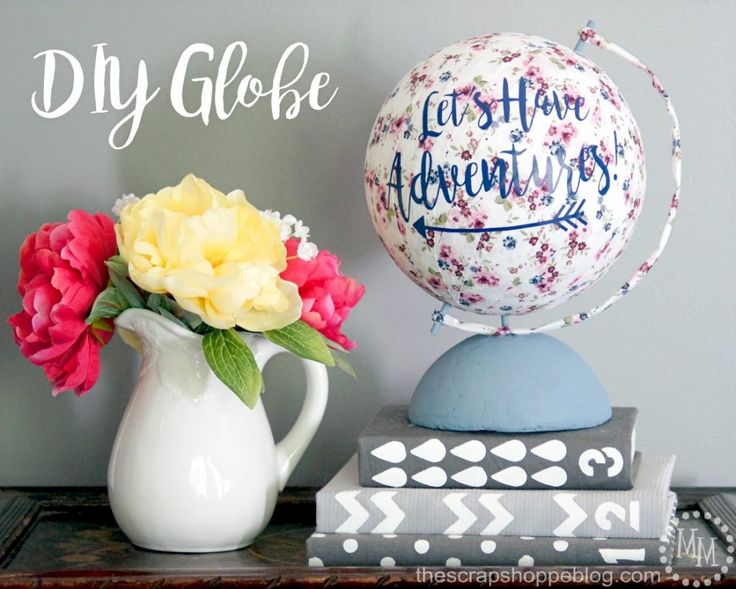
DIY Adorable Globe
I absolutely adore DIY projects, and making your own adorable globe is such a fun and creative idea! When you personalize a globe, you can add your favorite colors, memories, or even dream destinations. It's a fantastic way to bring a touch of uniqueness and personality to your space. Plus, it makes for a wonderful conversation piece when guests come over. The best part? You can let your imagination run wild and make it truly one-of-a-kind. So, grab your paintbrushes, markers, or whatever craft supplies you fancy and get ready to embark on a globe-trotting DIY adventure!
Supplies:
- FloraCraft® Make It: Fun® 8″ foam ball
- FloraCraft® Make It: Fun®6″ foam ball
- Fabric
- FloraCraft® Make It: Fun® Smooth Finish
- FloraCraft® Make It: Fun® Foam Cutter
- FloraCraft® Make It: Fun® StyroGlue
- Small dowel rod
- Fabric Stiffener
- Paintbrush
- Wire
- Paint
- Adhesive Vinyl
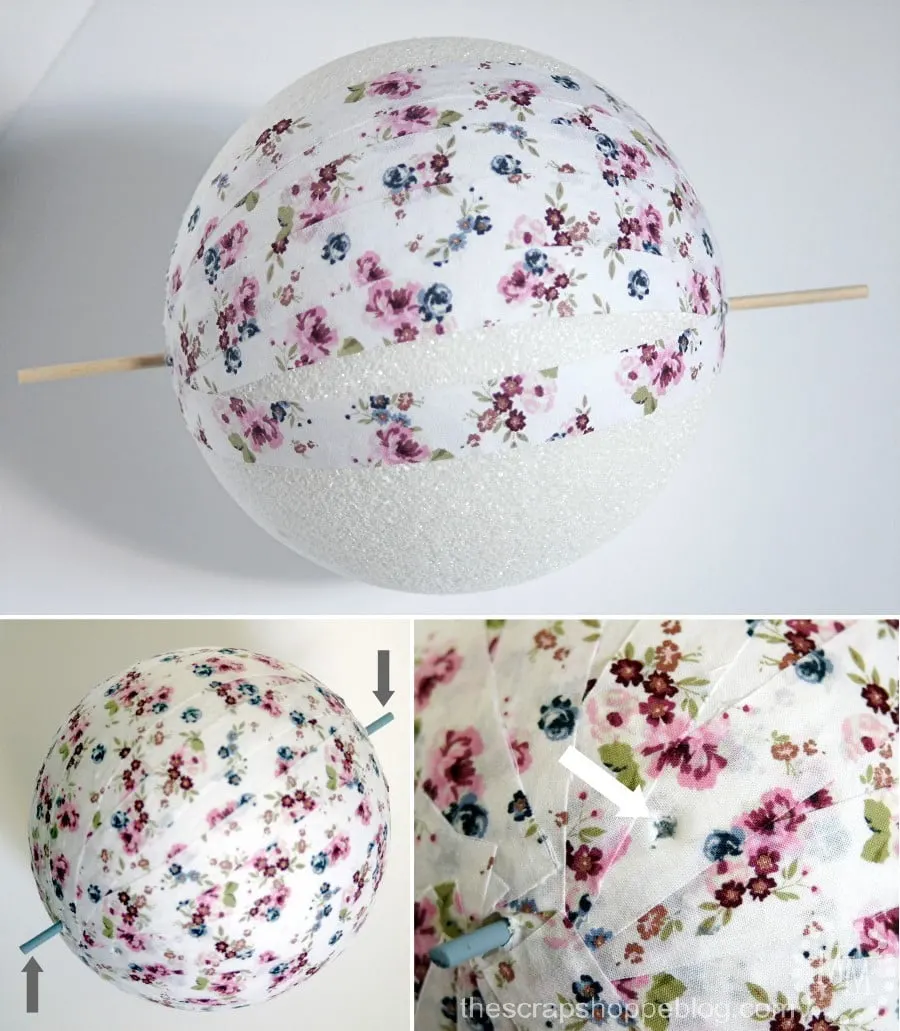
Stick the dowel rod through the center of the 8″ foam ball.
This will be the polar axis of the globe.
Cut the fabric into 1″ wide fabric strips ~12″ long.
Run a line of the StyroGlue from one dowel rod down the side of the ball to the other dowel rod and use a paintbrush to smooth the glue down.
Place a strip of the fabric over the glue and press firmly.
Repeat until the entire ball is covered with the fabric strips.
Cut the dowel rod to length and paint it if you choose.
Mark a spot of the globe where it will attach to the globe base then use an X-acto knife or small sharp scissors to cut an X into the fabric and foam ball.
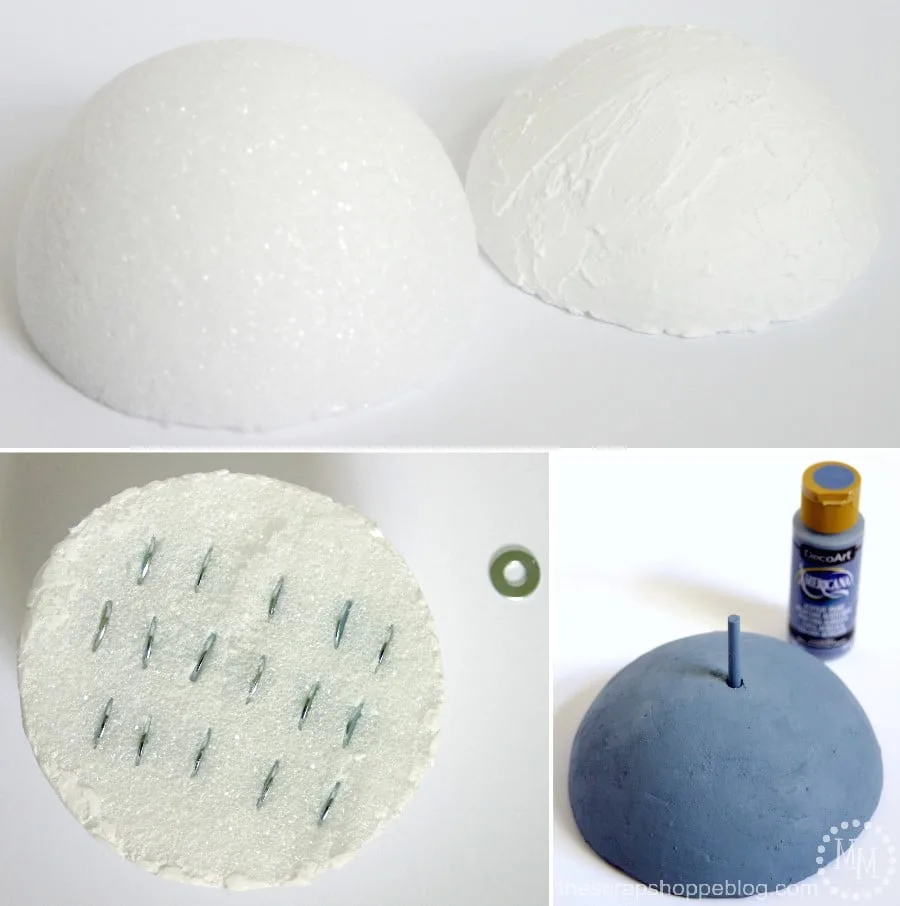
To create a base for the globe, cut the 6″ foam ball in half, but slightly off center.
Cover the top of the shorter side with a couple of coats of the Smooth Finish.
Insert washers into the underside of the base to add weight to it.
We don’t want the globe to topple over!
Press them flush with the foam then cover with a coat of the Smooth Finish.
Once the Smooth Finish is dry, sand it smooth and paint it.
I used Americana Acrylics in Continental Blue which has a slate-look to it.
Use the portion of the dowel rod that you cut off from the globe to stick in the top center of the base.
Paint it also.
The globe can now be attached to the base.
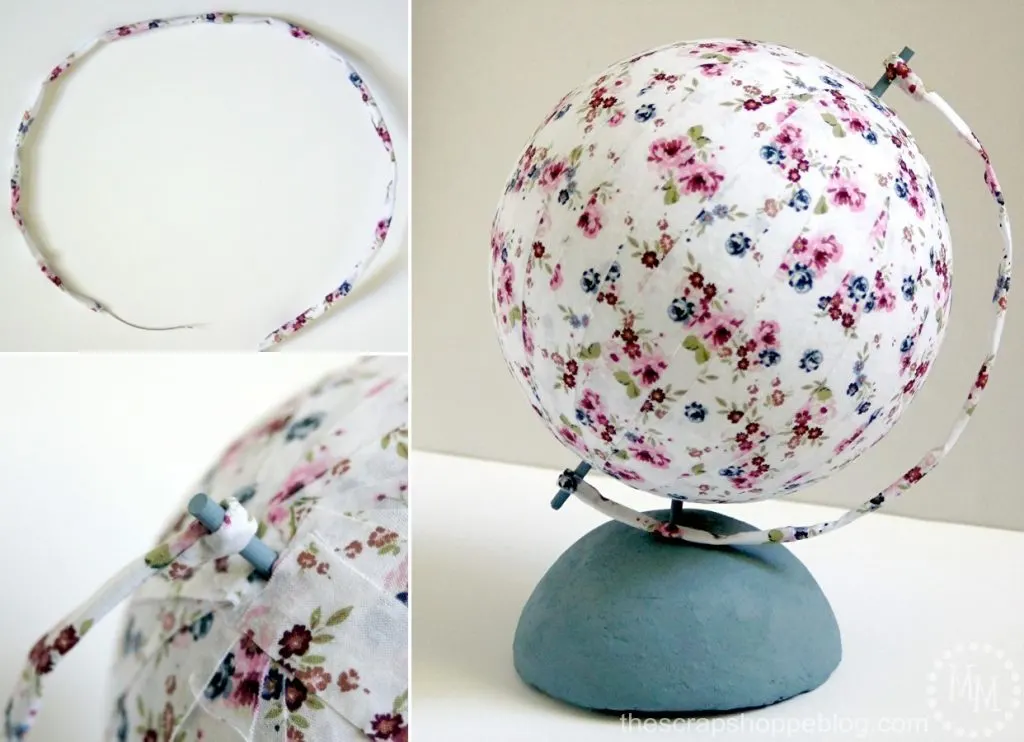
Take leftover strips of fabric and glue 3 of them end-to-end to create one long strip.
Roll the strip into a tube and glue along the edges to keep the shape.
Lay out the tube in a semicircle that would be slightly larger than the globe and spray with fabric stiffener.
Once dry, insert wire into the tube.
Attach one end of the tube to the North Pole by simply twisting the wire around the pole.
Repeat with the South Pole.
Cut off any fabric.
Manipulate the wire as needed to keep the shape around the side of the globe.
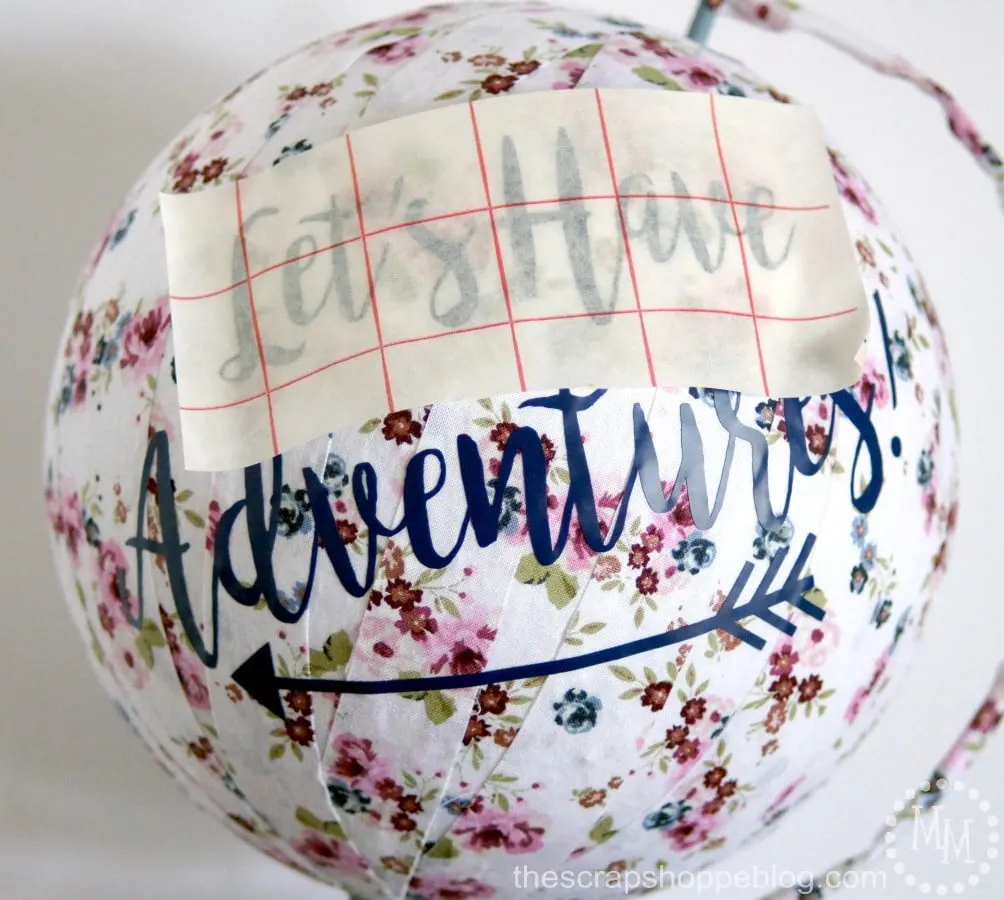
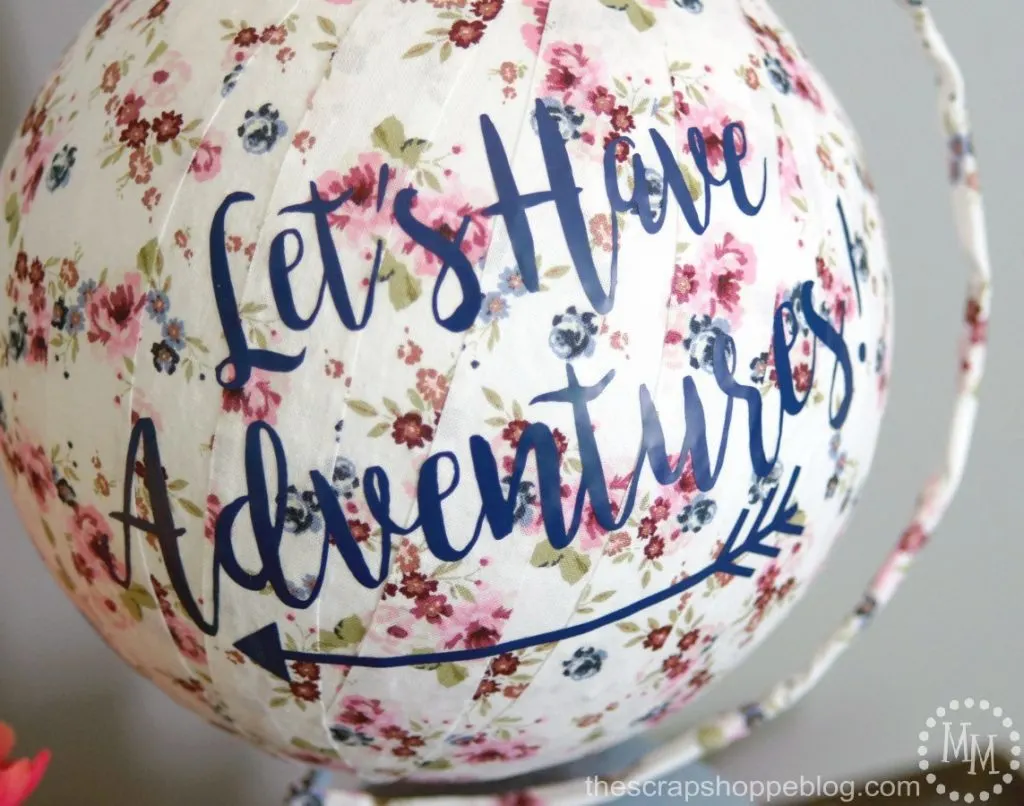
I used my Silhouette Cameo to cut out the words on adhesive vinyl to go on the globe.
The font is called Bromello.
Because of the curve of my surface, I applied the words and arrow in 3 stages:
1) “Let’s Have”
2) “Adventures!” and
3) the arrow.