DIY Dish Towel Bunny
If you're looking to add a touch of whimsy to your kitchen decor, creating a DIY dish towel bunny is the perfect project! Not only is it a fun and simple craft to do, but it also brings a smile to anyone who sees it hanging in your kitchen. All you need is a dish towel, some rubber bands, and a few minutes of your time to transform a mundane kitchen essential into an adorable bunny that will brighten up your space. So go ahead, get creative, and hop into this charming DIY project to add a playful touch to your home!
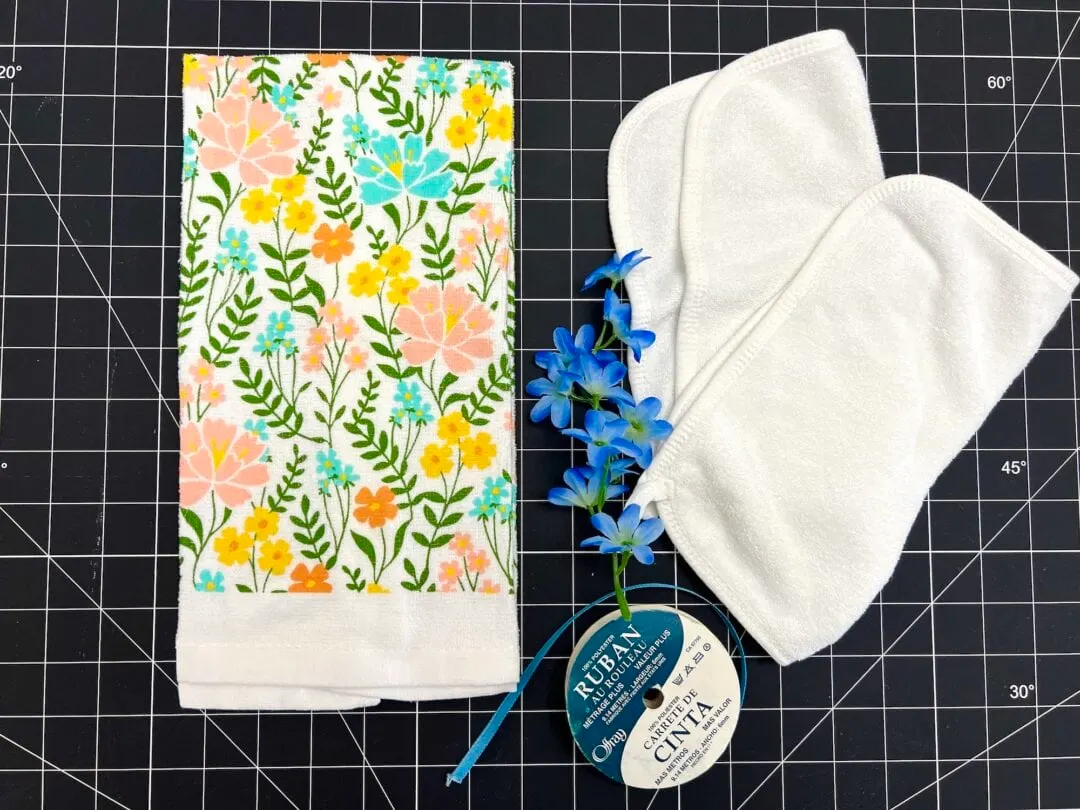
Supplies

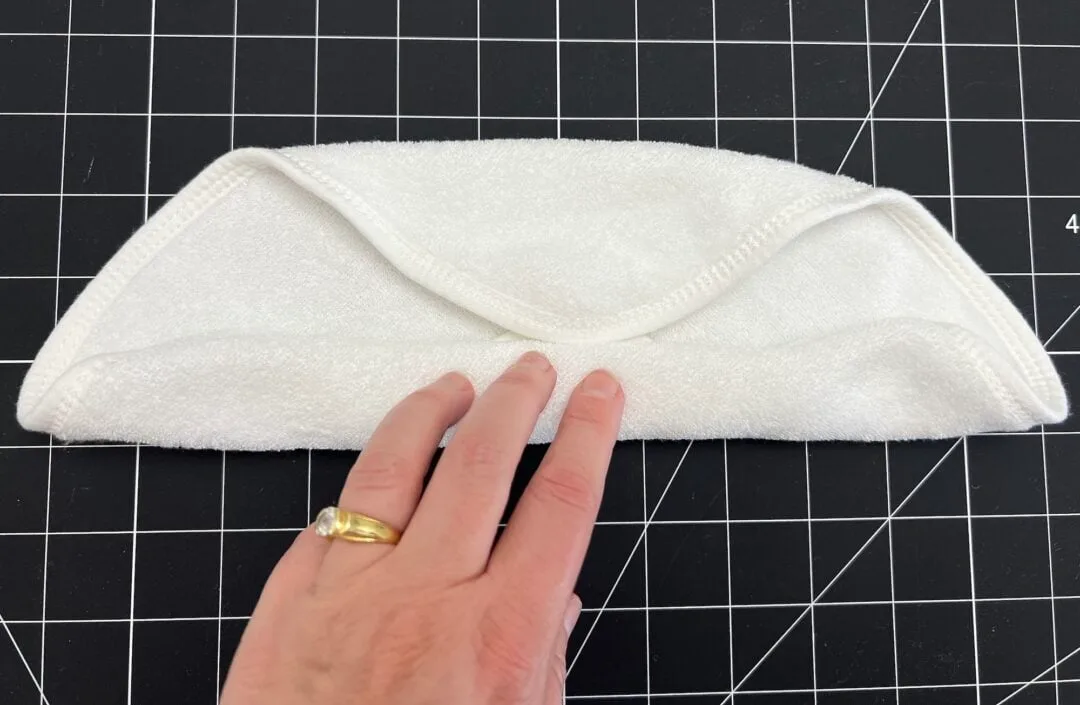
Fold in the top and the bottom corners towards the middle. Then start rolling the top towards the middle, then roll the bottom towards the middle.
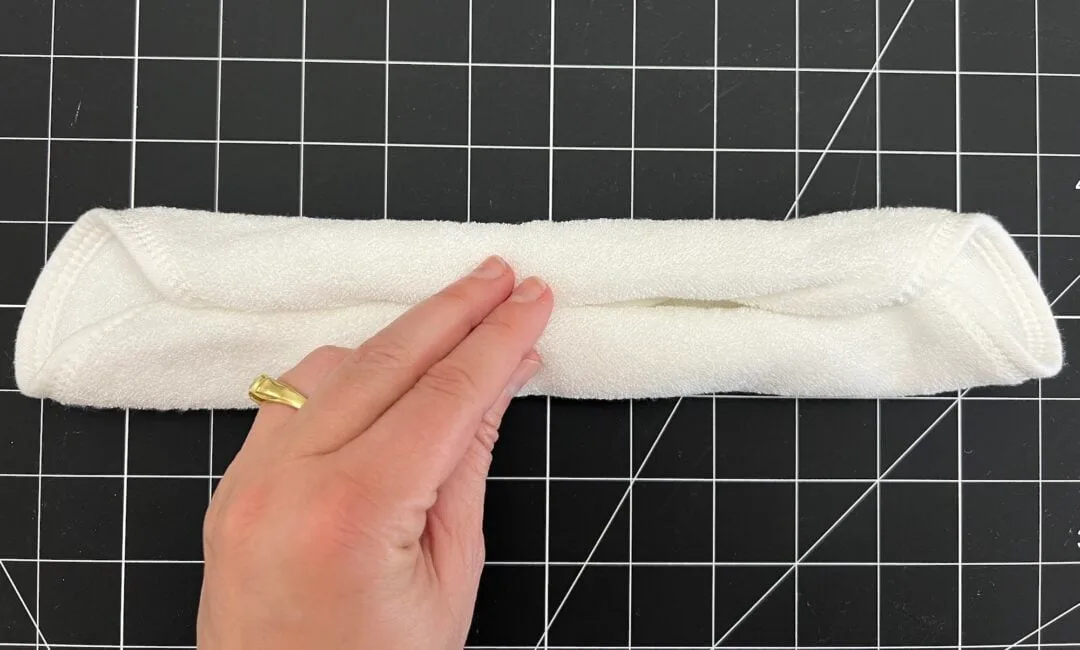
Wrap a rubber band or hair tie around the middle to secure. You could also tie with ribbon or twine, if desired.

This does not have to be exact, but the front should be much longer than the back.
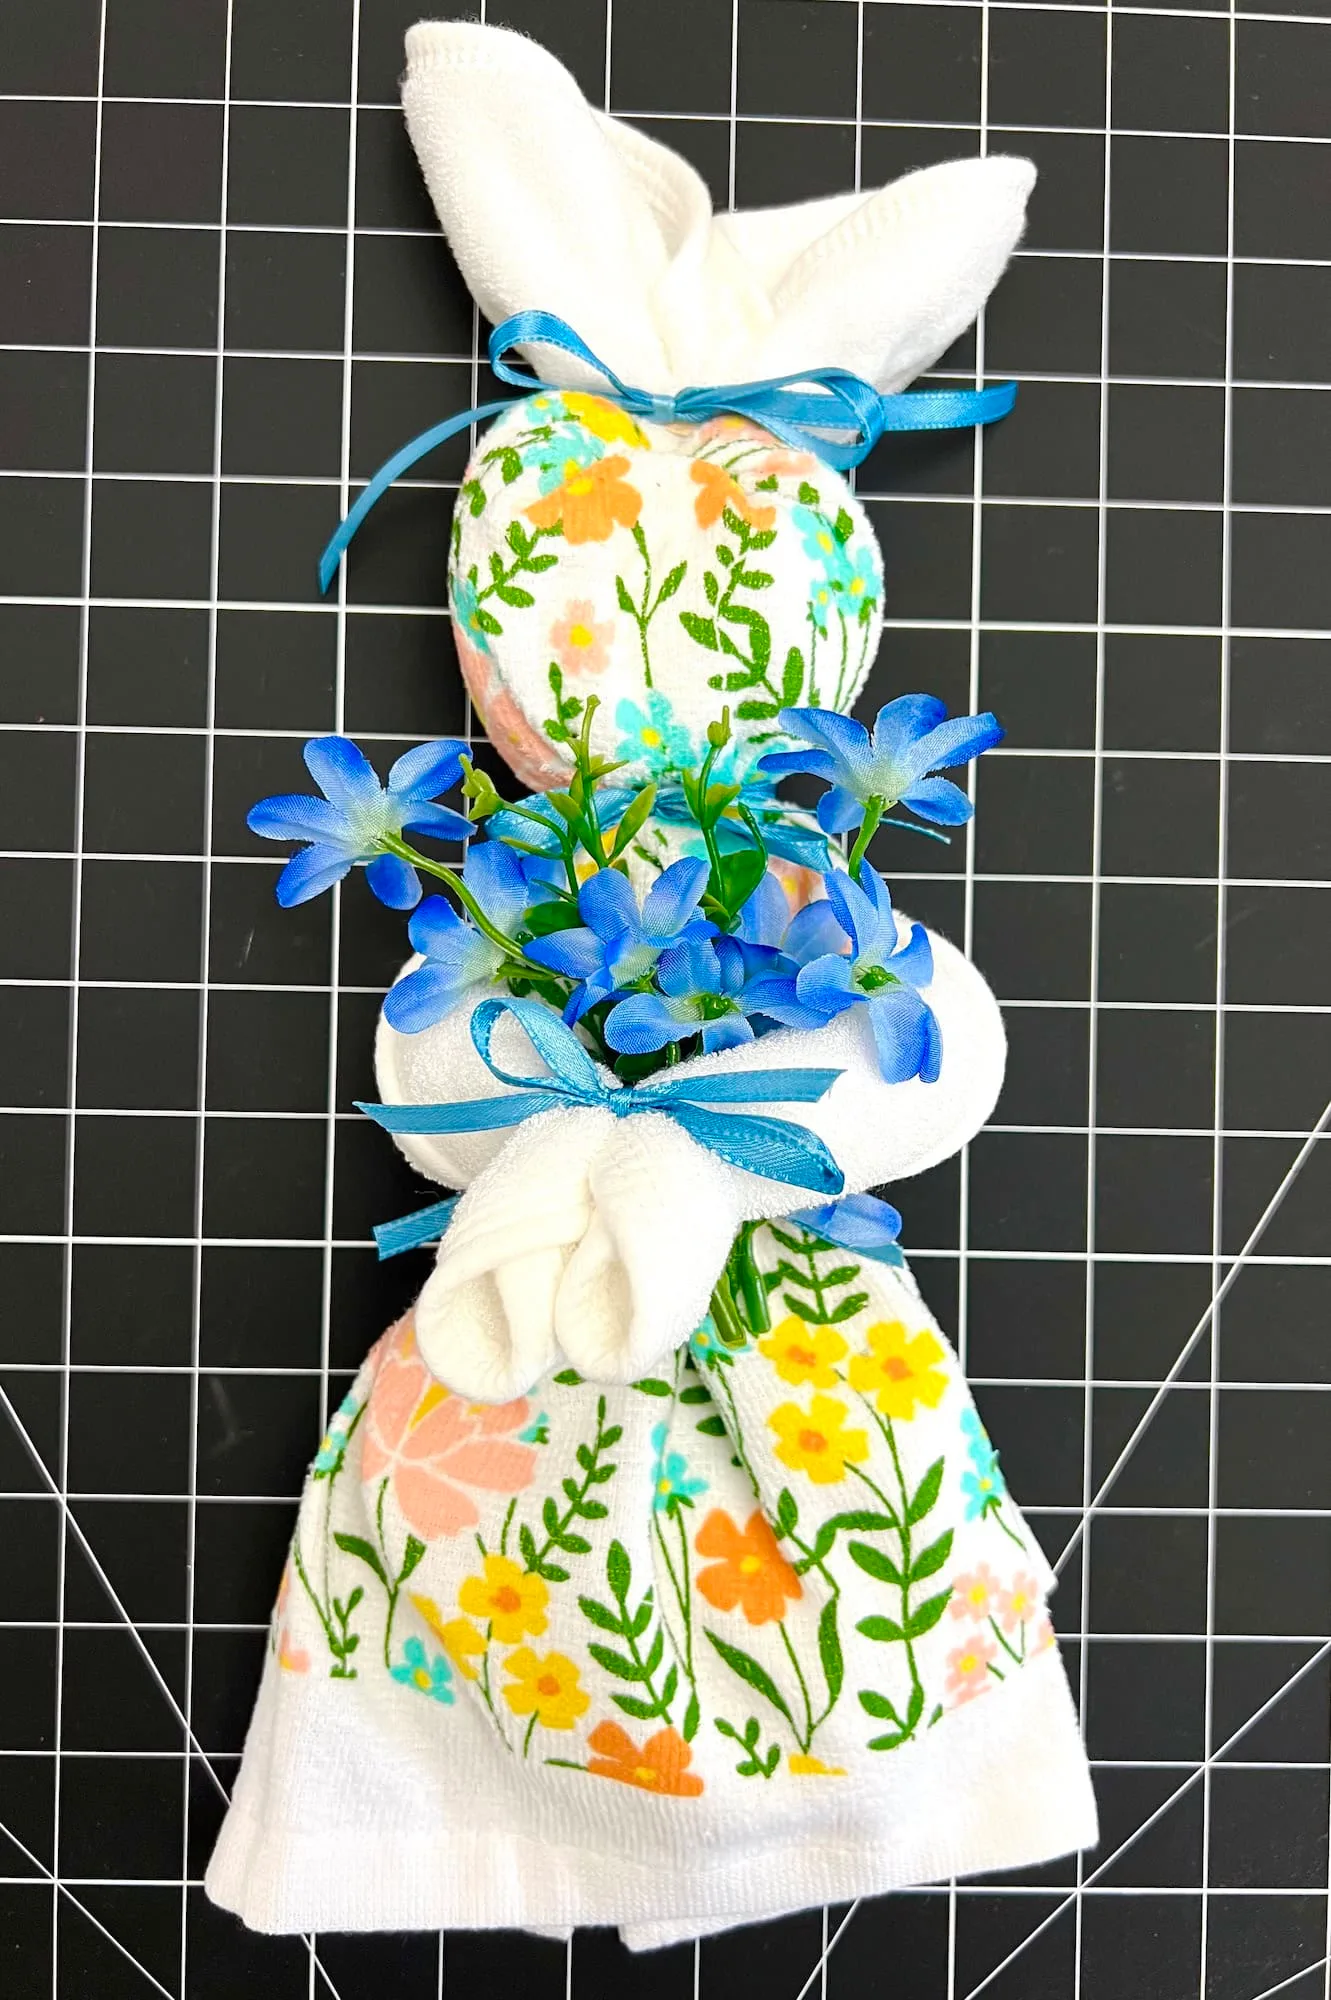
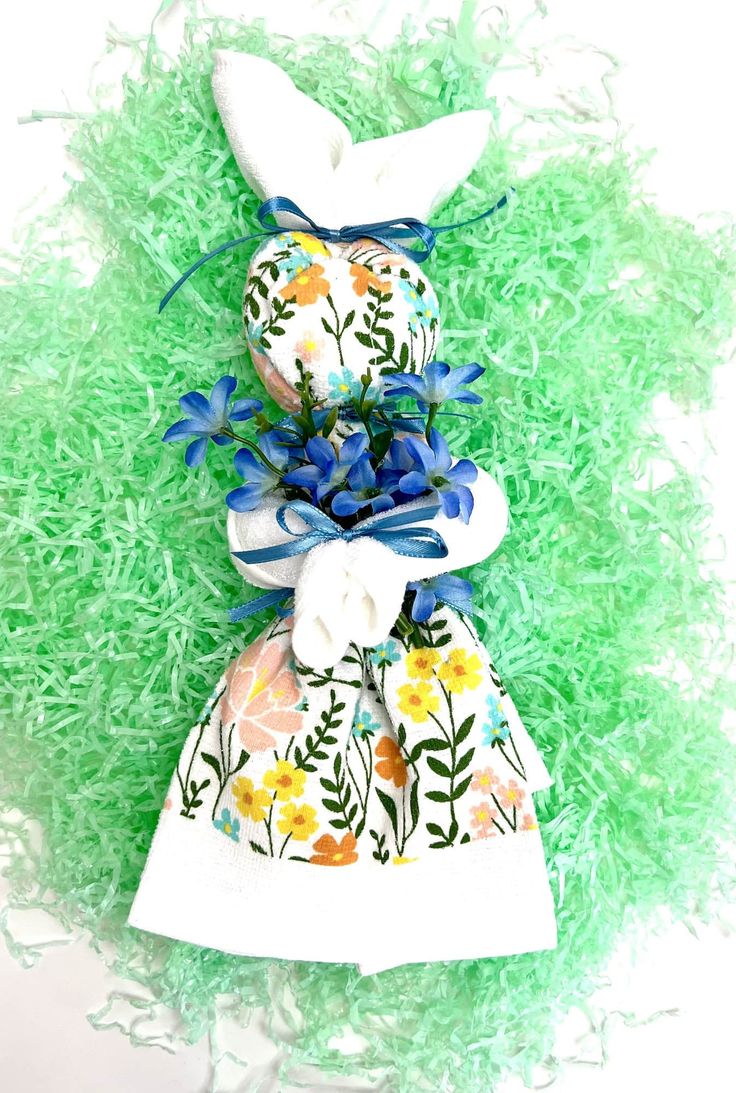
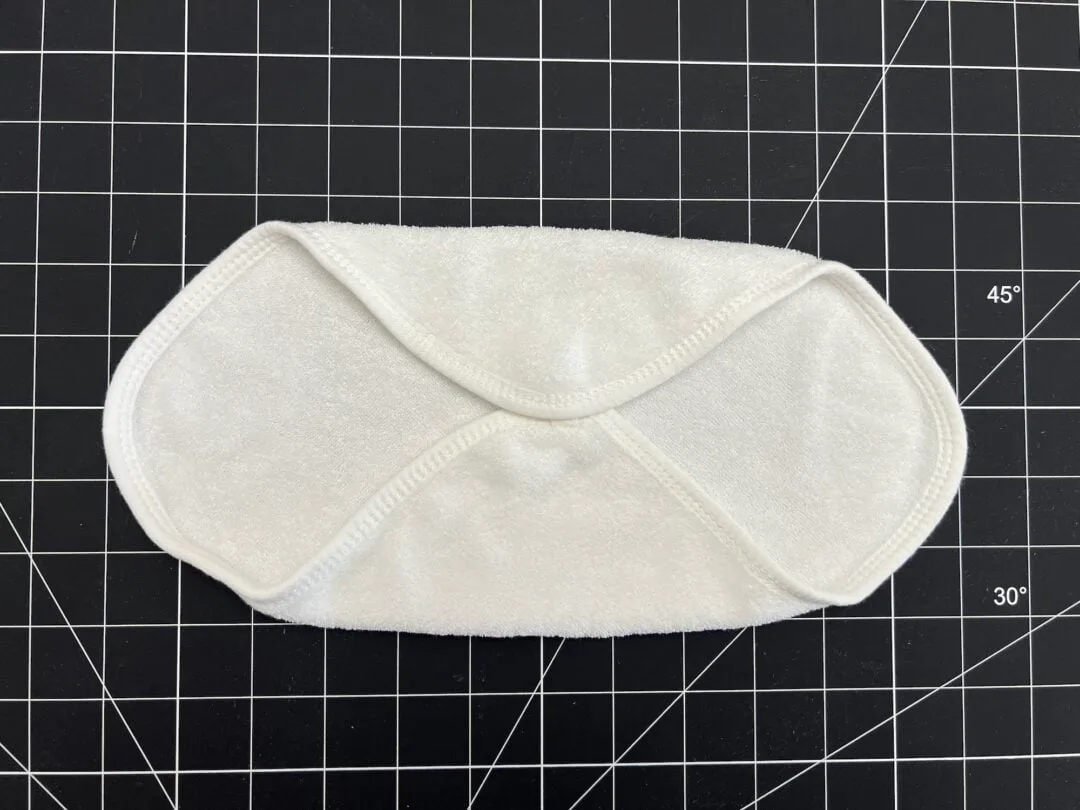
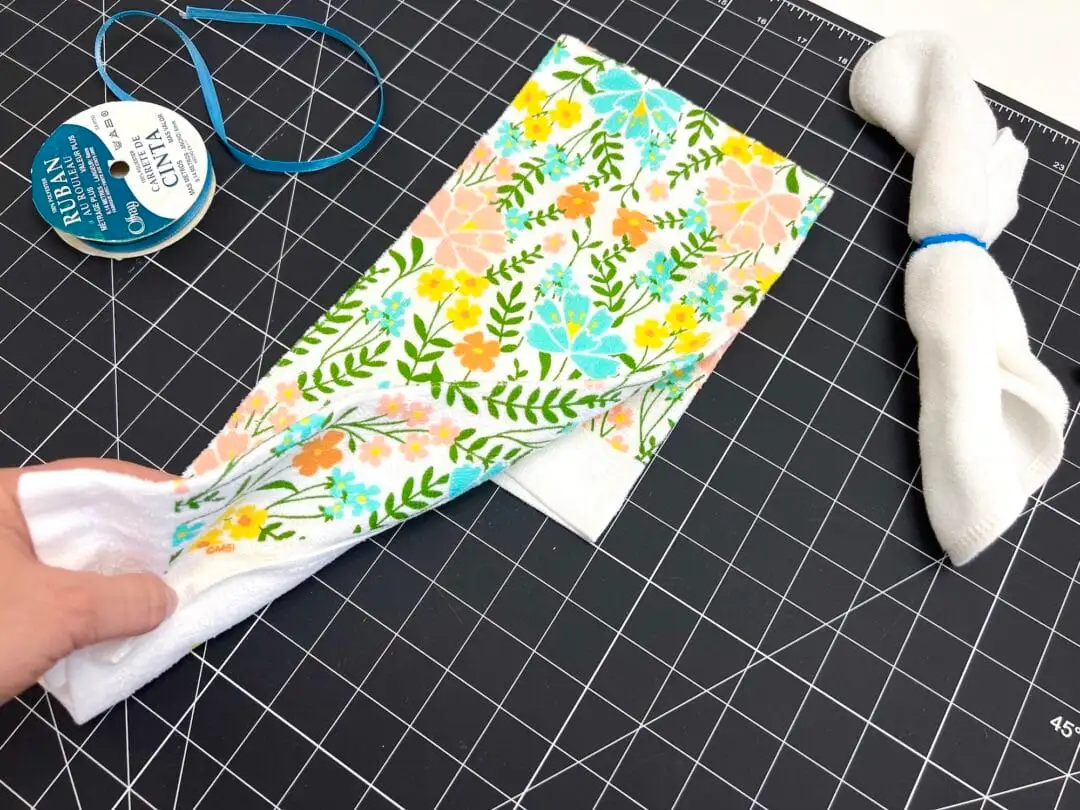
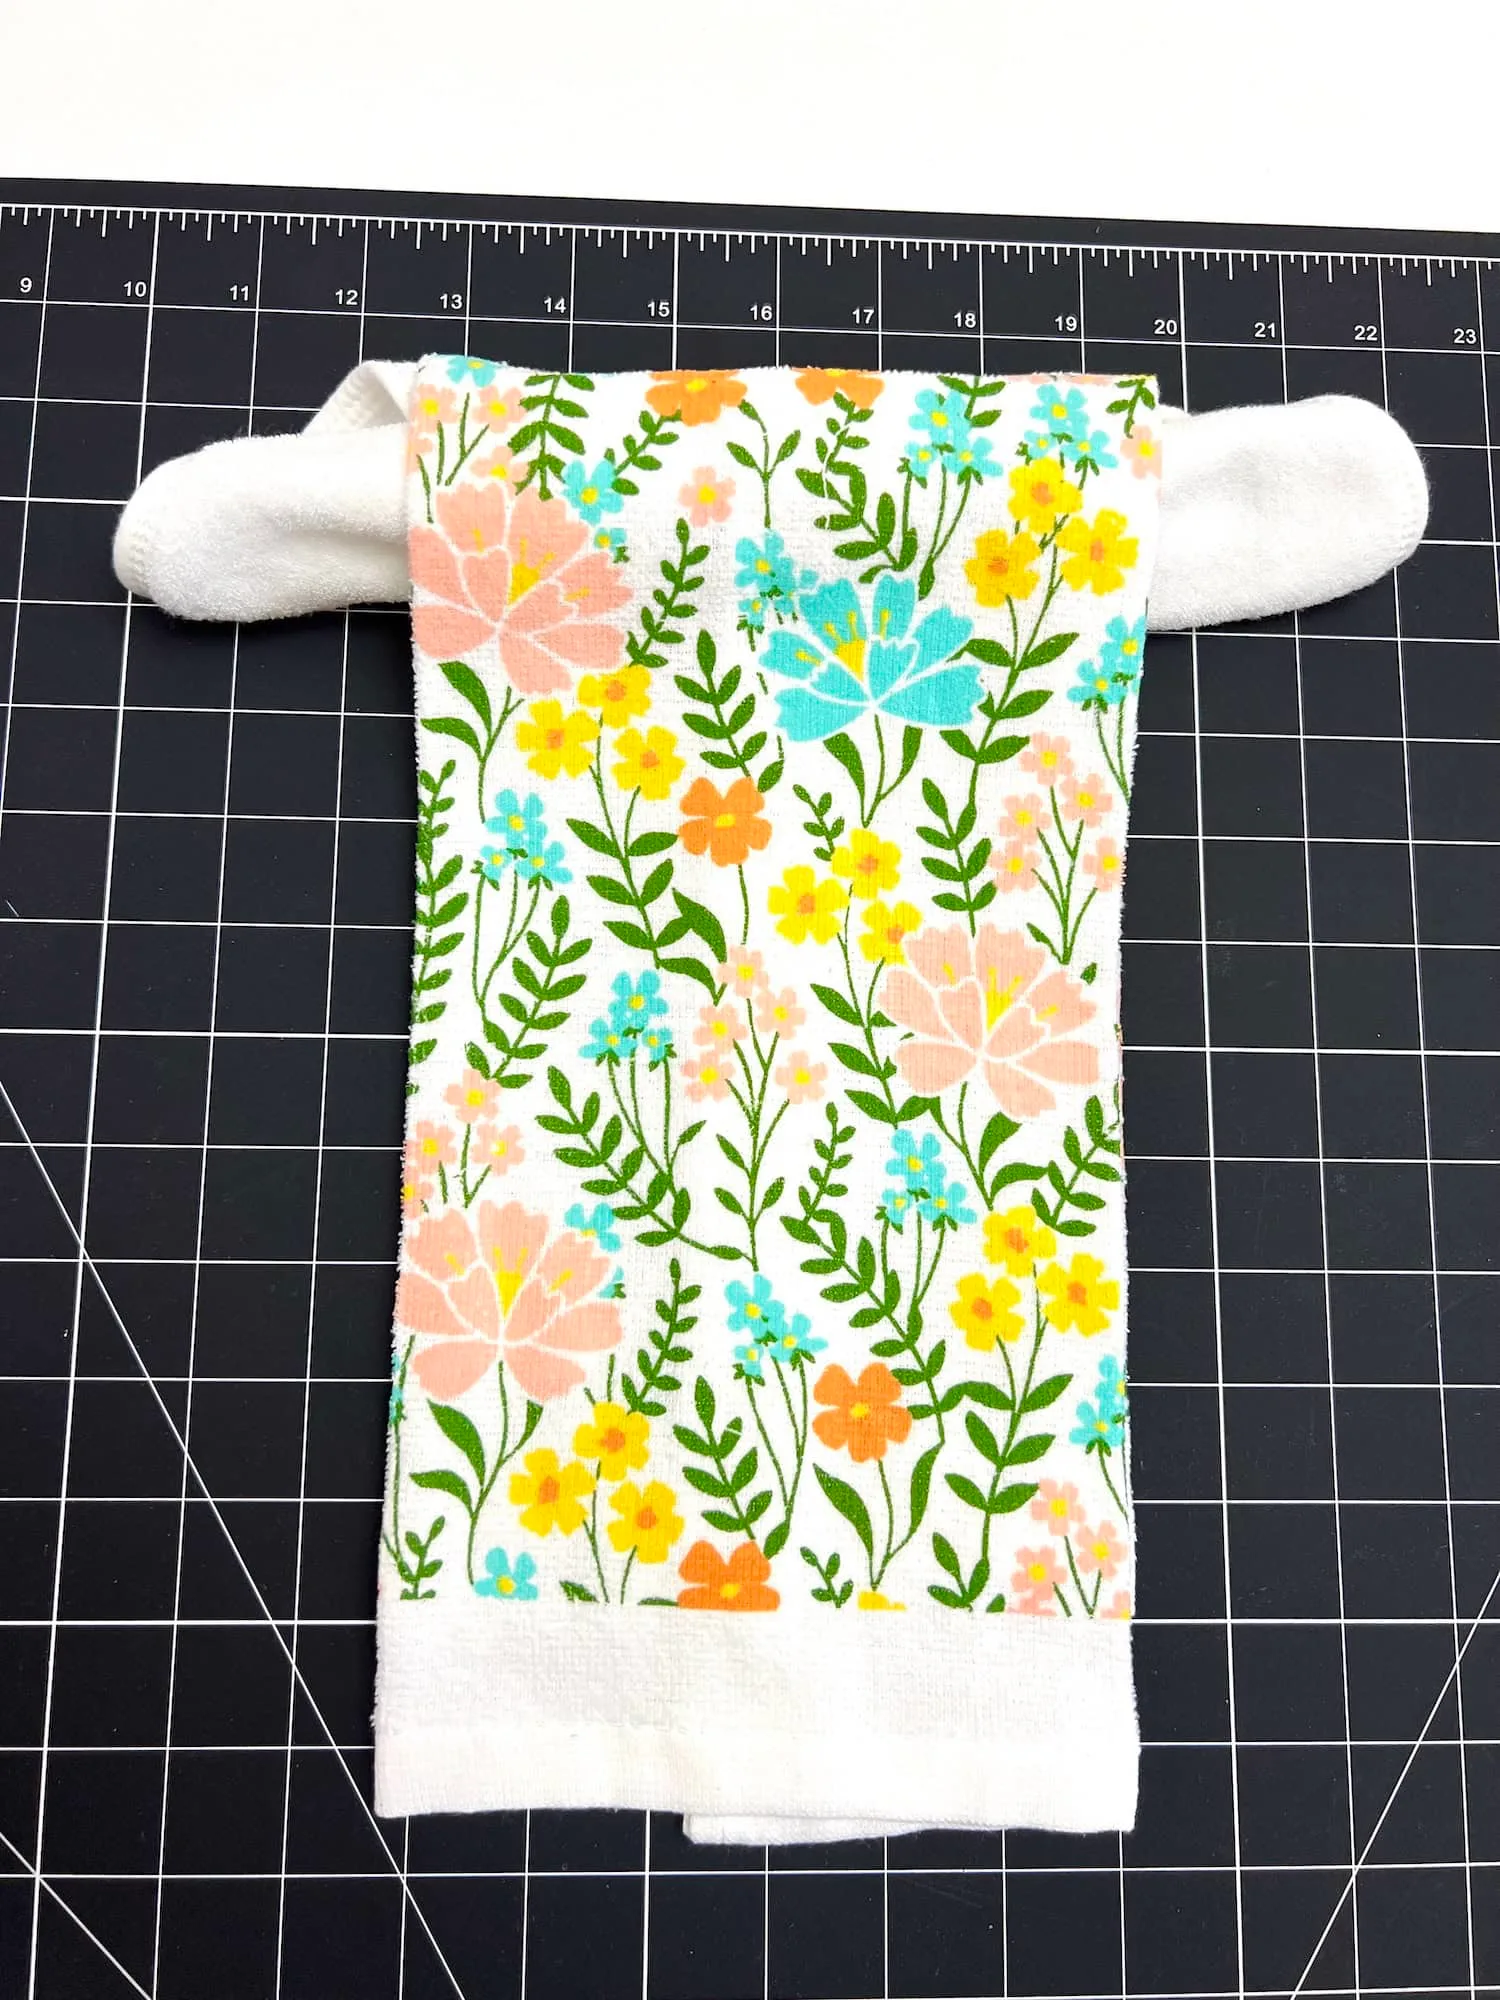
Place the wash cloth ears where the fold of the dish cloth is.
The ears should be placed in between the front and the back layers.
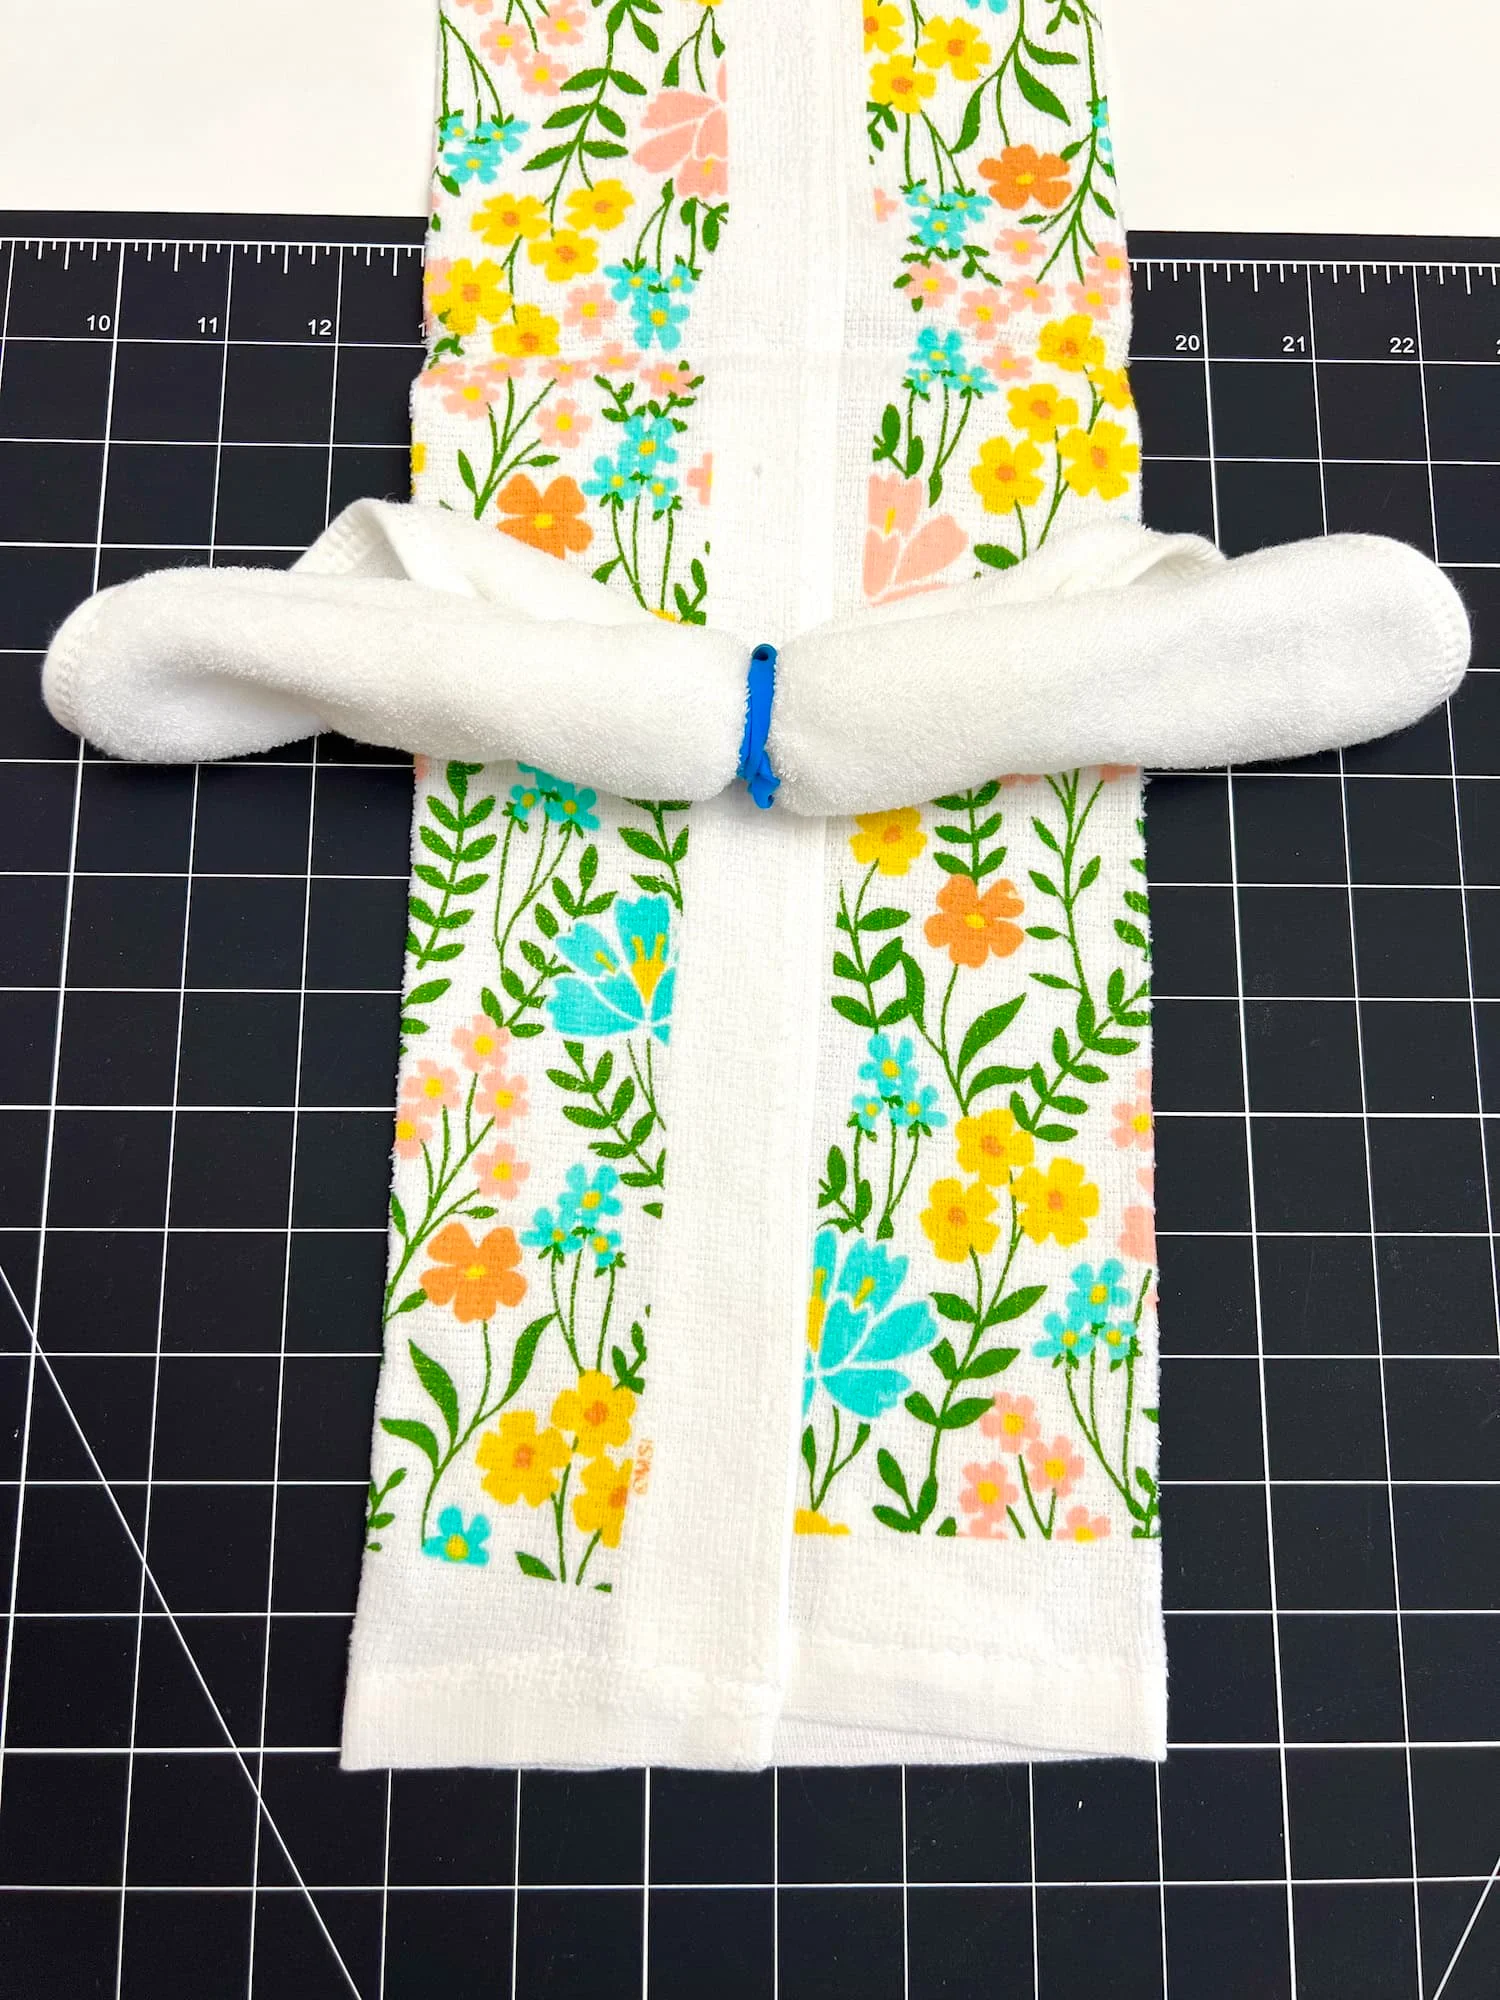
Fold the ends of the washcloth up while pulling down the dish cloth. Adjust the towels so that the open gaps in the ears are seen on the front.
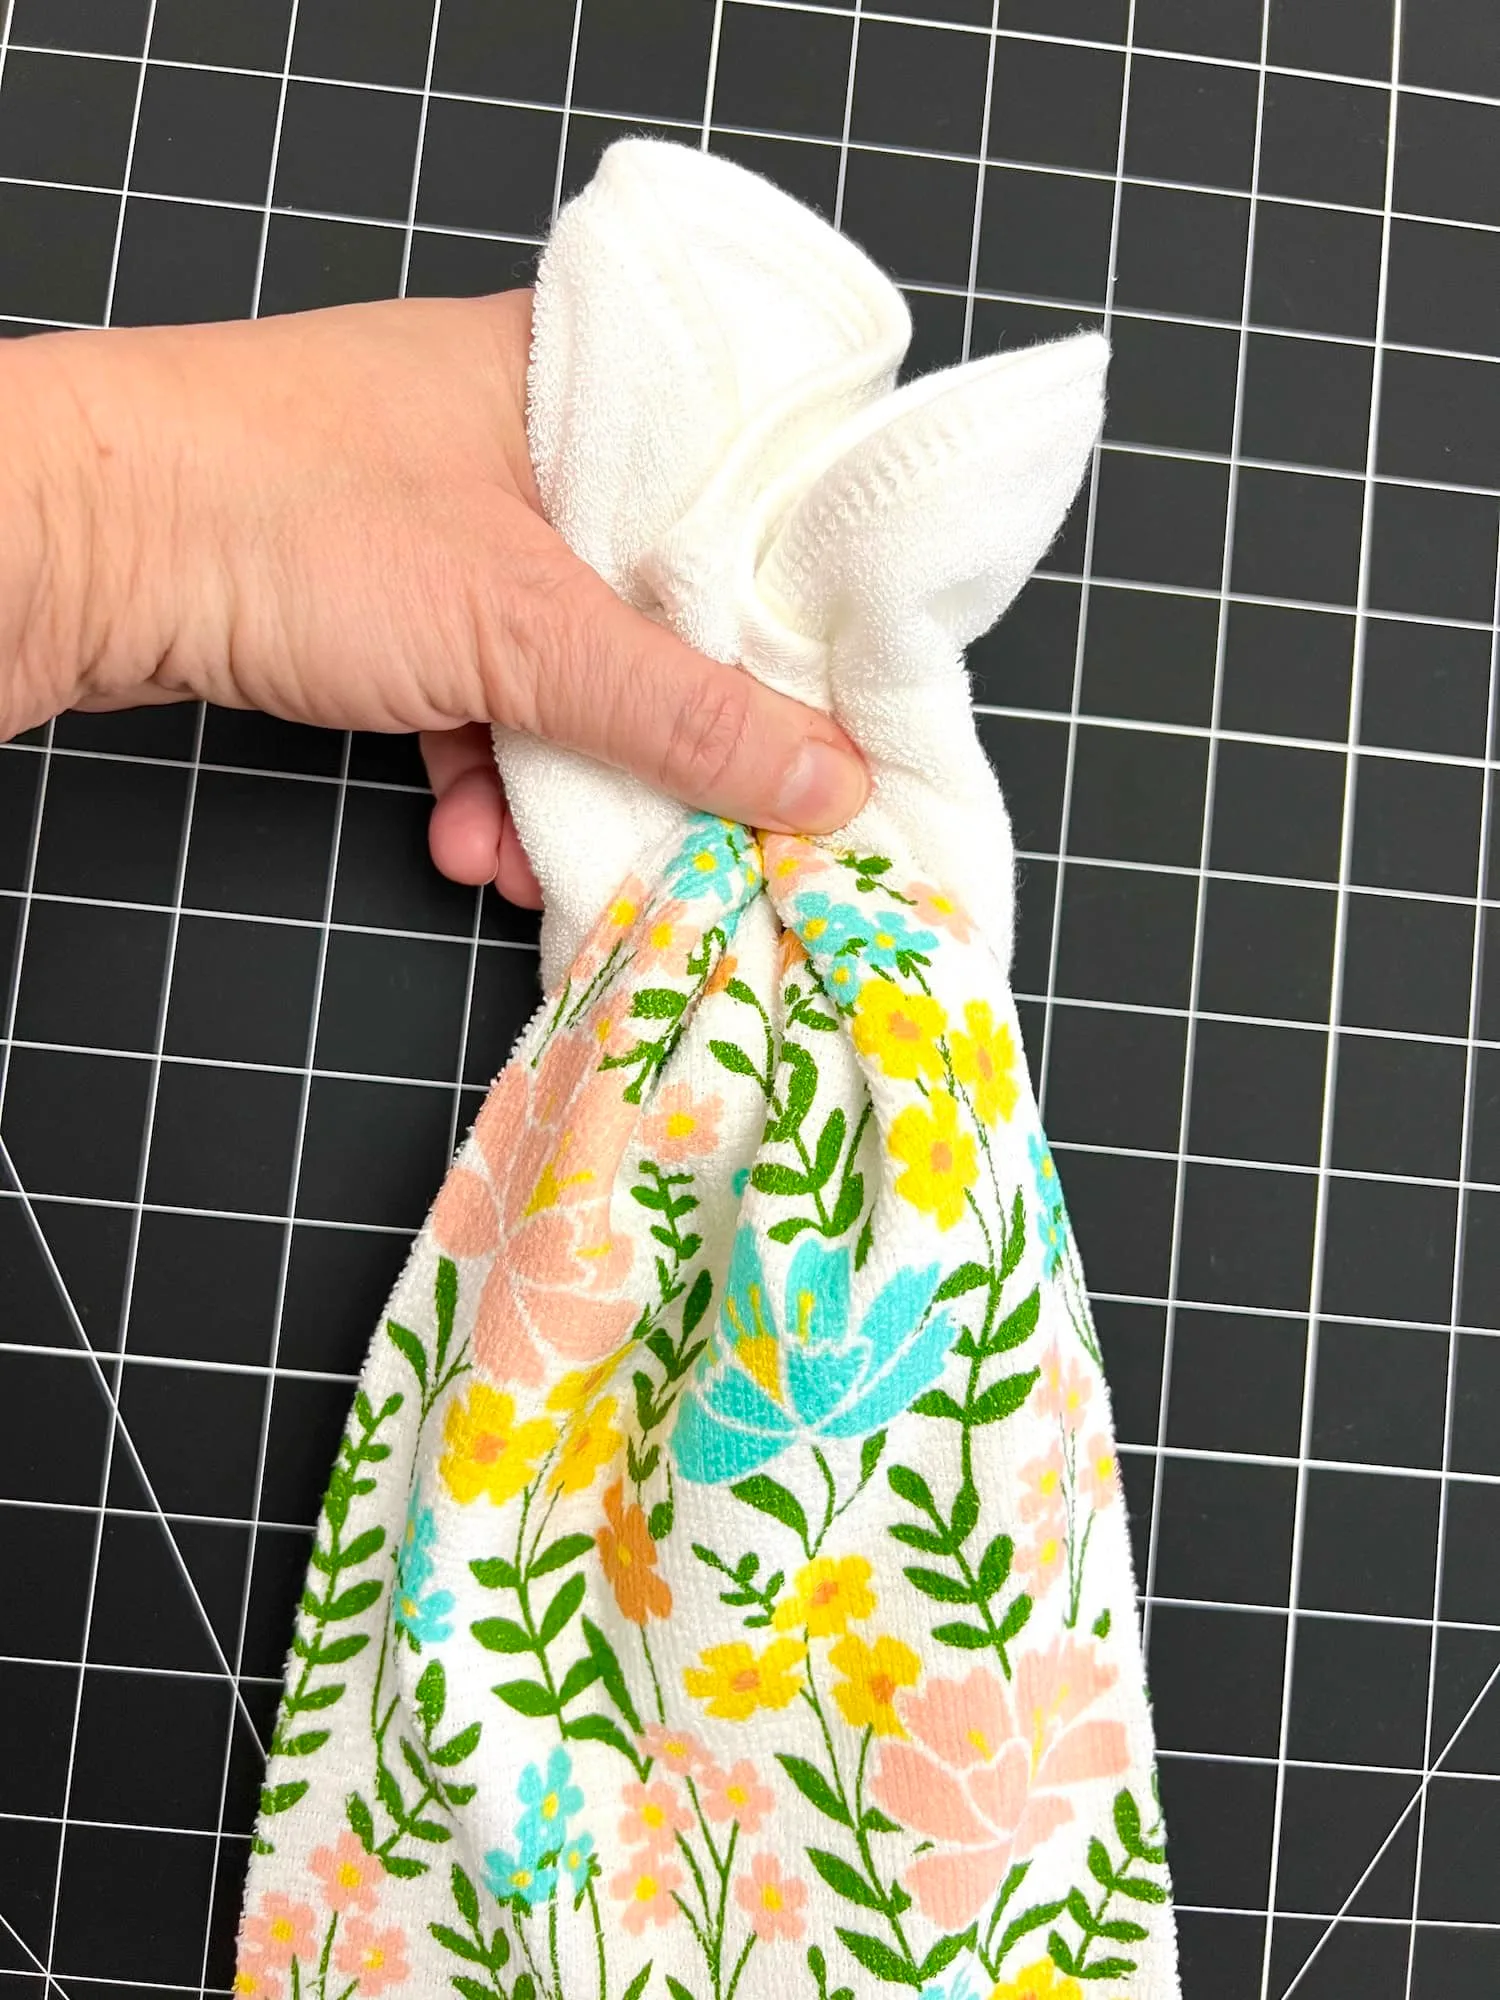
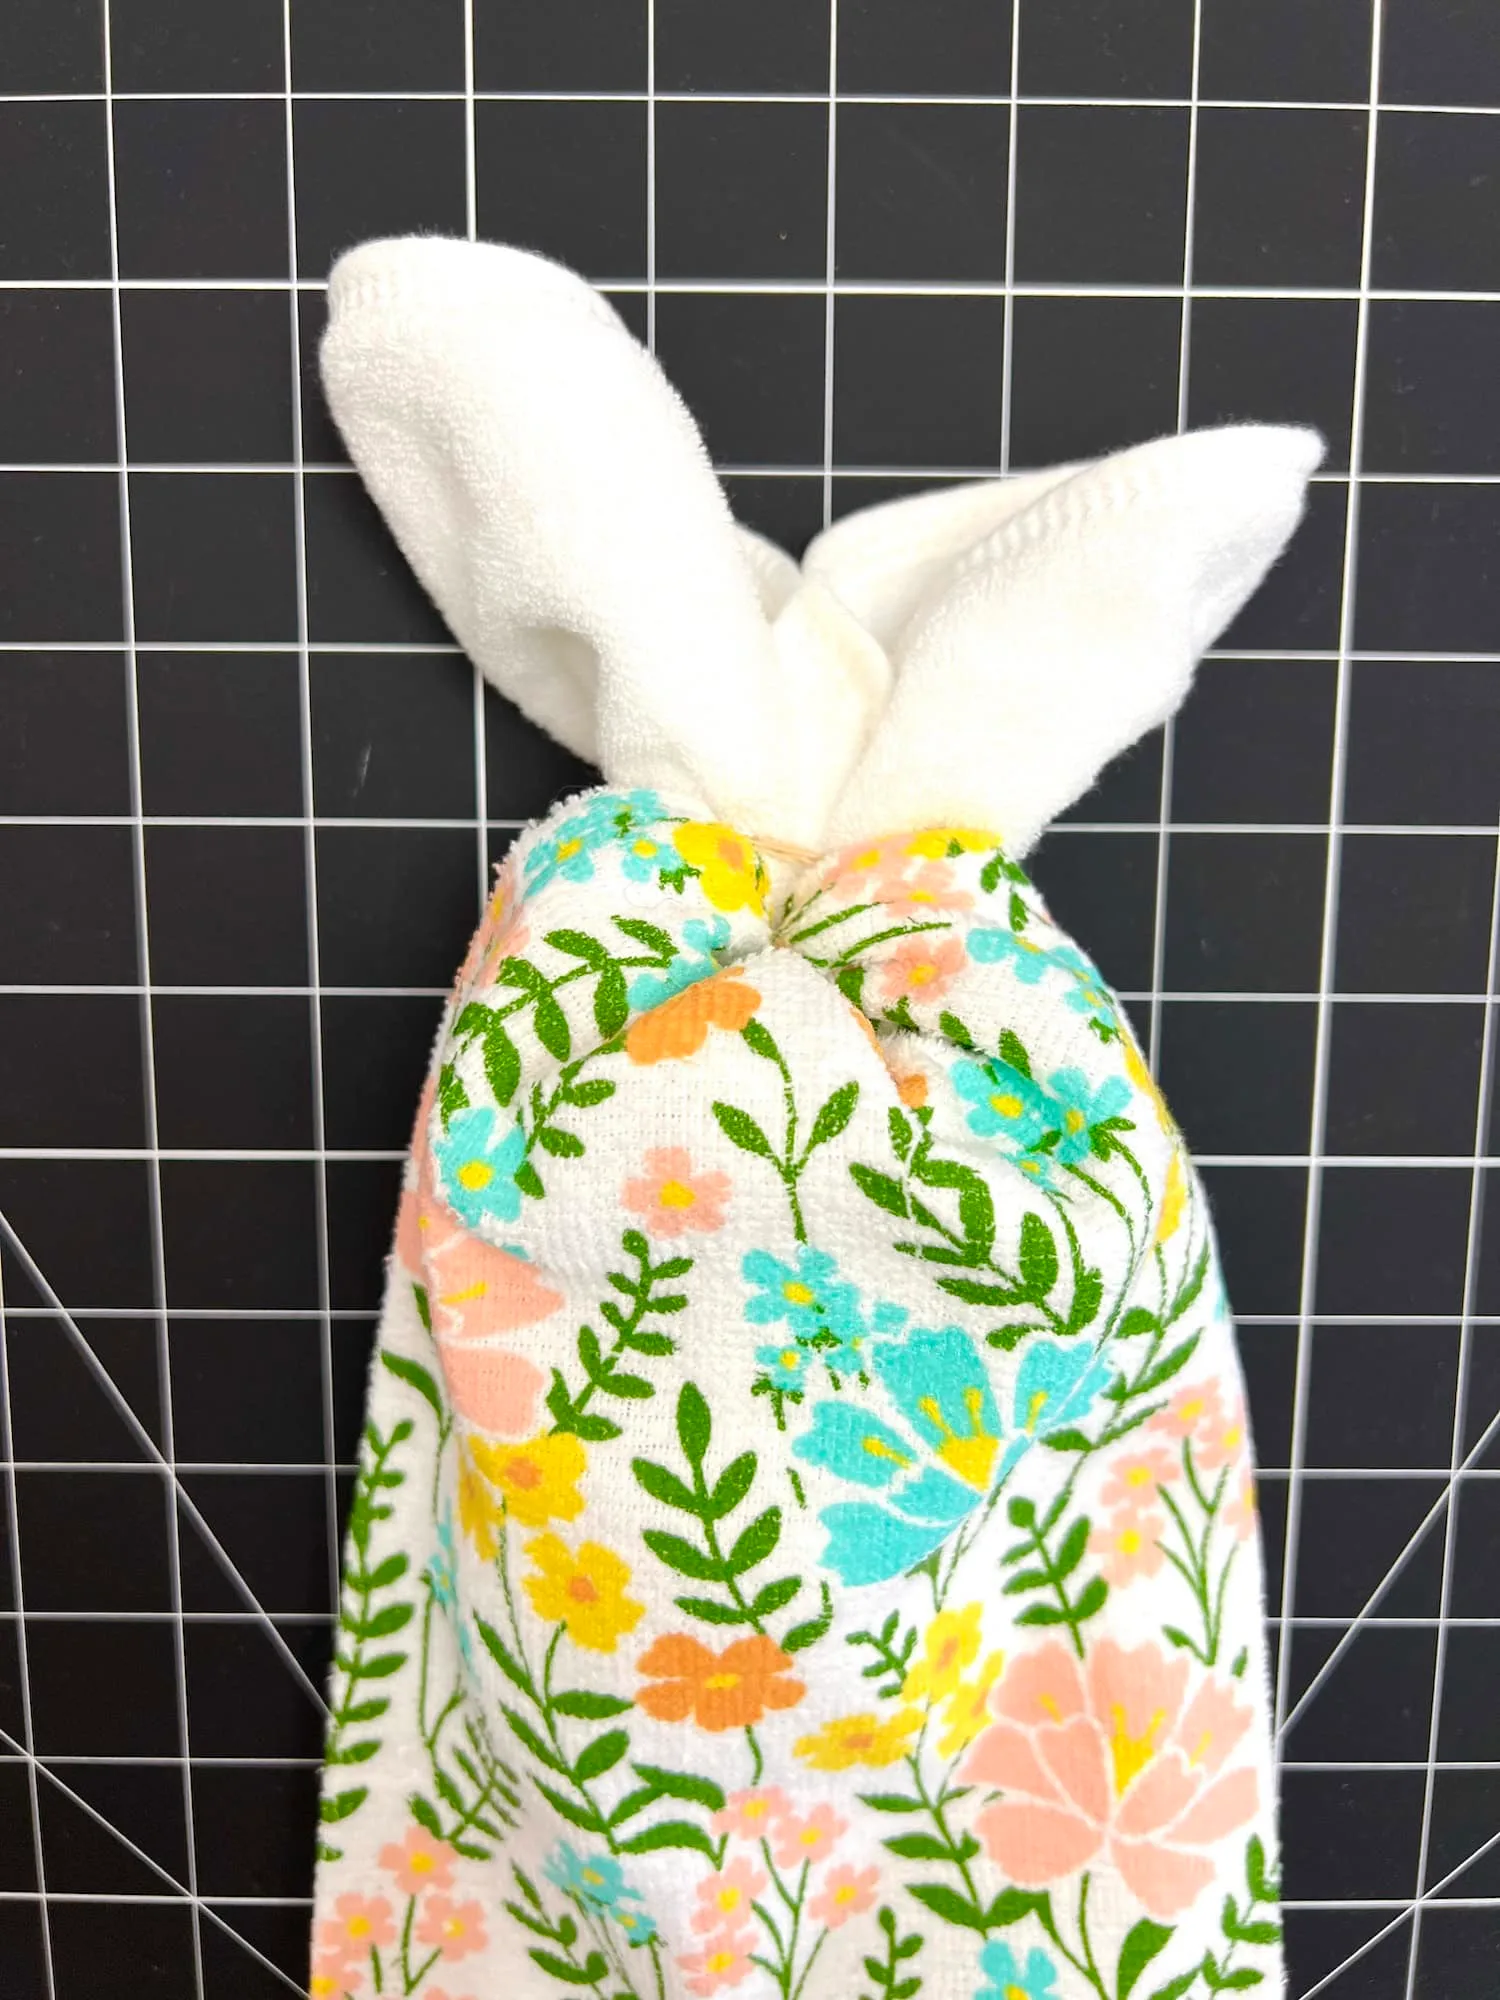
Wrap a rubber band around the washcloth bunny ears, just above the dish towel. Alternatively, you could just tie ribbon in a bow to secure.
Wrap a piece of ribbon around the base of the “head” to tighten and secure. Tie it in a bow.
Alternatively, you could use a rubber band or hair tie to secure, then later cover it with ribbon.
Place the washcloth in between the towel layers, just underneath the head.
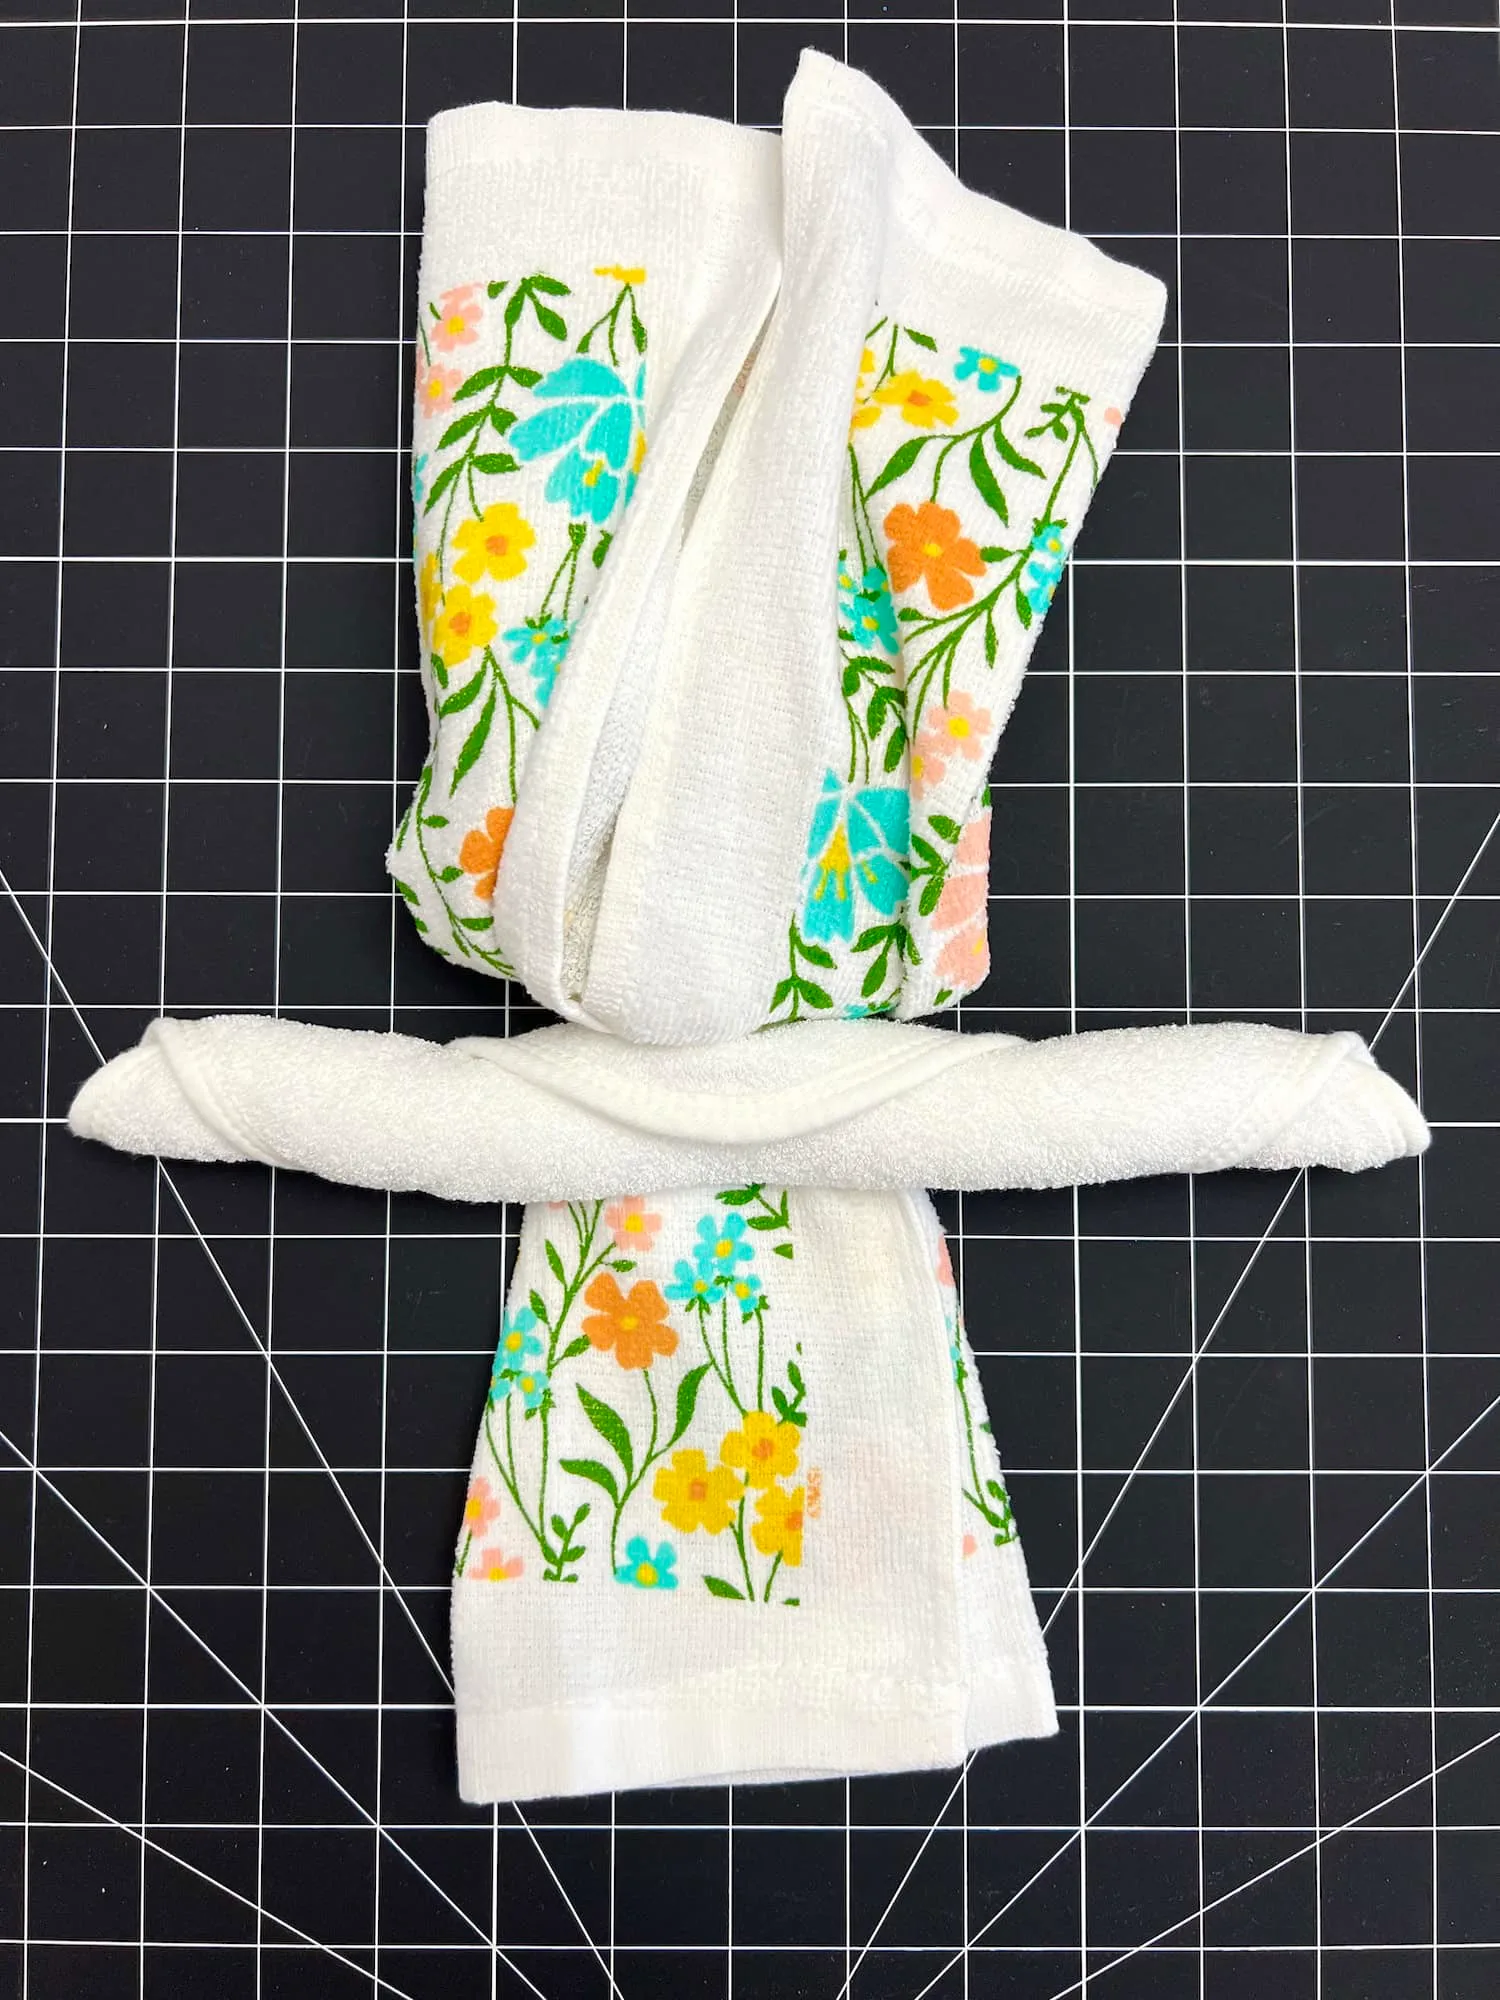
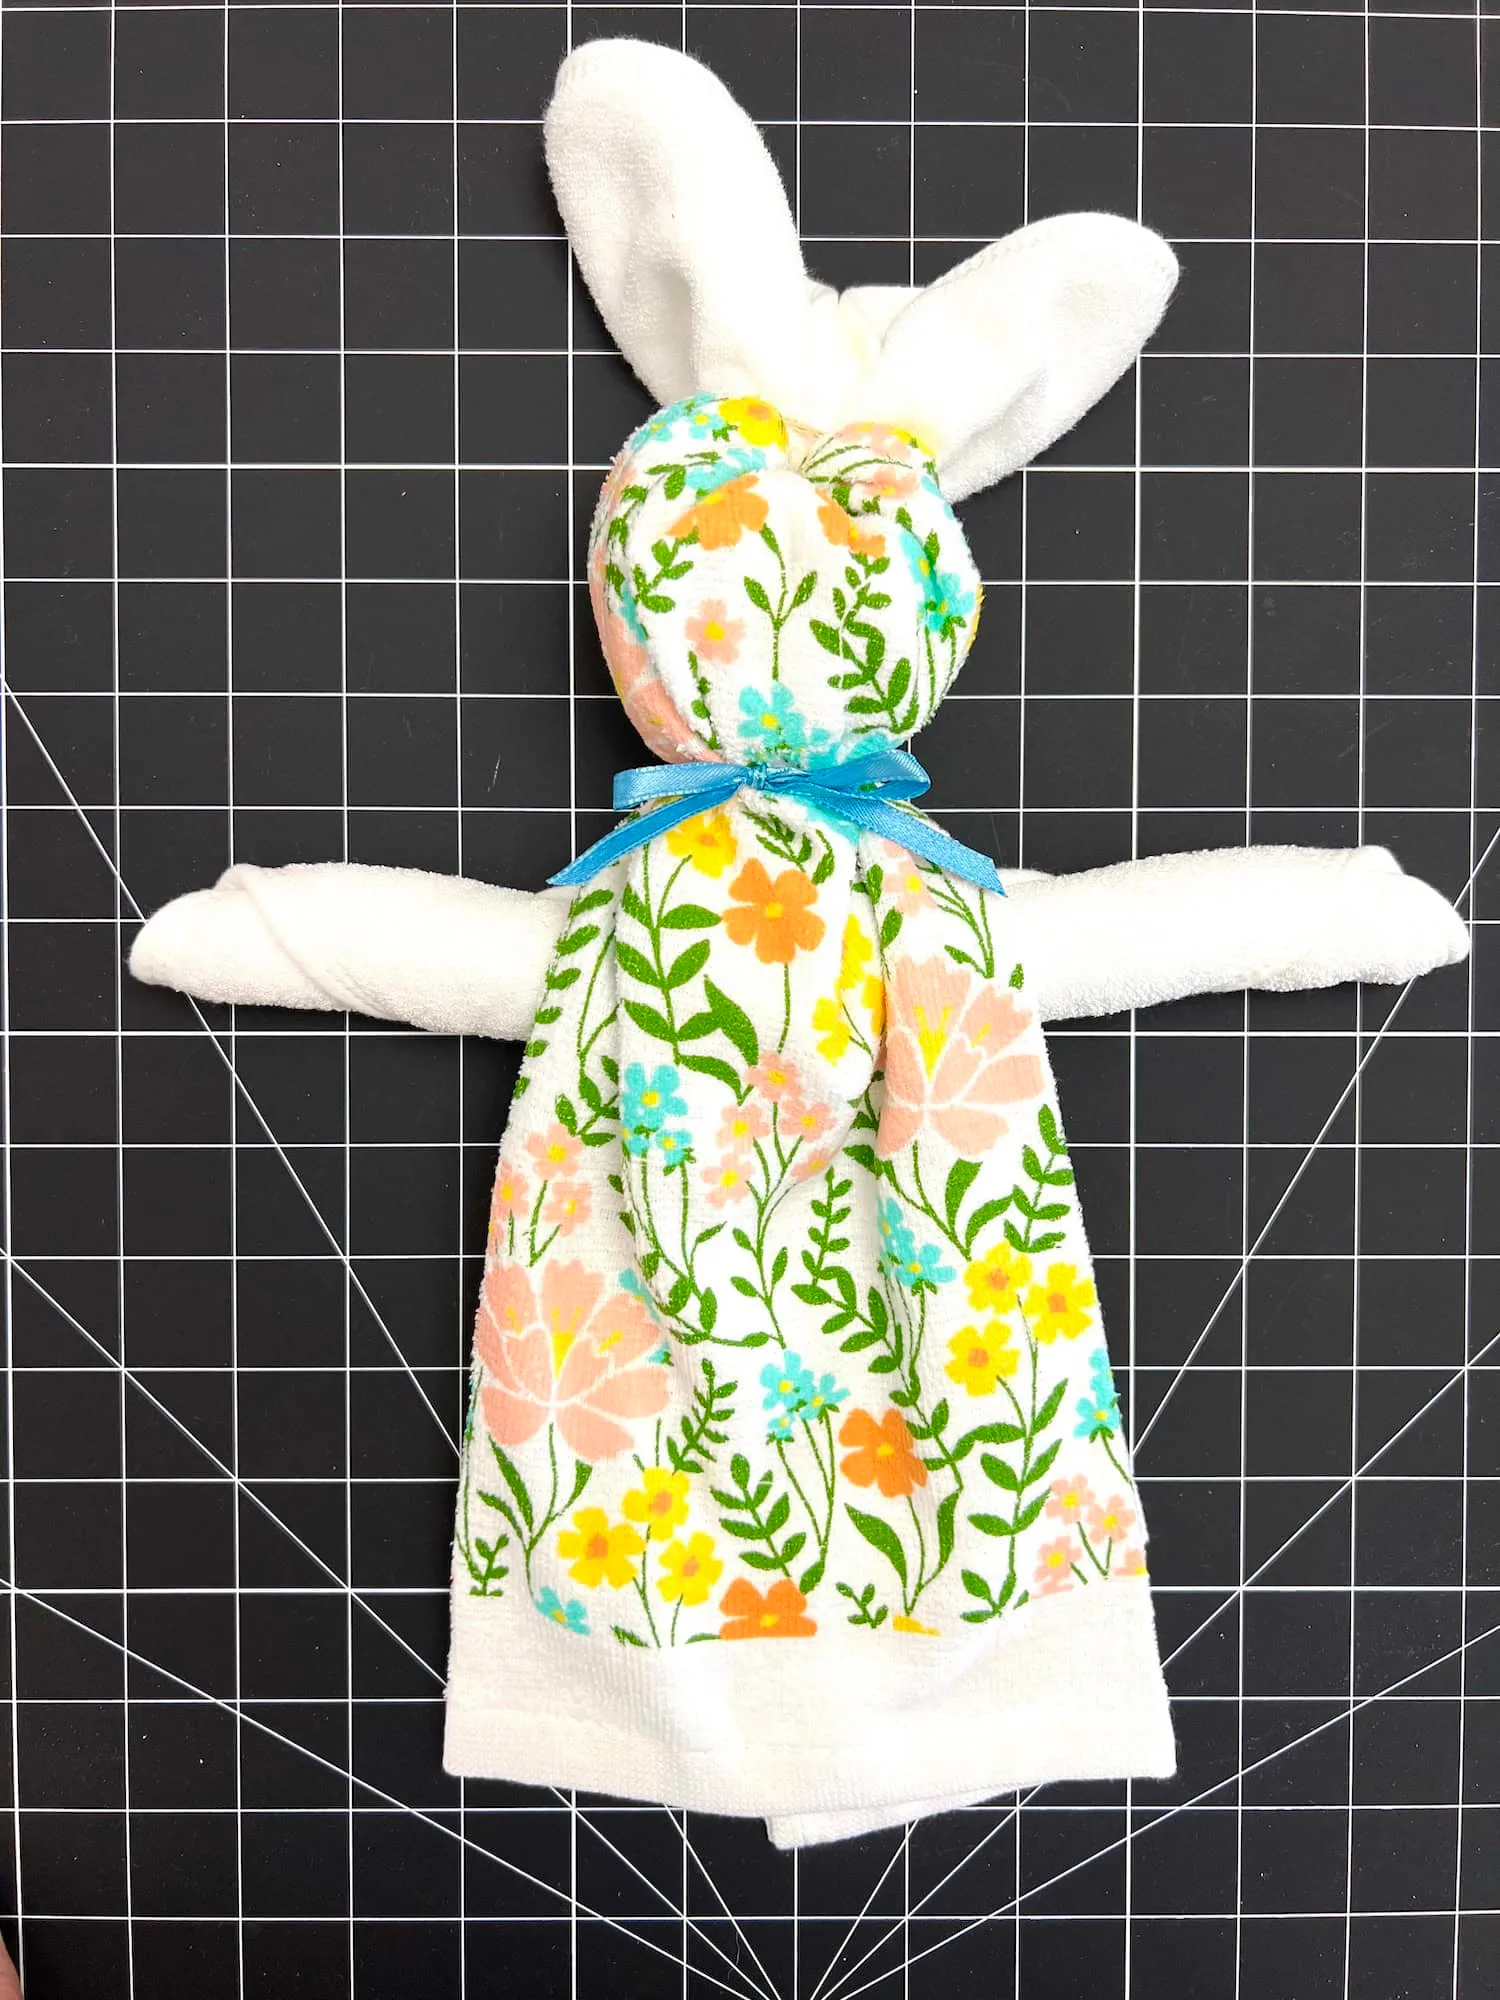
Tie a ribbon around the dish towel just underneath the arms. Alternatively, you could use a rubber band to secure first, then add a ribbon over the rubber band later.
Step 6
Bring the ends of the arm washcloth to the front of the bunny body
Wrap ribbon around the ends and tie in a bow. (Helpful Hint: Tie the bow an inch or so up the arm so that you get all of the layers of the washcloth secured.)
Alternatively, you could secure first with a rubber band and then cover with a ribbon.
Step 7
It is time for the finishing details.
I went back to the ears and tied a ribbon over the rubber band on top of the head.