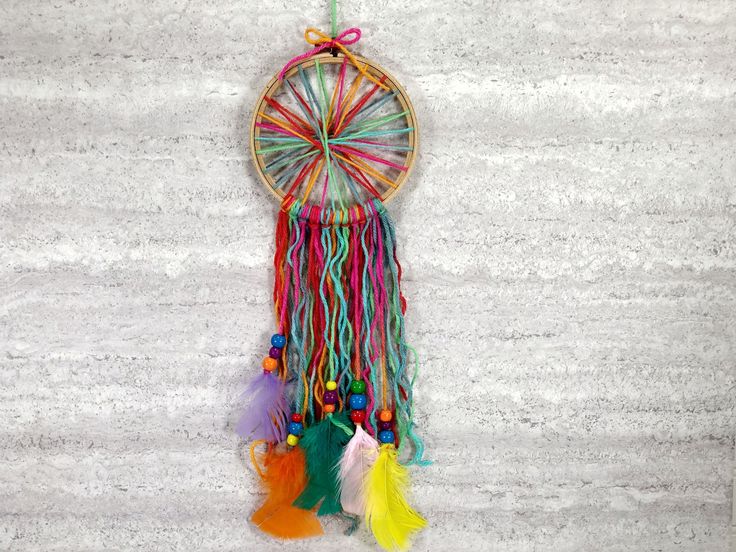
Creating your very own DIY dream catcher can be such a fun and creative project to add a touch of whimsy to your space! With just a few simple materials like a hoop, some yarn, and decorative accents, you can craft a beautiful dream catcher that reflects your unique style. Don't worry about perfection, let your creativity flow and enjoy the process of making something special that will bring a bit of charm to your home. So go ahead, grab your supplies, and dive into this delightful craft project to create a dream catcher that will catch both dreams and compliments from your friends!
Supplies
Colorful Rainbow Yarn
Embroidery Hoop
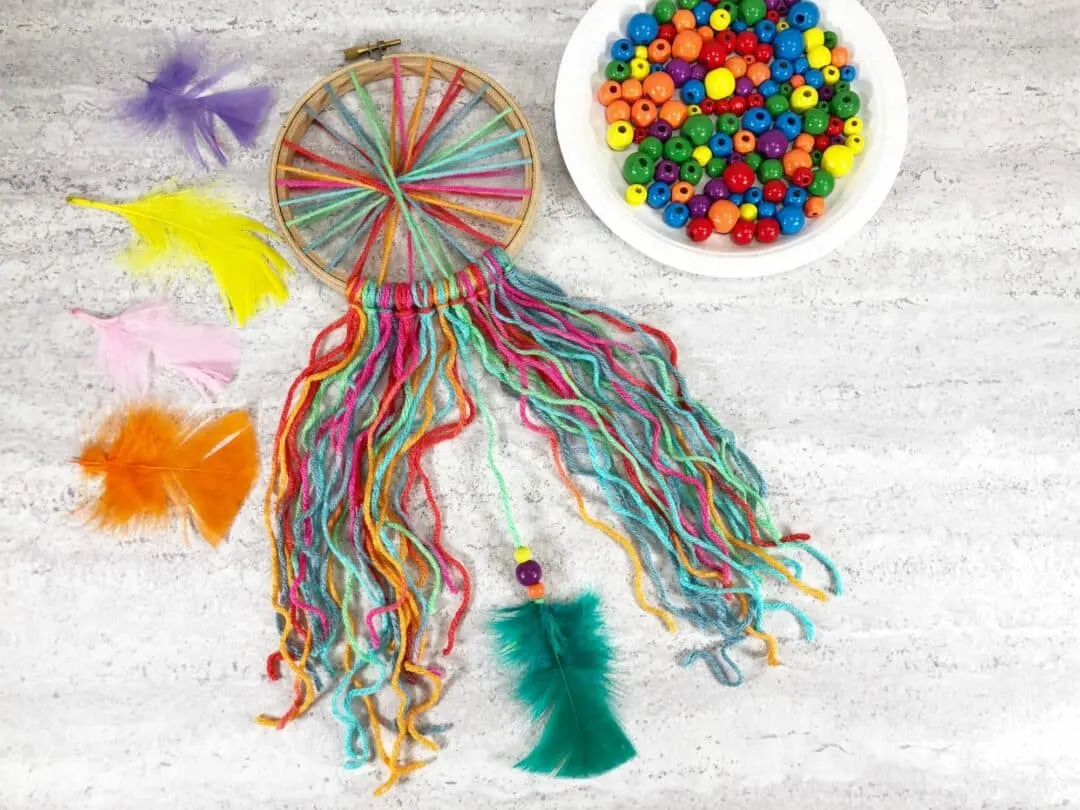
Assorted Wooden Beads
Assorted Feathers
Ruler
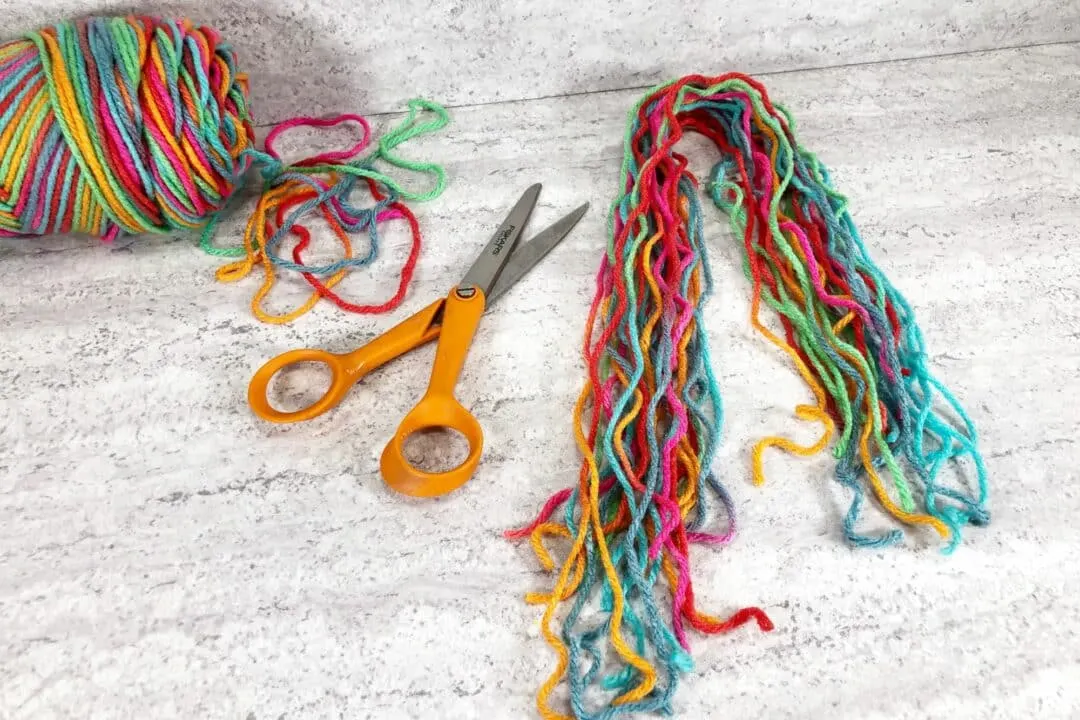
Scissors
Directions
Step 1
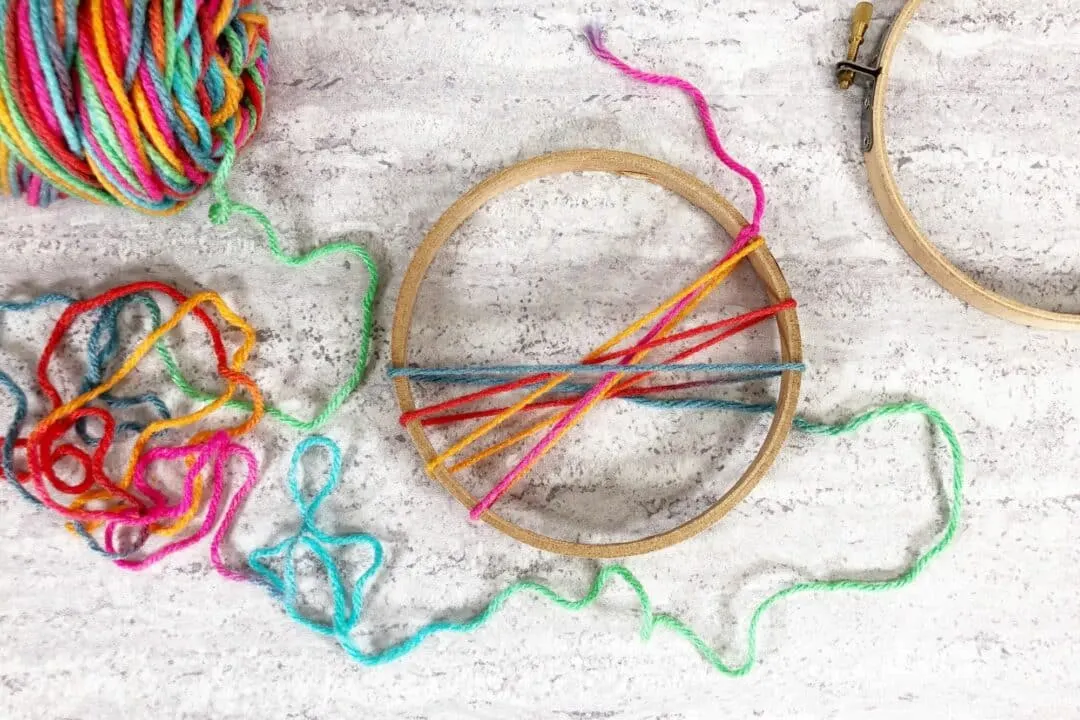
Loosen the screw at the top of the embroidery hoop and separate the rings.
Using the yarn, tie a double knot around the inside ring and trim the yarn tail with scissors.
Step 2
Hold the ring in one hand and tightly wrap the rainbow yarn around the outside edge of the ring in a circular pattern.
Step 3
Tie off the yarn with a double knot and trim the yarn tail with scissors.
Step 4
Place the outer ring of the embroidery hoop on top of the inside ring and then tighten the screw at the top.
Step 5
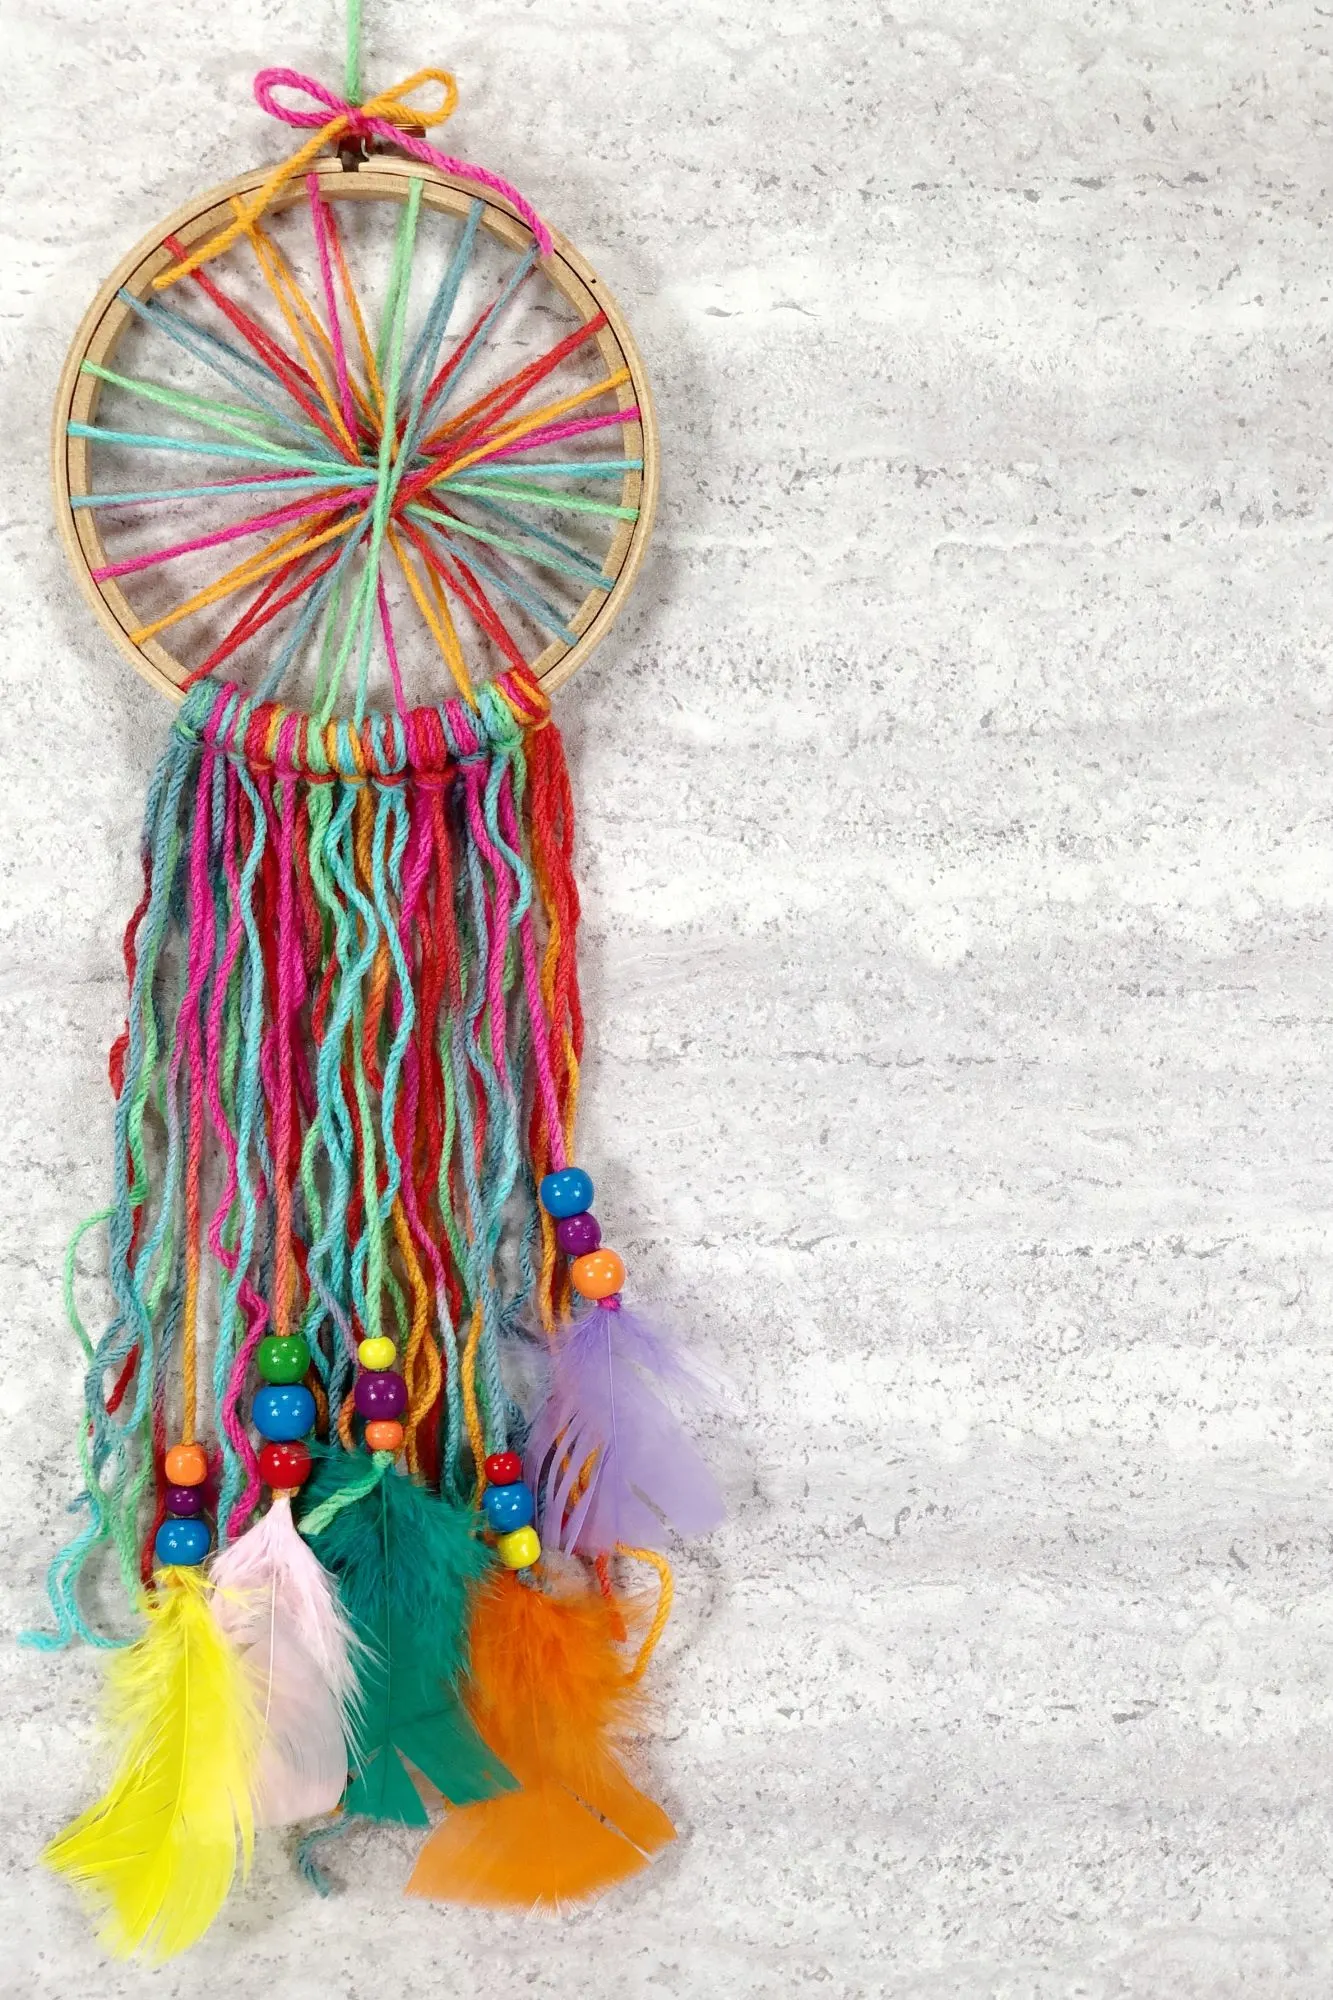
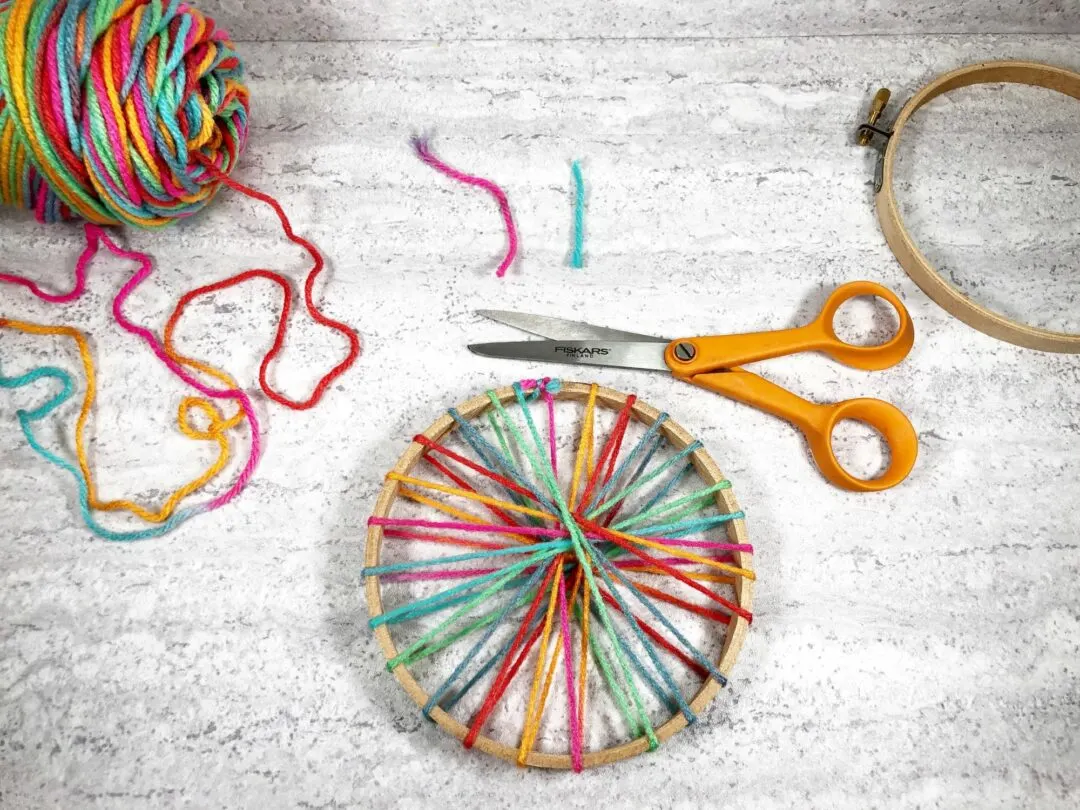
Cut 24 lengths of yarn that are 24” (2 feet) long.
Step 6
Attach the yarn, two strands at a time, to the bottom of the embroidery hoop, using a luggage tag loop method.
Step 7
String wooden beads onto several of the lengths of the yarn. Then tie a colored feather to the end of the yarn with a double knot.
Slide the wooden bead down the yarn, covering the feather’s quill.
Step 8
Measure and cut two 12” lengths of yarn. Tie the first in a loop through the screw, securing it with a double knot.
Tie the second piece of yarn around the screw in a bow.