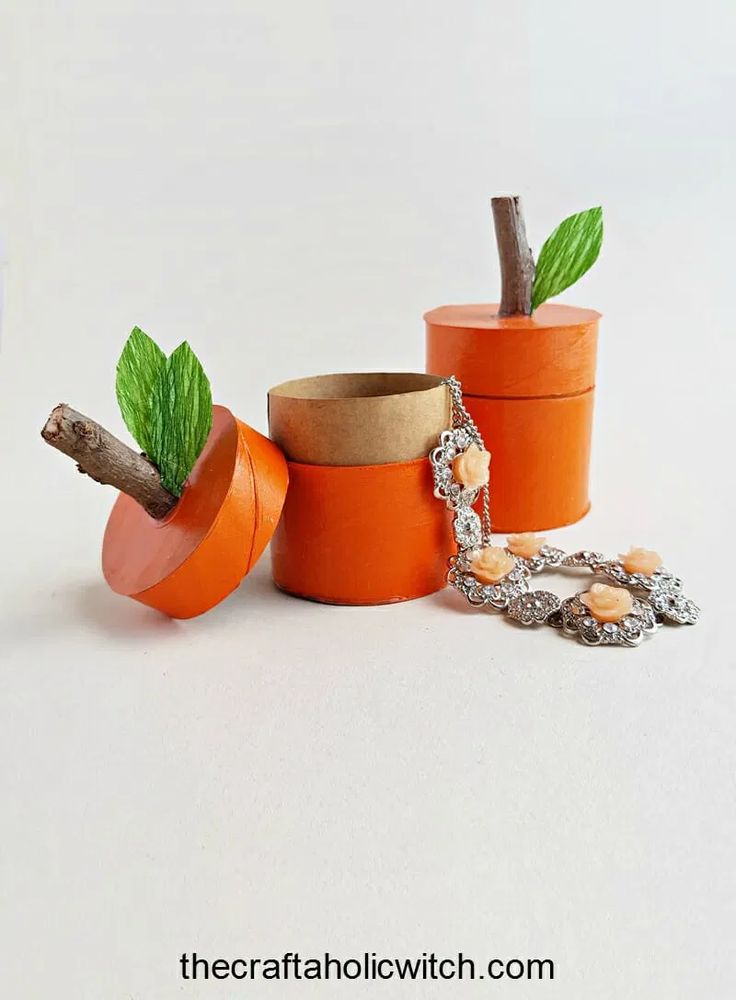
DIY Recycled Pumpkin Box
Looking to add a touch of eco-friendly charm to your fall decorations? Why not try creating a DIY Recycled Pumpkin Box! Not only will you be reducing waste by upcycling materials, but you'll also have a unique and sustainable decor piece to proudly display. So grab your crafting supplies and get ready to add a dash of creativity and sustainability to your autumn decor!
List of Supplies
Toilet paper roll
Brown cardstock paper
Ruler
Scissors
X-acto knife
Craft glue
Pencil
Acrylic paint
Paint brush
Dry twig
Learn how to make a recycled pumpkin box from toilet paper roll!
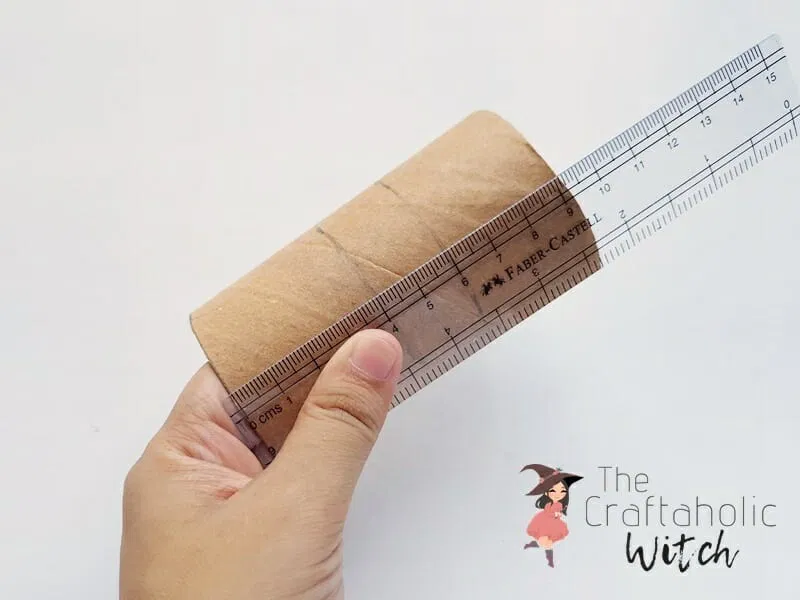
Step 1
First of all, determine the sizes for the box and the lid. Use a pencil and a ruler to measure and mark the determined height for the box and the lid.
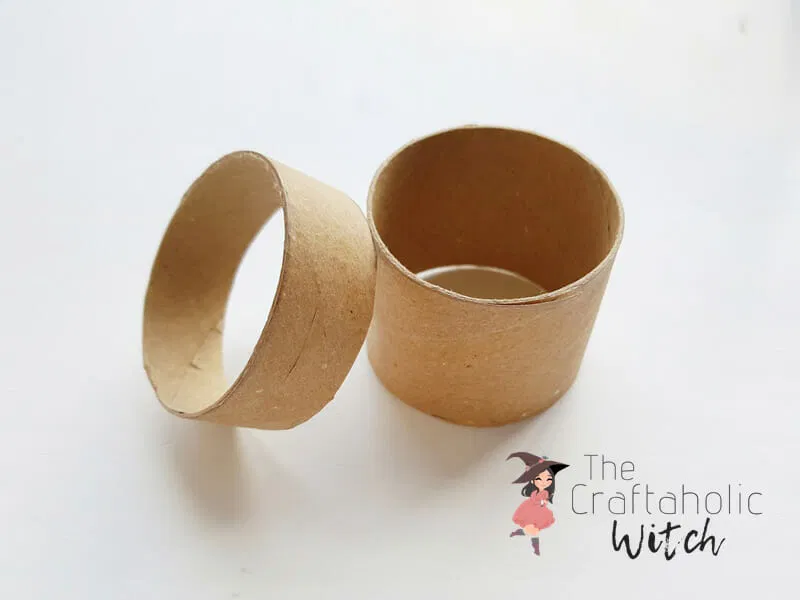
Step 2
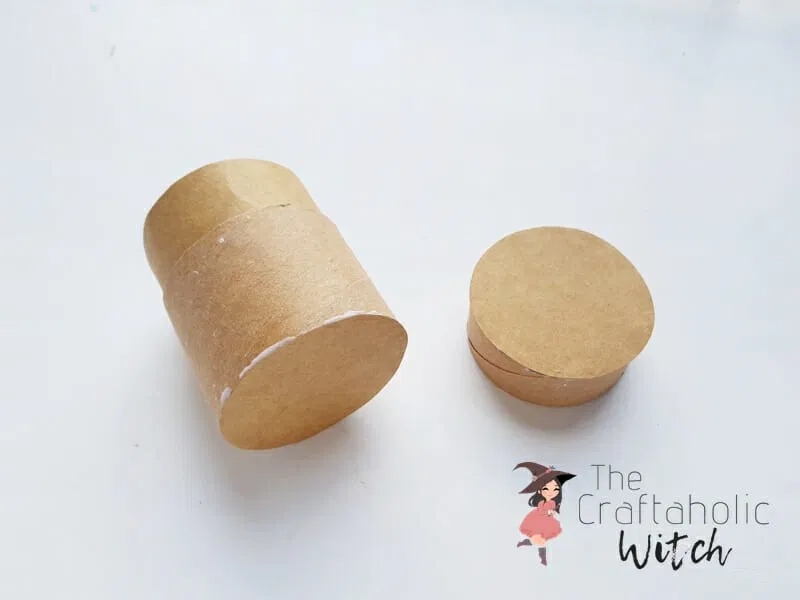
Cut out the parts for the box and the lid from the toilet paper roll by using an x-acto knife.
Step 3
Cut out a strip of a cardstock paper. The length of the strip should be long enough to wrap around the roll once and the width should be the sum of the box and lid’s height. Roll and place the cardstock strip inside the box roll cutout, and make sure that any 1 end of the rolled cardstock paper is leveled with either end of the box roll. Use a pencil to mark the edge where the strip covers 1 roll inside the box roll.
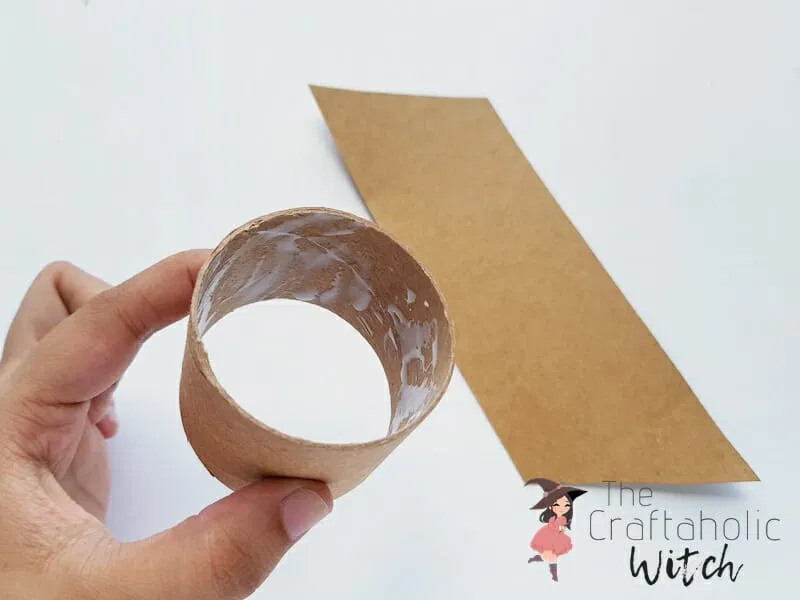
Step 4
Take out the cardstock roll from the box roll and apply craft glue on the inner surface of the box roll.
Step 5
Neatly roll the cardstock strip and place it inside the box roll. Press the cardstock roll against the inner glued surface of the box roll to make sure that they are glued nicely.
Step 6
On a cardstock paper place the roll and trace around its outer border on the cardstock. Cut out 2 circles; 1 for the bottom side of the box and 1 for the top side of the lid. Apply a thin line of glue around the border of the circle cutouts.
Step 7
Take the box roll and carefully place it on the glued bordered circle cutout; making sure that the box roll’s open end is perfectly sealed with the cardstock circle. Similarly, attach the other circle cutout with the roll prepared for the lid.
Step 8
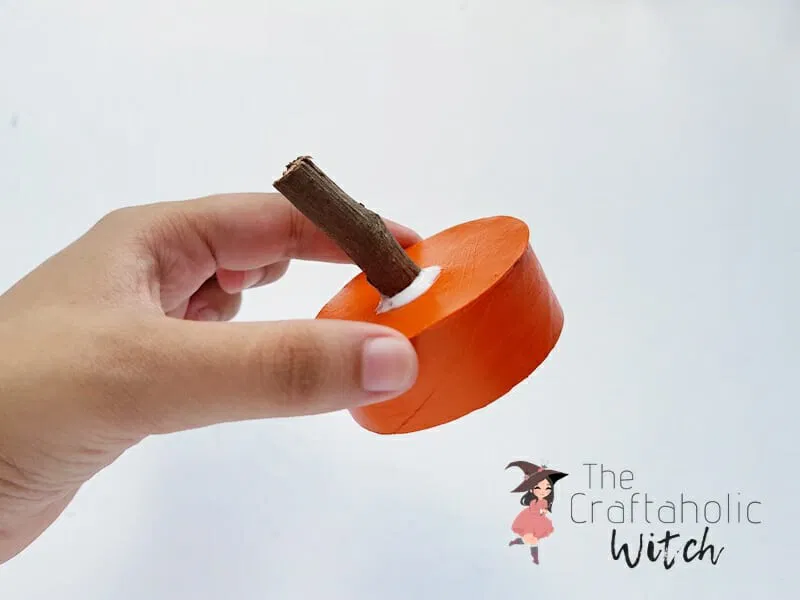
Paint the box and lid’s outer surface using acrylic paint. I’m using orange acrylic paint. Apply 2 coats (2nd coat should be done after th 1st coat dries) of paint if required.
Step 9
Once the paint dries completely, glue a small dry twig on the center of the lid’s top and tada!
No comments
Write a comment