DIY Jewelry Organizer
Creating your very own DIY jewelry organizer can be such a fun and rewarding project! Not only does it allow you to personalize your organization space to match your style and needs, but it also gives you a creative outlet to showcase your favorite pieces. So gather your crafting supplies, unleash your creativity, and enjoy crafting a unique and functional jewelry organizer that perfectly complements your jewelry collection!
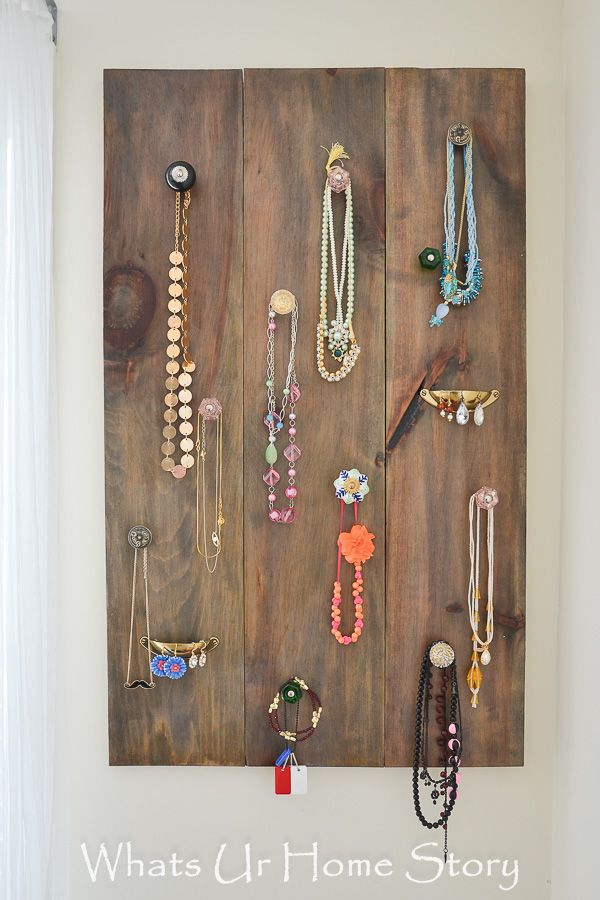
To make this 36″ x 21.5″ jewelry display you’d need;
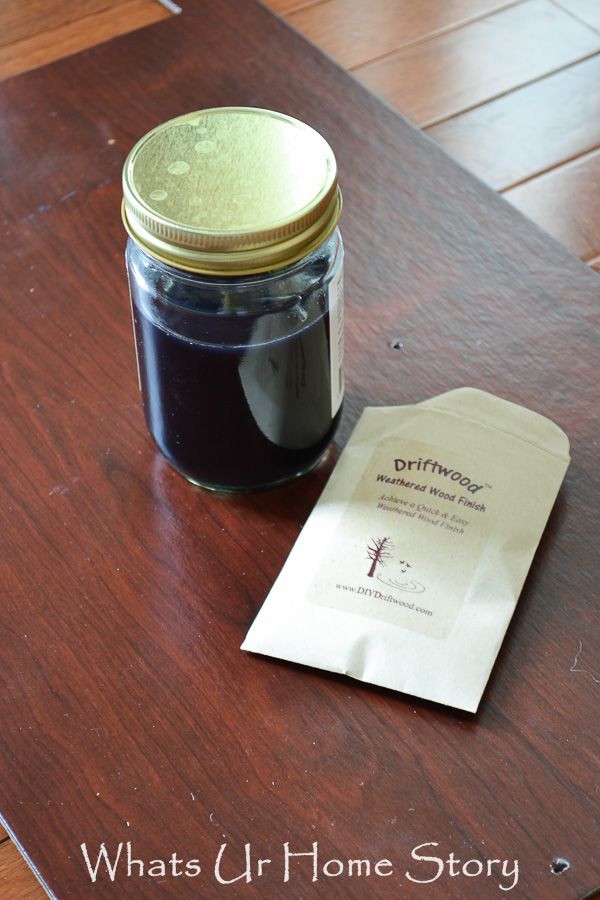
Place the panels over your work surface aka. on a heap of old newspapers in your family room and brush the finish on. In the pic below the first panel does not have any coat on while the other two have a coat of the driftwood finish on.
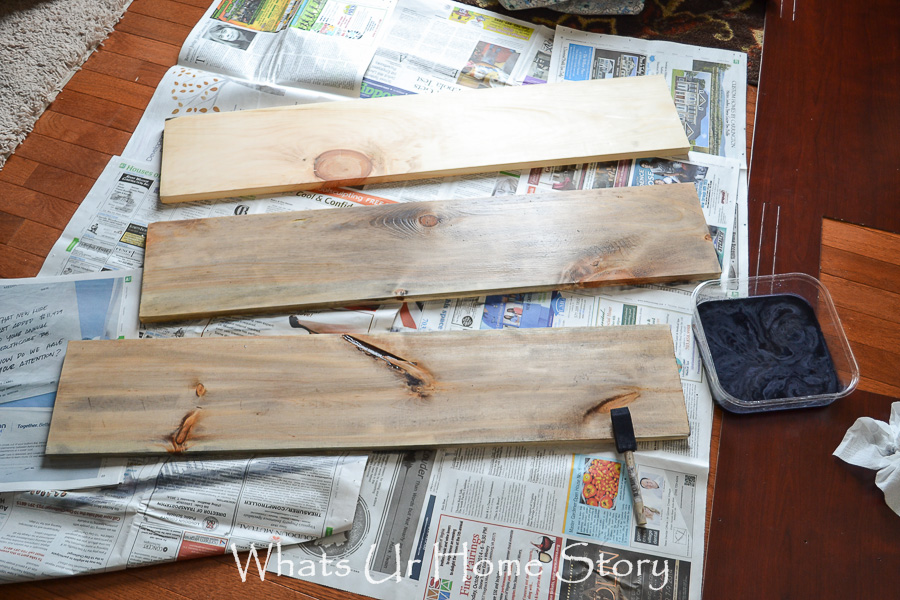 You can see the color difference even better in the below pic.
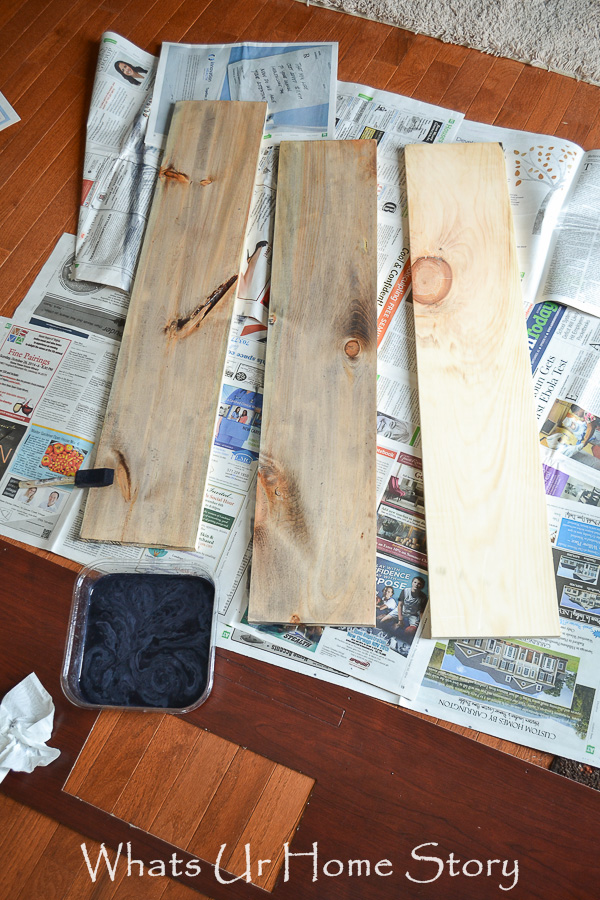
After 2 coats the panels were looking a lot darker from where we started. Make sure to coat the sides too as these will be visible.
I wanted the piece to be darker so I added two more coats (4 coats in all). I think the extra 2 coats made all the difference. Love how the driftwood finish brings out the knots and dents in the wood.
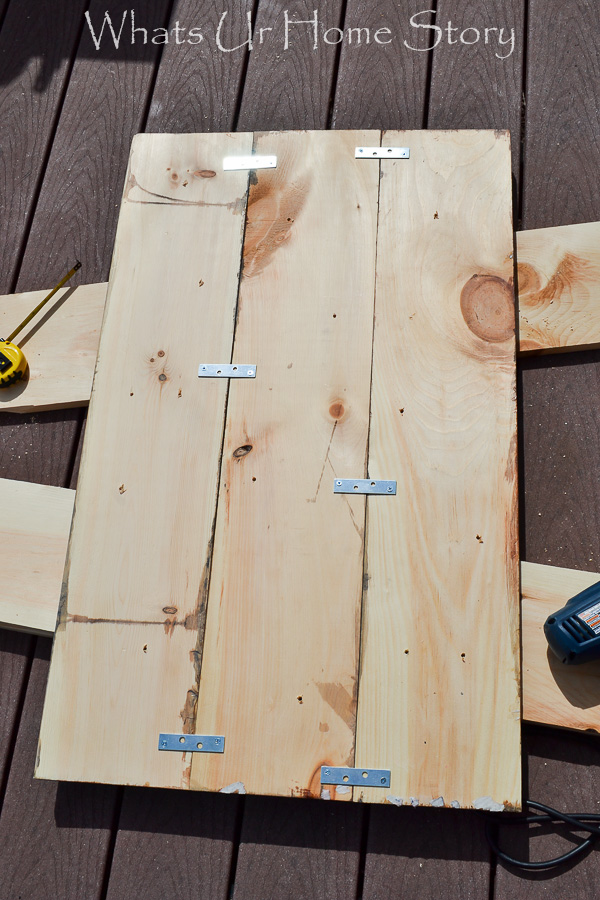
Once the panels are dry turn them upside down and screw on the mending plates. This pic is before we screwed on the longer mending plates.
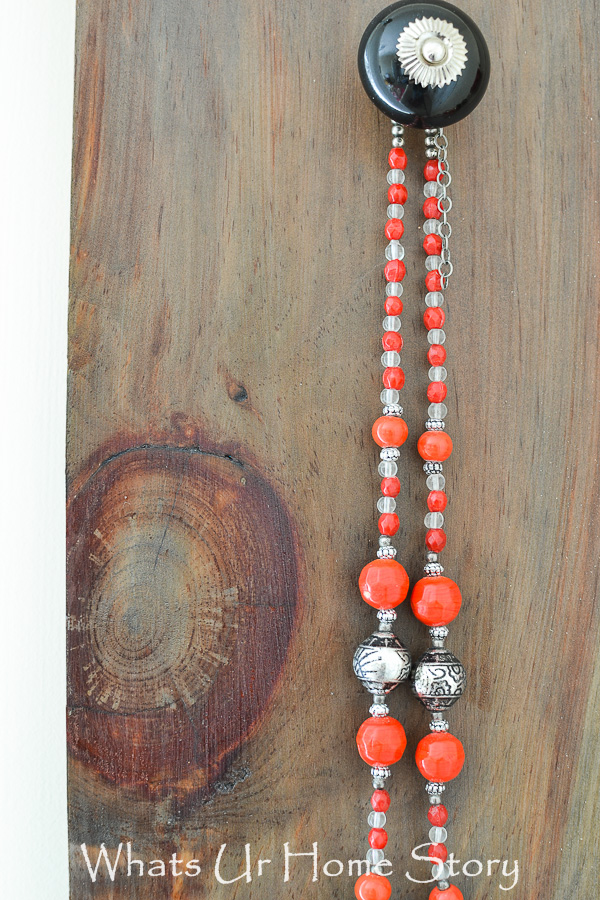
Arrange the knobs on the piece till you are pleased with it.
Hang in the room with picture hanging hardware.
