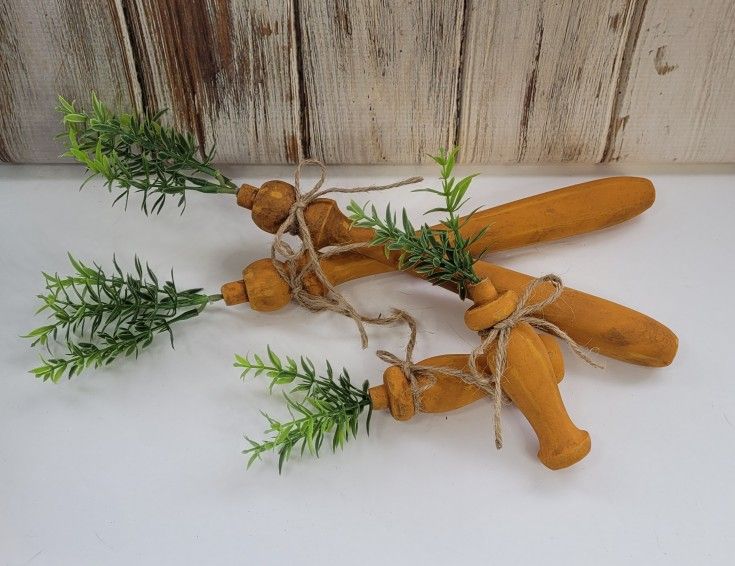
DIY Wooden Spindle Carrots
If you're looking to add a touch of charm to your home decor or Easter festivities, DIY Wooden Spindle Carrots are a fun and creative project to try out! These DIY Wooden Spindle Carrots make for a lovely addition to your seasonal decorations, and they are sure to bring a smile to your face and those around you with their whimsical touch!
Spindle Carrot Supplies
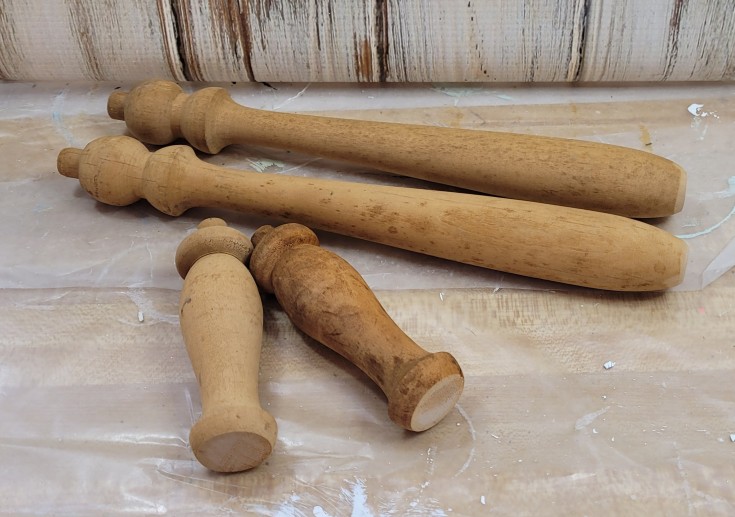
Start by cutting your spindles to the desired length for carrots. I cut mine so I could make two long wood carrots and two short.
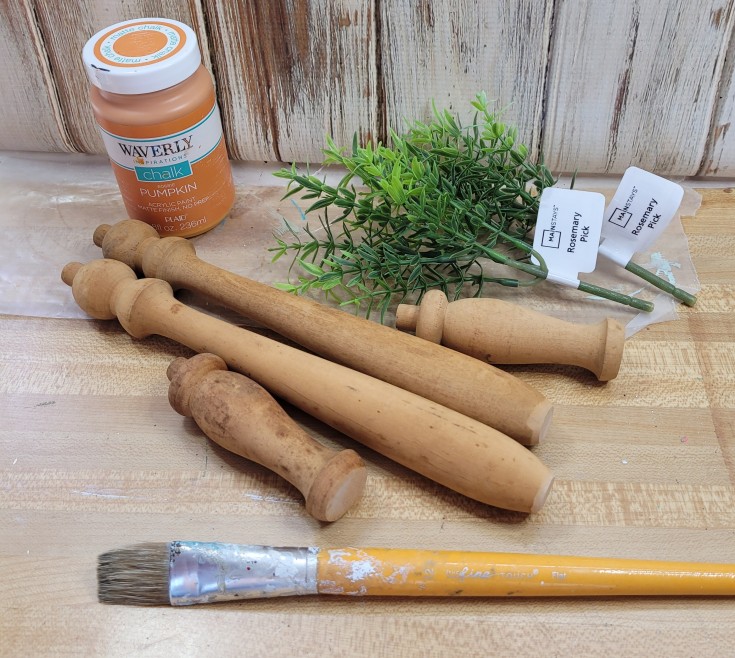
Then give the wooden spindle carrots one or two coats of orange paint. (I used Waverley’s pumpkin chalk paint).
Once the paint dried, I added some water-based gel stain for an antique effect.
Then I sanded the spindles to get the distressed look that I so desire.
Next pull the greenery off of the lower stems, and cut the ends off to make them easier to stick several into the ends of the smaller wooden spindle carrots.
For the longer carrots just cut the top portion off of the green sprigs.
To add the greens for the wood carrots just squirt some hot glue into the holes and push the ends of the sprigs into the holes. Hold till dry!
Tie a piece of jute around the tops of the wooden spindle carrots, and that’s it! So simple yet cute!