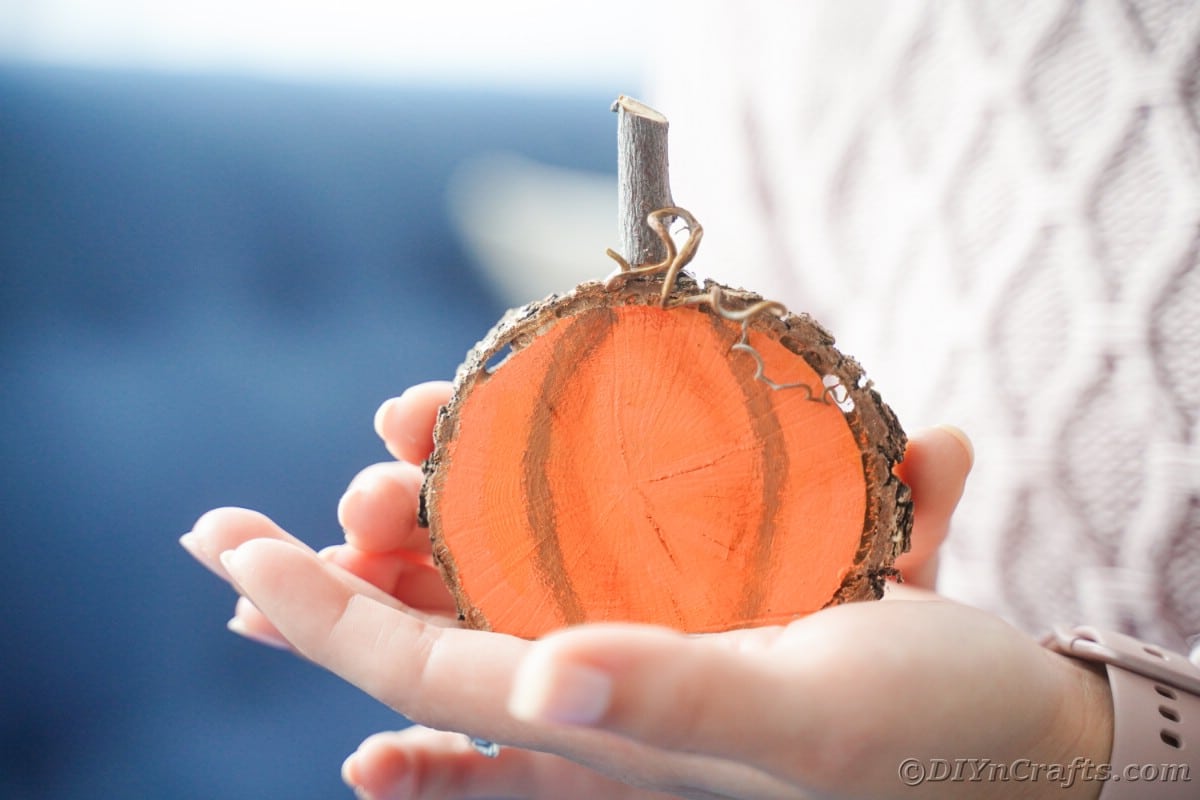
DIY Painted Wood Slice Pumpkin
Looking to add a festive touch to your fall decor? Why not try your hand at making a DIY Painted Wood Slice Pumpkin! This charming project involves using a wood slice as the base for your pumpkin shape and then painting it with vibrant orange paint and a cute little green stem at the top. Not only is it a fun and creative way to celebrate the season, but it also makes for a wonderful handmade decoration that will surely impress your friends and family. So gather your supplies, unleash your inner artist, and get ready to create a delightful pumpkin masterpiece that will bring a touch of autumn cheer to your home!

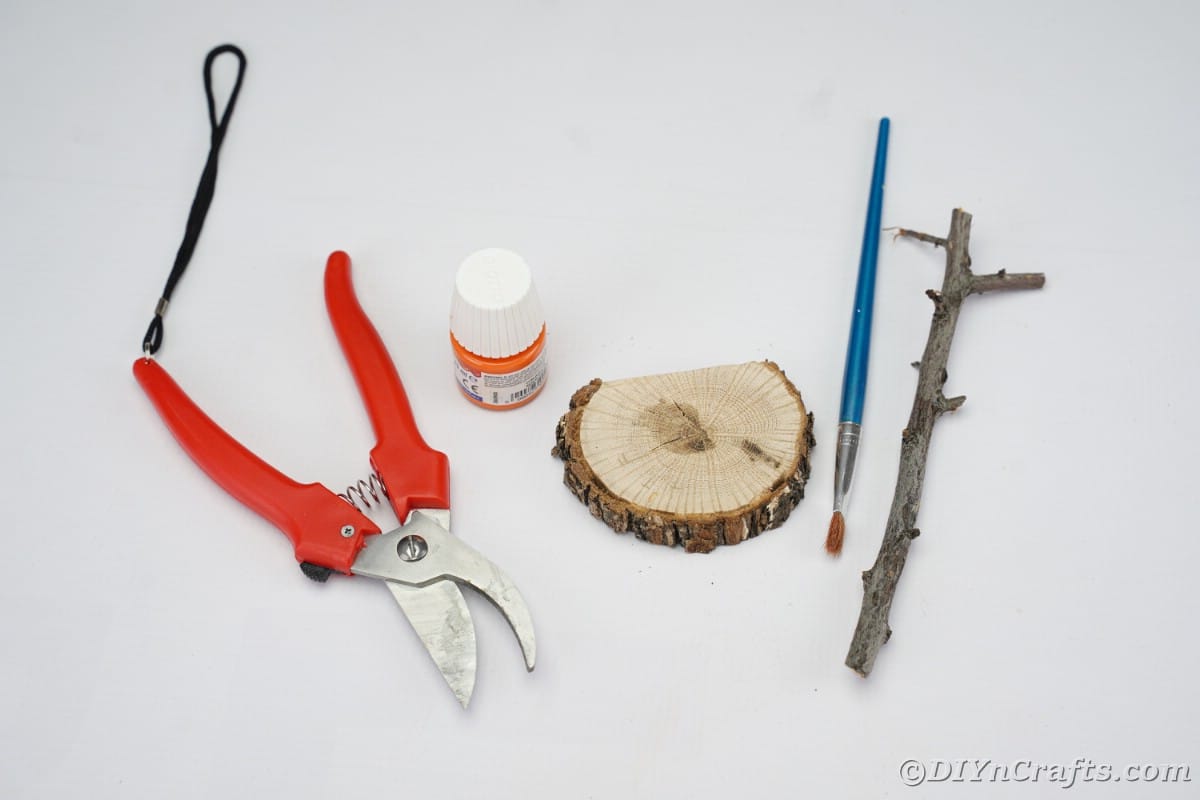
Supplies Needed
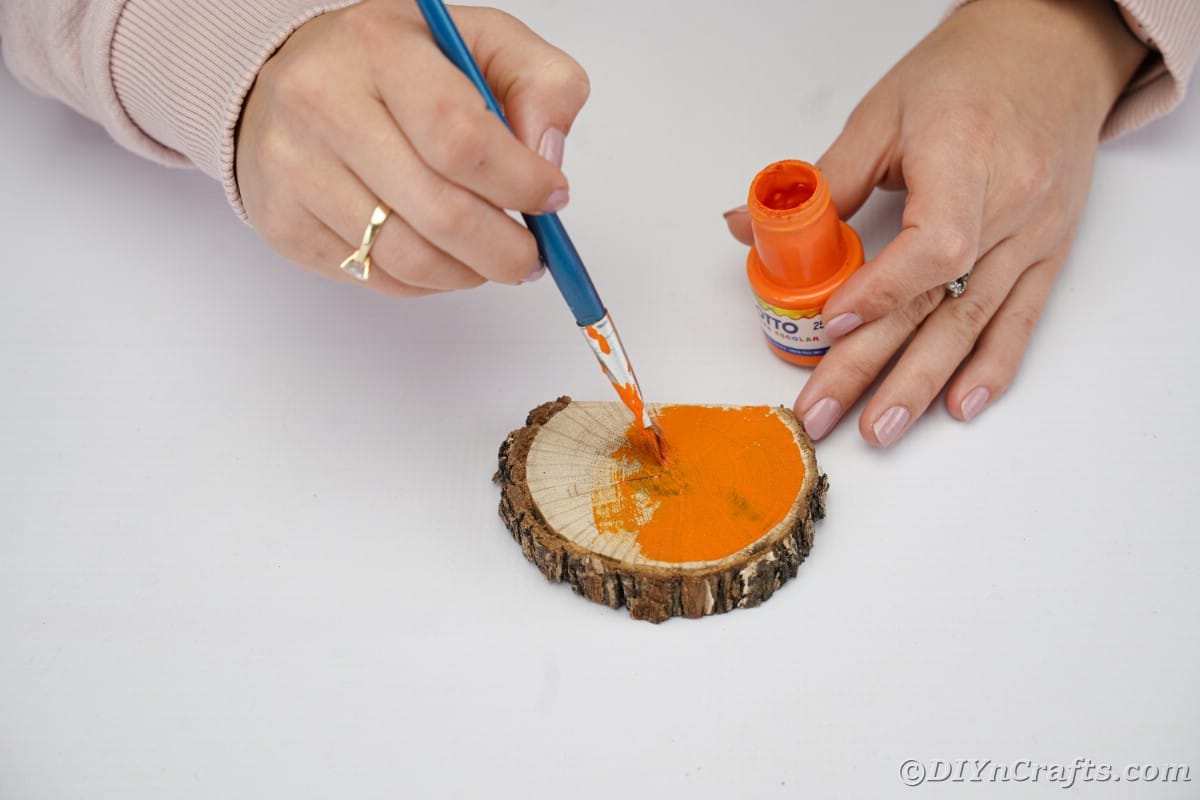
Let the paint dry for a few minutes before using red craft paint to draw a few curved lines onto the pumpkin. This gives it a natural pumpkin look.

If you are planning to paint both sides, then set it aside to dry fully before painting the second side. If not, just let the front side dry before moving to the next step.
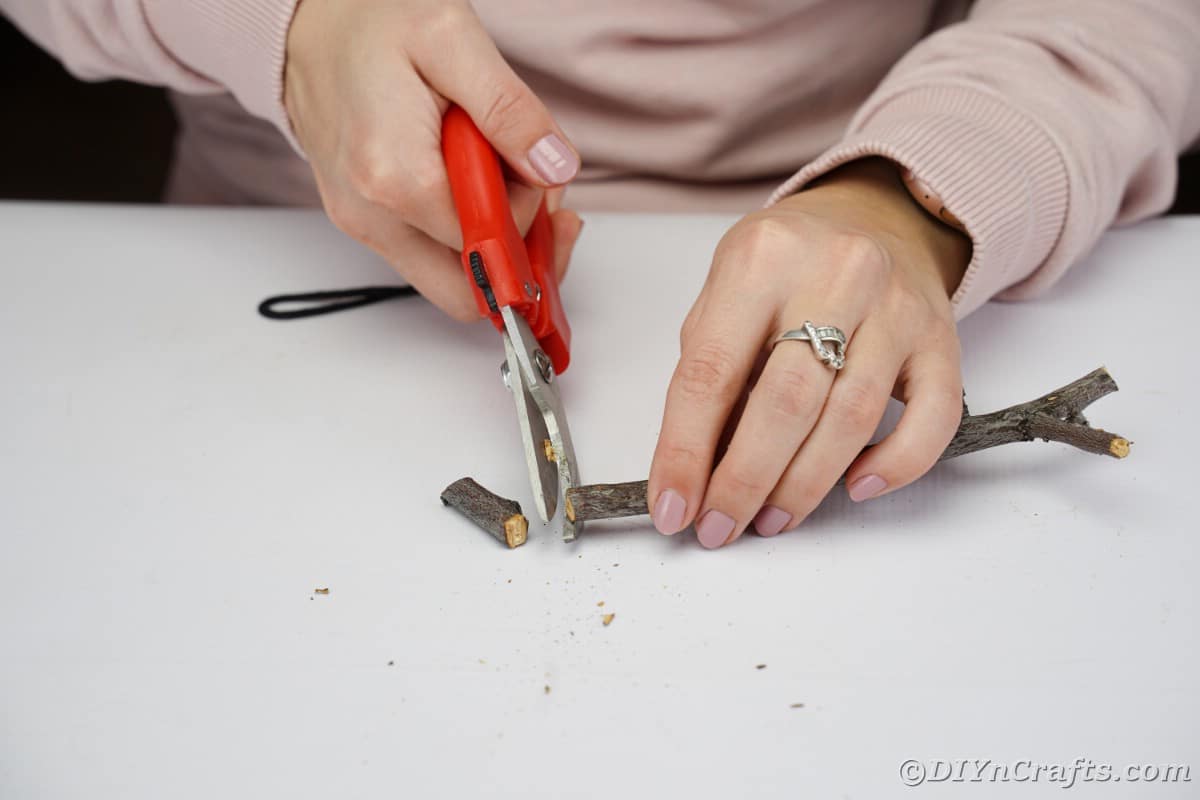
Cut a 1" piece of twig or branch and set it aside. Can use wood, a cork, twig, branch, or small pinecone for this if you prefer.
Once the paint on your pumpkin has dried completely, attach a spring of wire to the top of the wood slice.
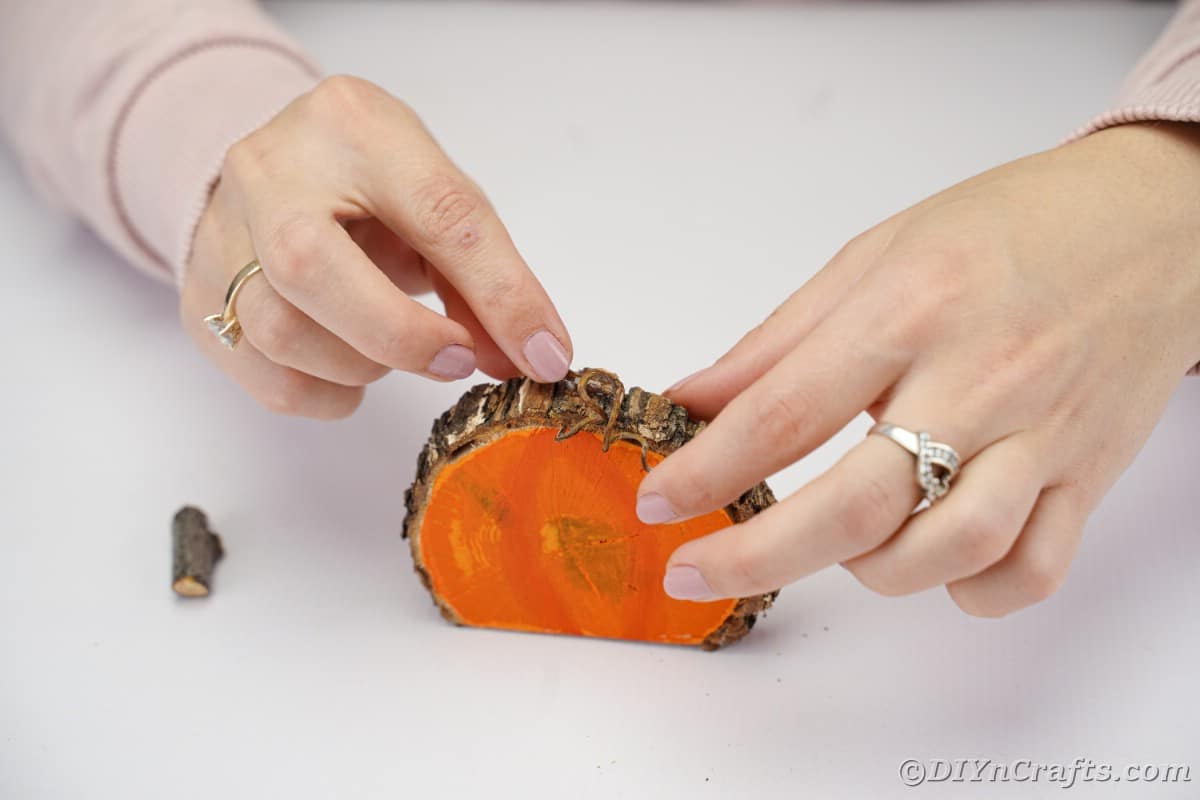
Next, glue the "root" made out of the twig to the top alongside or on top of the wire piece.
Once the glue has dried, your pumpkin is ready to display.