Transform Plain Pillars: Easy DIY Candle Painting Tutorial (Floral Designs with Tea-Light Wax)
Want to give plain candles a fresh, personal touch? This easy DIY candle painting method uses coloured tea lights as paint to create raised, long-lasting designs on pillar candles. The technique is simple: melt coloured tea-light wax, dip a fine brush, and paint shapes directly onto a cooled pillar candle. Below you'll find a quick overview, materials list, step-by-step instructions, and helpful tips to get pretty floral results.
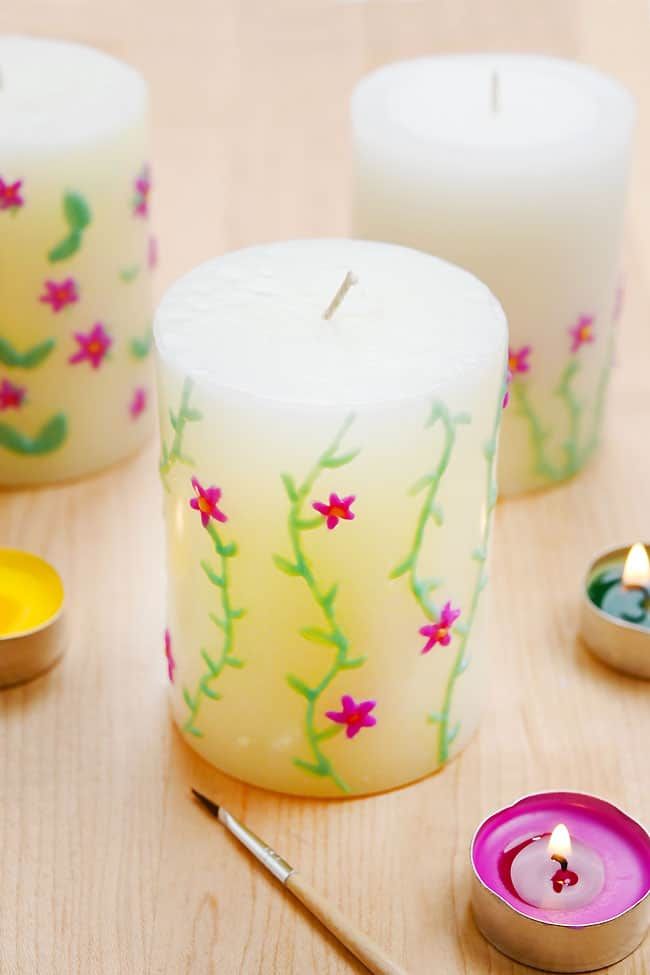
Materials:
White pillar candle
Coloured tea lights (for melting)
Equipment:
Lighter or match (to melt tea lights)
Paintbrush (thin, fine-tipped)
Toothpick (for corrections)
Paper towel
Safety note: Work on a protected surface, keep flammable items away, and be careful when handling open flames and hot wax. Extinguish tea lights after a small pool of wax has formed before using the wax if you prefer to avoid working directly over a flame.

Step 1: Gather supplies and prepare
Set up your pillar candle on a stable, flat surface. Light a coloured tea light and let a pool of liquid wax form. Use a fresh, thin paintbrush for detail work and keep a paper towel nearby for wiping the brush.
Step 2: Paint the flower stems
- Choose the tea-light colours you want to use. Light a tea light and allow a small pool of melted wax to form.

Dip the tip of the fine-tipped paintbrush into the pool of coloured wax — just enough to pick up colour — and then paint thin lines on the candle to form stems. Work carefully and keep your brush strokes confident.

Paint the stem shapes you want around the candle. If the colour looks faint, add one or two more thin layers of wax once the previous layer cools slightly to deepen the colour.

Wipe your brush on a paper towel after every few dips so wax buildup doesn’t smear your design. If excess wax collects on the brush, use the towel to clean it before continuing.

Small mistakes or uneven edges can be tidied with a toothpick by gently scraping away the excess wax while it’s still slightly soft, or after it cools for finer control.

Step 3: Add leaves and flowers
- Add short green lines for leaves along the stems. Use another coloured tea light (for example purple) to paint small petal shapes clustered at the top of each stem. Paint about five small petals so the inner edges meet, forming a simple flower.

If desired, add a contrasting dot in the centre of each flower (yellow is a classic choice) to make the blooms stand out.

Step 4: Repeat and vary
- Create additional clusters of flowers around the candle, varying stem height, angle, and petal colours to make the design look natural and balanced.

Continue adding groups of flowers until you come full circle. Space the flowers so the overall pattern looks pleasing from all sides. Keep wiping the brush between colours and layers.

Your painted candle is complete! Allow all wax to fully cool and set before moving the candle. Display as a decorative piece or give as a handmade gift.
Quick tips: Test on a spare candle first to practice pressure and brush loading. If you want a flatter look, melt very small amounts of coloured wax and apply thinner layers. Always supervise lit candles and never leave them unattended.