Easy DIY Paper Picture Frames — Make Custom Frames in Minutes
Making your own paper picture frames is an inexpensive, fast, and creative way to display photos, kids' artwork, or handwritten notes. Using basic supplies you likely already have at home, you can customize colors and patterns to match any decor or gift theme. Follow these simple steps to create a charming 3D paper frame in just a few minutes.
What You’ll Need
Ruler
Permanent markers or crayons
A4 paper sheets (or decorative scrapbook/wrapping paper)
Glue
Scissors
Pencil
Craft tip: Because part of the frame is rolled to create a 3D effect, favor small, repetitive patterns (like gift-wrap-style prints). Large continuous images may distort when rolled.
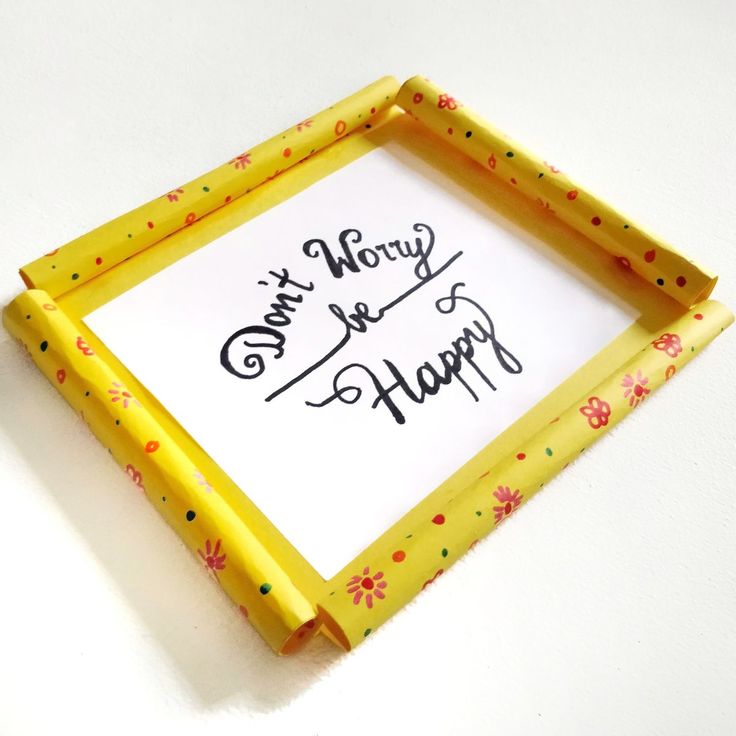
Example of finished paper picture frames ready to display.
How to Make a Homemade Paper Picture Frame
STEP 1
Choose a sheet of colored or patterned paper. Place the photo (or artwork) in the center and lightly pencil a guideline around it, leaving a few centimeters of border so the image won’t look cramped when attached.
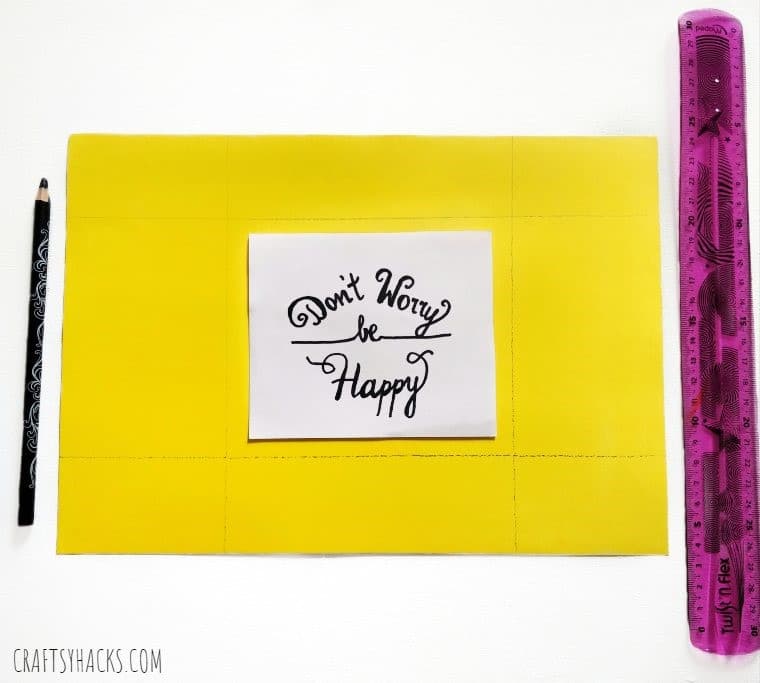
Place the photo centered on the paper and draw guidelines for the frame opening.
STEP 2
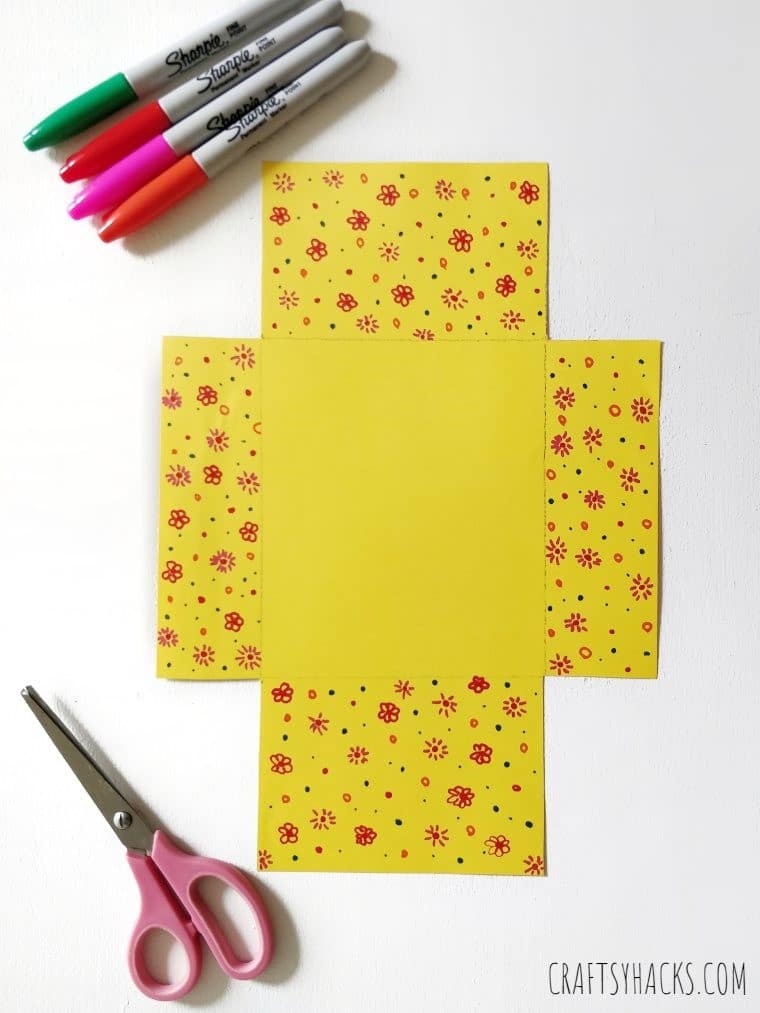
Cut away the four outer corner squares of the sheet, as shown. Decorate the border areas around the central rectangle with markers, crayons, stickers, or glitter — leave the picture area plain.
Cut the corners and decorate the four border flaps before rolling.
STEP 3
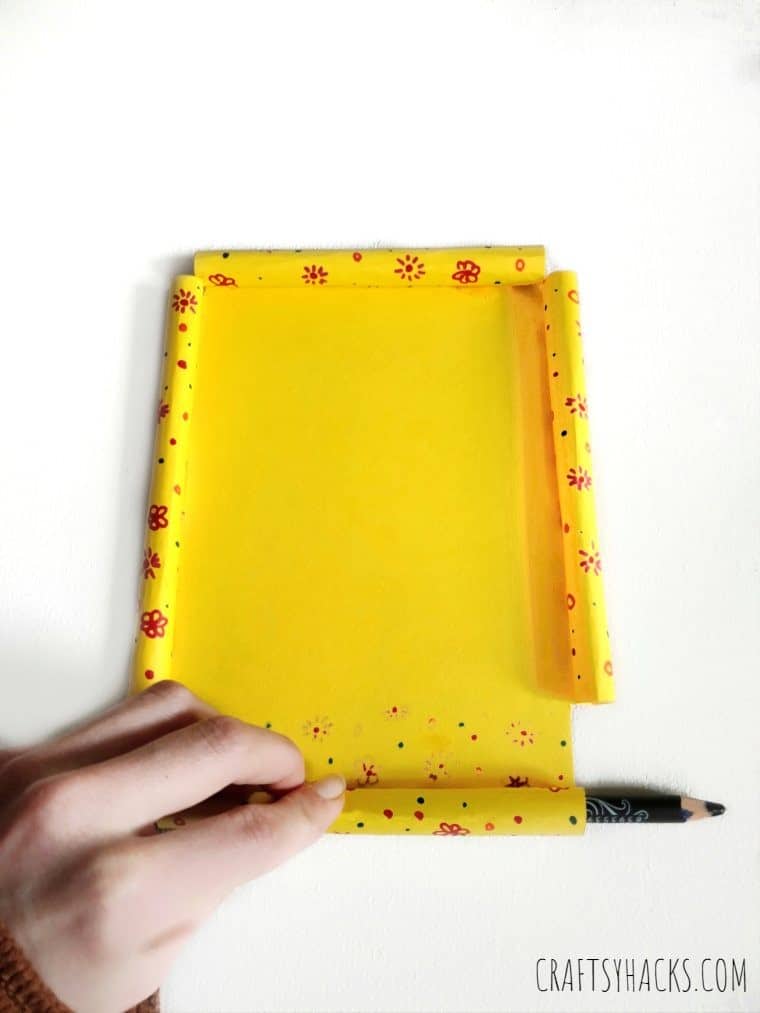
Use a pencil to roll each decorated corner flap inward toward the photo area. Ensure the decorated side faces outward to show the pattern. Secure rolled sections with a dab of glue where needed to hold the 3D shape.
Roll each decorated corner inward with a pencil to form the frame's 3D edges.
STEP 4
Once the rolled corners are set, glue your photo into the central rectangle. Let the glue dry flat for a few minutes. These frames also work well for kids’ drawings, quotes, gift tags, or lightweight decorations.
Glue the photo into the finished paper frame and allow to dry.
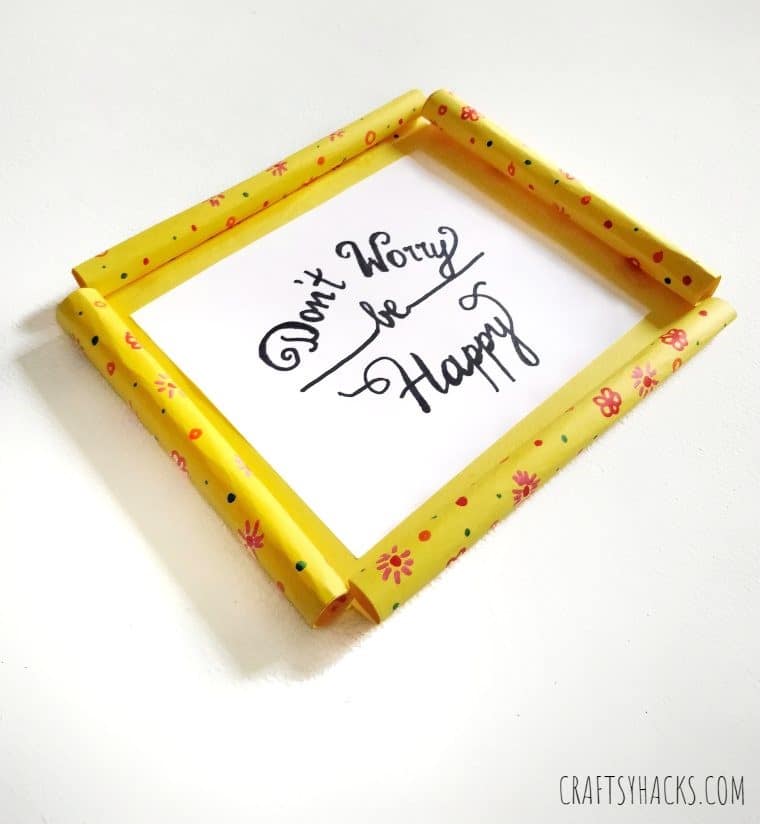
Finished frame showing the photo secured in the paper frame.