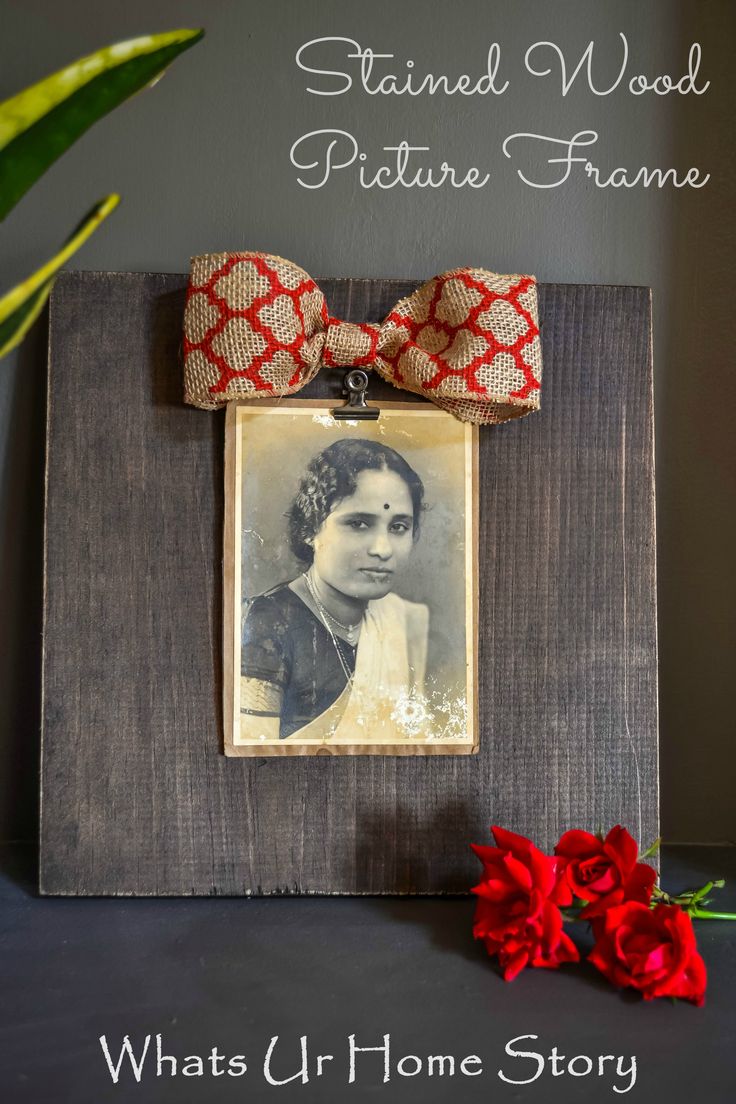
DIY Stained Wood Picture Frame
Creating your own DIY stained wood picture frame can be a fun and rewarding project to showcase your favorite memories. Not only is it a great way to add a personal touch to your decor, but it also allows you to customize the frame to perfectly fit your style and preferences. With some basic materials and a little creativity, you can transform a plain piece of wood into a beautiful and unique frame that will beautifully display your photos or artwork. So grab your supplies, unleash your inner artist, and get ready to craft a frame that is as special as the memories it holds!
Materials
11 x 11 piece of pine board, any piece of scrap wood do
Rustoleum Varathane Fast Drying Wood Stain – I used Kona
Fine Grit Sand Paper
Gorilla Super Glue Gel
Wired Burlap Ribbon & Hot Glue to make the bow
Metal Clip
Rag
Gloves
Method
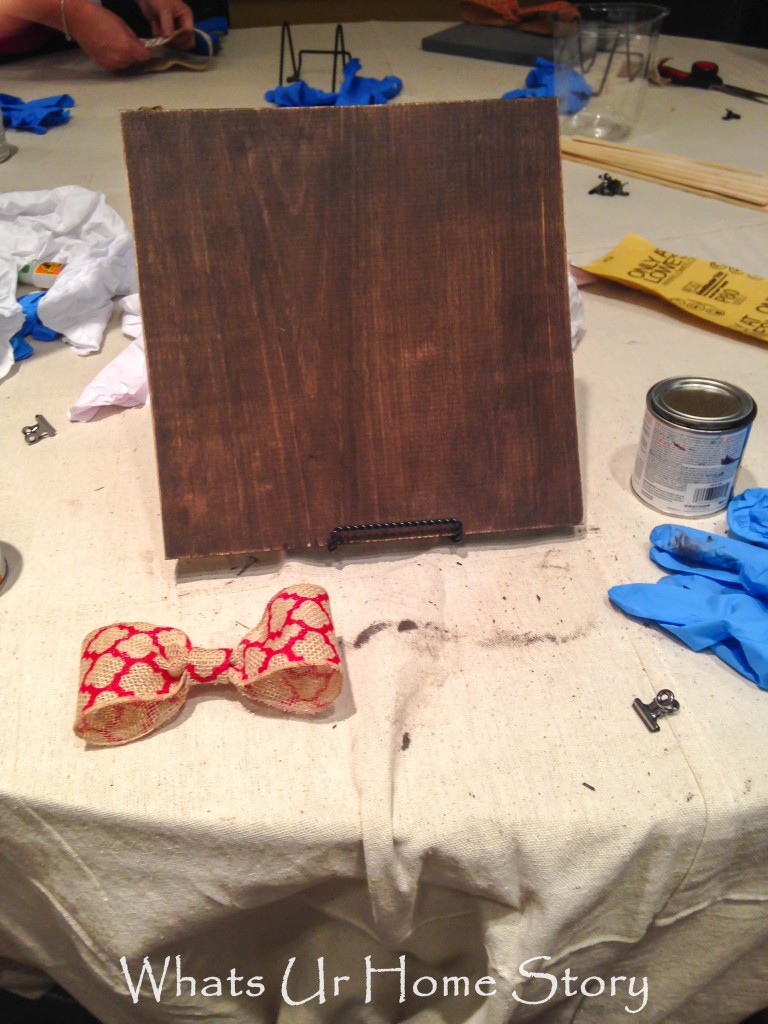
Put on the gloves, using the rag brush the stain on (in the front and sides), and wipe it off a few minutes later. Repeat if you need a darker color. My frame is a nice rich brown, don’t know why it looks dull in the above pics. Working on an Easel helps but it is not necessary.
While you let the stain dry make the Faux burlap ribbon bow.
To make the bow cut 2 pieces of wired ribbon (wired works better as it can hold its shape), 17″ and 2.5 -3″ long.
Fold the ends of the long piece towards the center so that there is an overlap. Hot glue both the ends.
Scrunch it in the middle to form a bow and hot glue the “scrunch” on the back side.
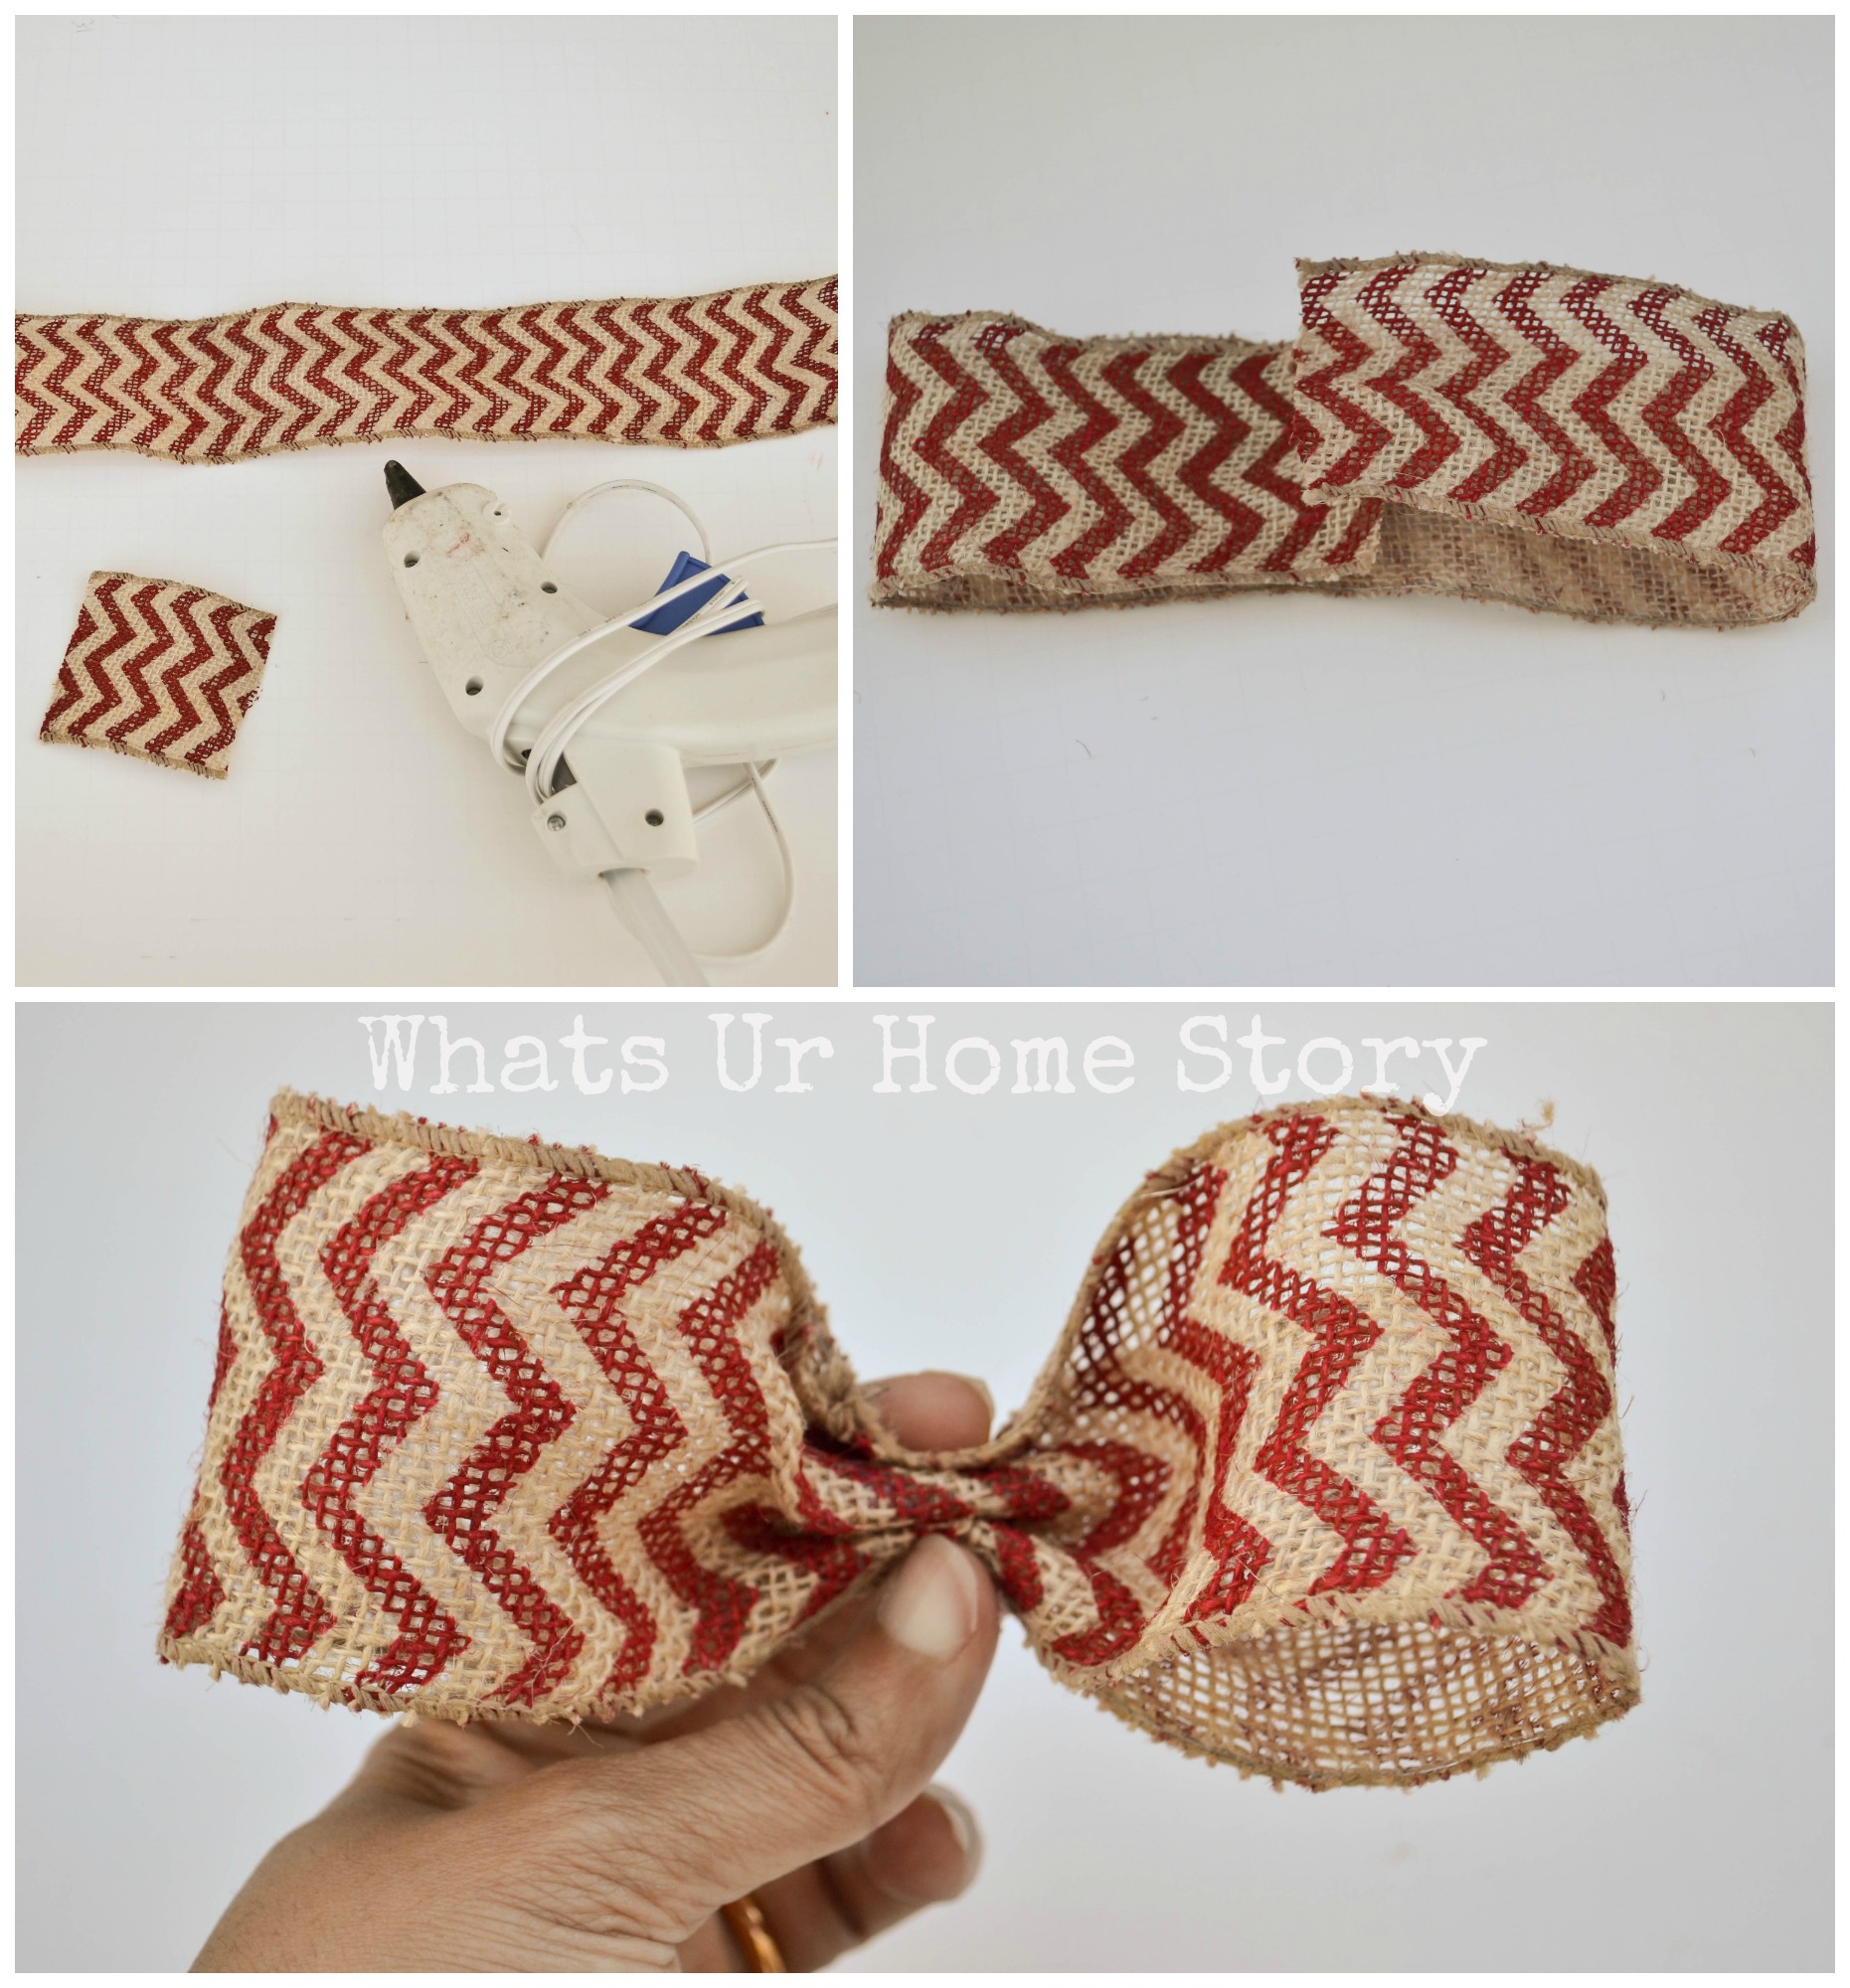
Fold the smaller piece along the wired side (not as shown I did it the not so ideal way, the opposite way), again with an overlap. Actually this works too but you will have just enough ribbon to work with when you are wrapping the piece around the bow. If you fold along the longer wired side your piece will be longer and easier to work with.
Wrap the smaller piece over the center of the bow to finish off the “scrunch” and hot glue on the back side. Trim any excess ribbon.
Fluff up the bow to your heart’s content.
When the stain is dry, lightly sand the edges of the wooden piece to give it a roughened up look (not needed if you are not a fan of the look).
Wipe the dust away with a rag and glue the bow in place on the board with the Gorilla glue. Be careful with the glue, it is pretty much hard to move once it is on there, which happens in a few seconds.
Glue the metal clip just below the center of the bow, again with Gorilla glue.
Attach hanging hardware in the back if you like.
And you are done!
No comments
Write a comment