How to Crochet an Adorable Easter Bunny Amigurumi — Easy Step‑by‑Step Pattern
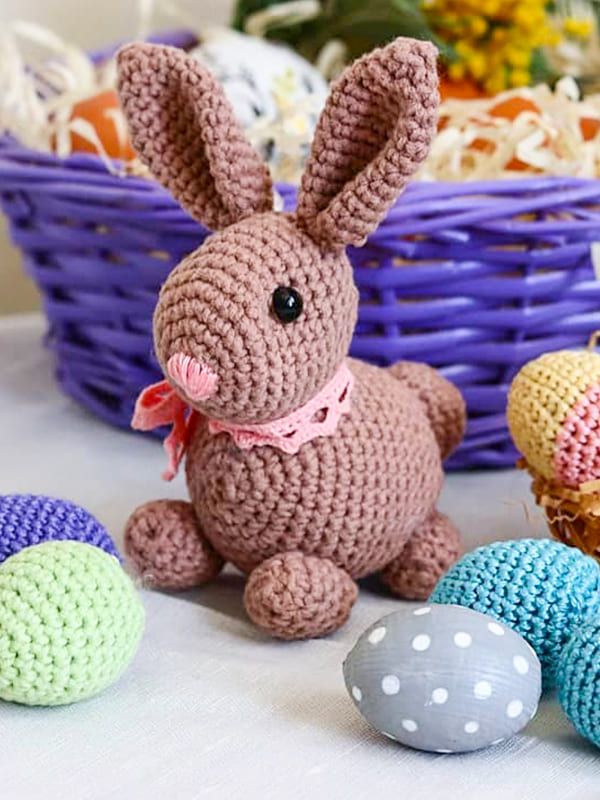
Crochet Easter Bunny Amigurumi is a charming, portable project perfect for the spring holiday. This pattern creates a small stuffed bunny and matching egg you can use in Easter baskets, as table decorations, or as a handmade gift. The pattern below uses YarnArt Jeans yarn and standard amigurumi techniques (magic ring, single crochet, increases and decreases). Suitable for confident beginners who know basic stitches and can count rounds.
Materials:
YarnArt Jeans, polyester filler, safety eyes, tapestry needle, stitch marker.
Abbreviations:
MR: Magic ring
Ch: Chain
Sc: Single crochet
Inc: Increase
Dec: Decrease
Slst: Slip stitch
Head
1- 6 sc in MR (6)
2 – (inc) х 6 times (12)
3 – (1 sc, inc) х 6 times (18)
4 – (2 sc, inc) х 6 times (24)
5 – (3 sc, inc) х 6 times (30)
6-12 – 30 sc (30)
Insert safety eyes between rows 8–9, spacing 11 sc apart.
13 – (dec, 3 sc) х 6 times (24) — start stuffing
14 – (dec, 2 sc) х 6 times (18)
15 – (dec, 1 sc) х 6 times (12)
16 – (dec) х 6 times (6), slst. Pull the yarn tail to close.
Body
1 – 6 sc in MR (6)
2 – (inc) х 6 times (12)
3 – (1 sc, inc) х 6 times (18)
4 – (2 sc, inc) х 6 times (24)
5 – (3 sc, inc) х 6 times (30)
6 – (4 sc, inc) х 6 times (36)
7 – (5 sc, inc) х 6 times (42)
8-14 – 42 sc (42)
15 – (dec, 5 sc) х 6 times (36)
16-18 – 36 sc (36)
Stuff the body firmly but not overstuffed.
19 – (dec, 4 sc) х 6 times (30)
20 – (dec, 3 sc) х 6 times (24)
21 – (dec, 2 sc) х 6 times (18)
22 – (dec, 1 sc) х 6 times (12)
23 – (dec) х 6 times (6), slst. Tighten and weave in ends.
Ears (Make 2)
1 – 6 sc in MR (6)
2 – 6 sc (6)
3 – (inc) x 6 times (12)
4 – 12 sc (12)
5 – (1 sc, inc) x 6 times (18)
6-13 – 18 sc (18), slst.
Fold each ear in half lengthwise and sew closed to shape, then attach to head at rows 12–13.
Paws (Make 4)
1- 6 sc in MR (6)
2 – (inc) x 6 times (12)
3-7 – 12 sc (12)
8 – (dec) x 6 times (6), slst.
Tail
1 – 8 sc in MR (8)
2 – (inc) х 8 times (16)
3 – (1 sc, inc) х 8 times (24)
4-6 – 24 sc (24)
7 – (dec) х 12 times (12), slst. Stuff lightly and close.
Assembly & Finishing
Make a small gathering at the muzzle to shape the snout. Embroider the nose with pink yarn. Sew ears to the head at the level of rows 12–13. Sew the head to the body, then attach paws and tail. Secure all pieces with tight stitches and hide tails inside the toy. Trim excess yarn.
Egg
1 – 6 sc in MR (6)
2 – (inc) х 6 times (12)
3 – (1 sc, inc) х 6 times (18)
4 – 18 sc (18)
5 – (2 sc, inc) х 6 times (24)
6-11 – 24 sc (24)
12 – (dec, 2 sc) х 6 times (18) — start stuffing
13 – (dec, sc) х 6 times (12)
14 – (dec) х 6 times (6), slst. Tighten and finish off.
Tips
Use a stitch marker to keep track of rounds. Adjust stuffing to change firmness. If using safety eyes for a toy intended for small children, consider embroidering eyes instead for safety. Personalize the egg with stripes or surface embroidery to match your decor.