Easy DIY Decorated Chocolate Bunny — Step-by-Step Guide with Cute Finishing Touches
Make a charming decorated chocolate bunny with simple craft supplies — perfect for Easter gifts, party favors, or a whimsical table centerpiece. This project uses a foil-wrapped chocolate bunny as a base and covers it with tissue-paper puffs, a ribbon bow, a pom-pom tail and other easy embellishments. Follow the steps below and use the safety tips to keep decorations separate from the edible chocolate.
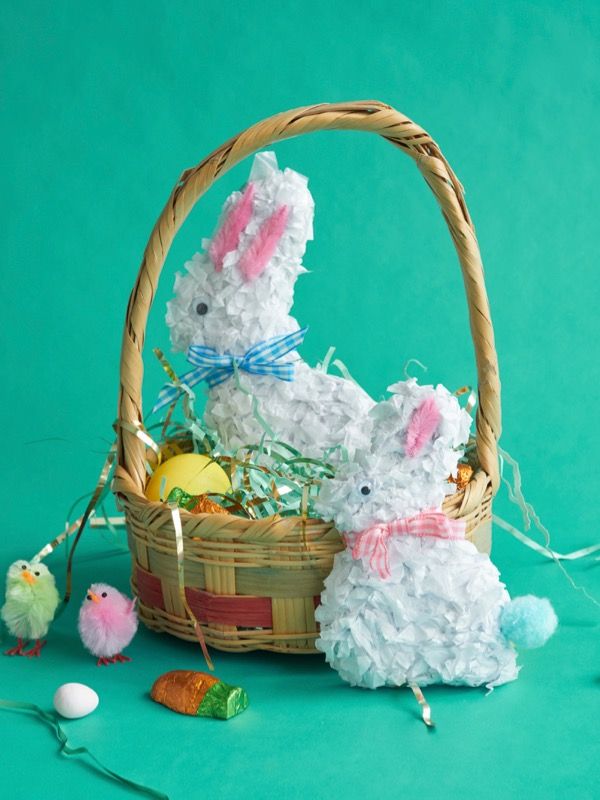
Caption: Foil-wrapped chocolate bunny ready for decorating — wrapping protects the chocolate from craft glue.
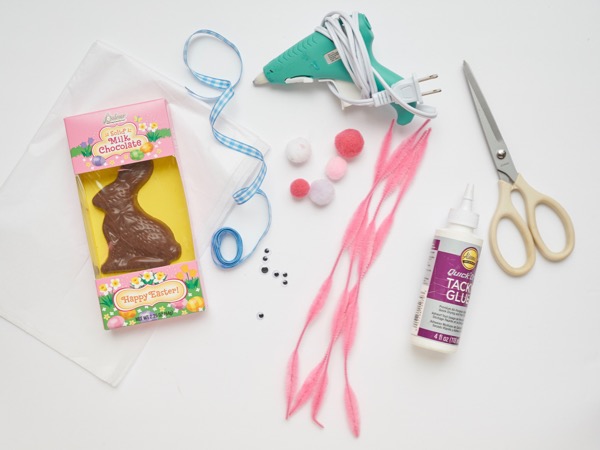
Materials needed:
- Chocolate bunny (wrap in tin foil if unwrapped)
- Tissue paper
- Scissors
- Craft glue
- Ribbon
- Pink chenille (pipe cleaner) for ear accent
- Googly eyes
- Tin foil (if needed)
- Pencil (to shape tissue puffs)
- ½" pom poms for tail
Step-by-step instructions
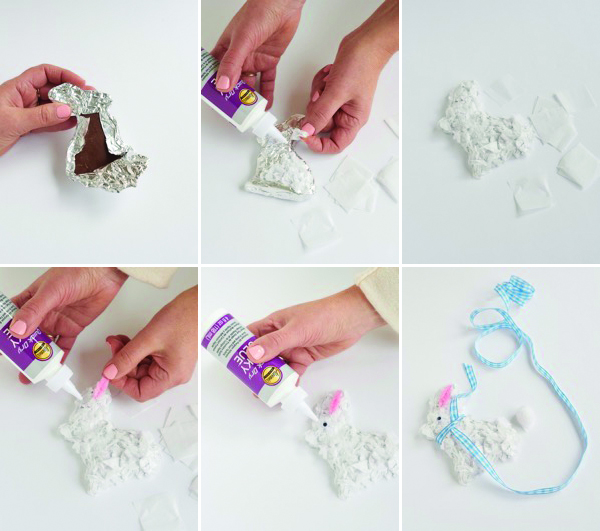
- Wrap the chocolate bunny in a layer of tin foil if it is not already wrapped. Press the foil gently to follow the bunny's shape — this creates a protective barrier so the craft glue and decorations never touch the chocolate.
- Cut tissue paper into roughly 1" x 1" squares. They do not need to be perfect; keeping them similar in size makes the finished look more even.
- Place a tissue square over the eraser end of a pencil, press it in to form a little puff, and add a drop of craft glue at the base. Use the pencil eraser to transfer each puff to the foil-wrapped bunny and release the pencil. Repeat across the front and sides until the bunny is covered as desired.
- Trim excess tissue where needed so the ears and face can be decorated neatly.
- Cut a small section of the pink chenille pipe cleaner and glue it along the inside of an ear for a pink ear accent.
- Glue on one or two googly eyes for a playful face. If you prefer an edible look and plan to remove decorations before eating, use food-safe eyes or skip non-edible pieces.
- Tie a small ribbon into a bow and glue or tie it around the bunny's neck. Glue a ½" pom-pom to the rear for a fluffy tail.
Caption: Adding tissue-paper puffs to cover the bunny — use the pencil eraser to form and place each puff.
Caption: Finished decorated chocolate bunny with ribbon, googly eye and pom-pom tail — a festive craft-ready gift or decoration.
Tips and safety
- Always keep craft glue and non-edible decorations separated from the edible surface. Use foil or another barrier if you want to preserve the chocolate for eating later.
- If you plan to eat the chocolate without removing decorations, use only food-safe decorations and edible glue.
- Work on a protected surface and allow glue to dry fully before handling or packing the finished bunny.
- These make great non-edible keepsakes for decoration, or edible treats if you swap craft materials for food-safe options.
Enjoy the process — you can vary colors, sizes of tissue puffs, and embellishments to create a collection of unique decorated bunnies.