DIY Paper Easter Bunny Candy Holder — Easy Step-by-Step Craft for Kids
Make your Easter celebrations sweeter with this simple and adorable Paper Easter Bunny Candy Holder. This quick DIY is perfect for kids and adults alike — it requires only basic craft supplies and can be finished in just a few easy steps. Use it to hold small candies on a table, add charm to an Easter basket, or make a bunch as party favors.
The Paper Easter Bunny Candy Holder is an adorable and creative way to add a festive touch to your Easter celebrations. This DIY craft is perfect for both kids and adults who enjoy making cute and functional decorations. By following simple steps and using basic materials like colorful paper and glue, you can create these cute bunnies to hold your favorite candies. They make great additions to Easter baskets or can be scattered around the house as whimsical decorations. Get ready to bring some extra charm to your holiday with these sweet and lovable Paper Easter Bunny Candy Holders!
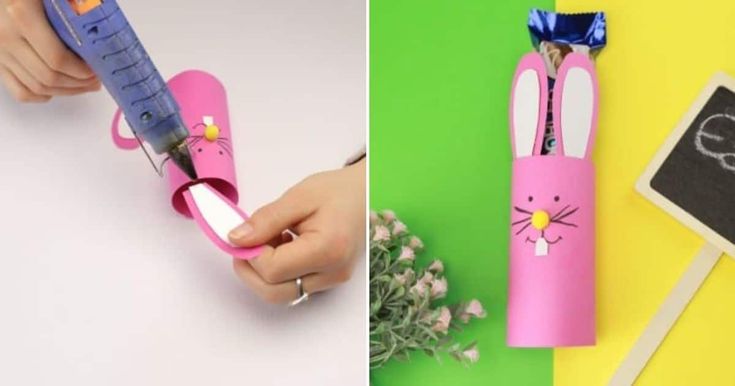
Materials
- Pink construction paper
- White construction paper
- Yellow pom-pom
Tools
- Black marker
- Pencil
- Hot glue and glue gun
- Scissors
Instructions

1. Decide on the size of your candy holder and cut a rectangle from the pink construction paper to match that size.
Once you have the rectangle cut out, wrap it around so one short edge meets the other and glue those edges together to form a cylinder.


This cylinder will be the container for your candy. Next, prepare the bunny features. Cut two matching ear shapes from the pink construction paper.

You now need to make the inner ears to go with the outer ears. Cut another pair of matching ear-shapes from the white construction paper, but make them slightly smaller.

Set the ears aside for a moment and work on the face. Use the black marker to draw two small dots for eyes, and glue the small pom-pom on as the bunny’s nose.


Use the black marker to draw whiskers extending from either side of the nose and add a small mouth under the nose.

Cut a small rectangle of white paper and glue it under the mouth to suggest bunny teeth.

Glue the white inner ear pieces onto the pink outer ears.


Finally, attach the completed ears to the top front edge of the cylinder (glue them to the inner front edge so they remain visible when the holder is filled with candy).

Once the ears are attached, the bunny is ready — set it out and add small candies inside.


Notes
This project does not include a bottom for the paper tube, so the holder is designed to sit upright on a surface (for example, a desk or table). If you carry it around without supporting the bottom, the candy will fall through.
Adult supervision is recommended when using a hot glue gun.